Doing one quick step before creating a user will ensure they start with a good setup.
Check Default User Preferences
Take a look at the default reports, time zone settings, etc. the new user will inherit. This step is especially important if you're adding a large block of new users.
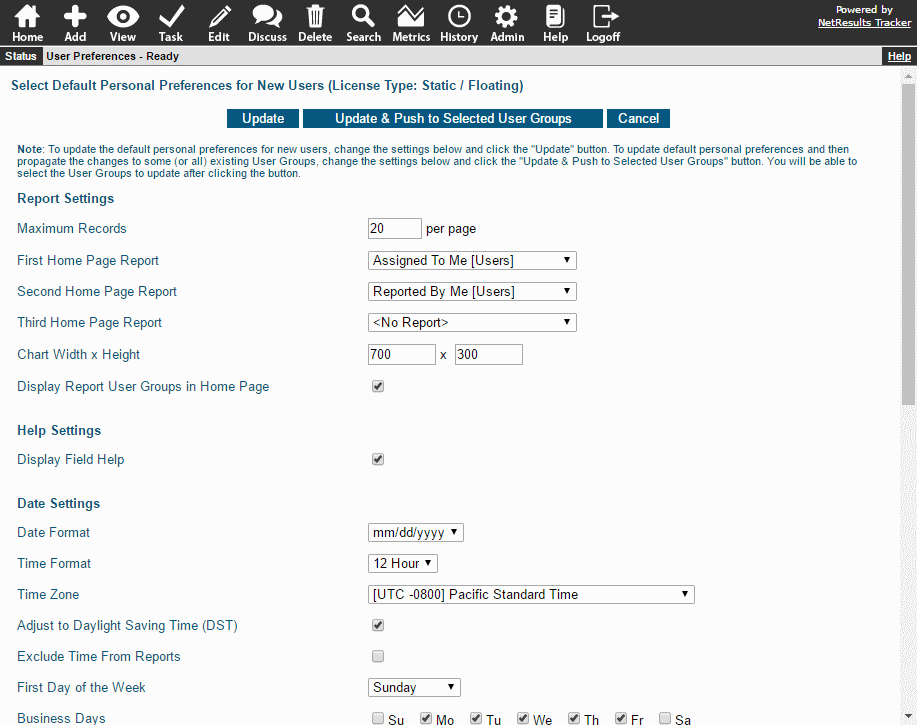
To check the Default User Preferences:
- Login as Admin and click on the Admin icon.
- Click on the User Preferences link.
- Select the User License Type, then click Continue.
- Check the settings. Make any desired changes and click Update. If you want to change the settings to what they were before, you can add the new users, then come back and use these steps to change the settings back.
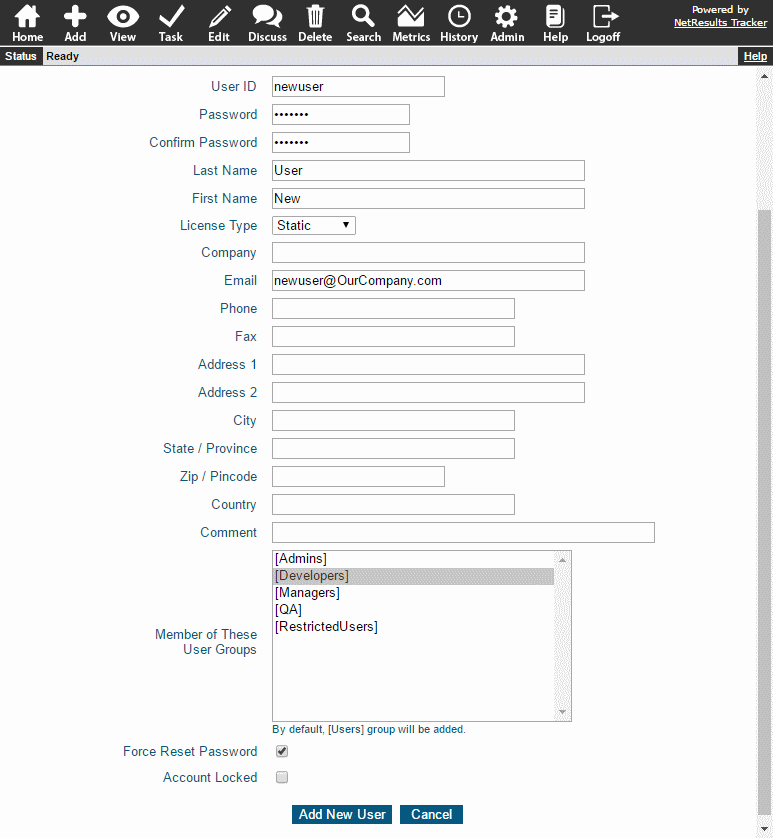
Add a User
- Login as Admin and click on the Admin icon.
- Click on the User Accounts link.
- Click on the Add User button.
- Fill out the profile information. User ID, Password, First Name are required fields. Email Address is not required, but is recommended so the user can receive email notifications.
- Click the Add New User button to save the user.
More information is available in the Users section of the Online Help Guide.