Fields can be initialized with a value on the Add Page or in a later workflow step.
Save an Important Date
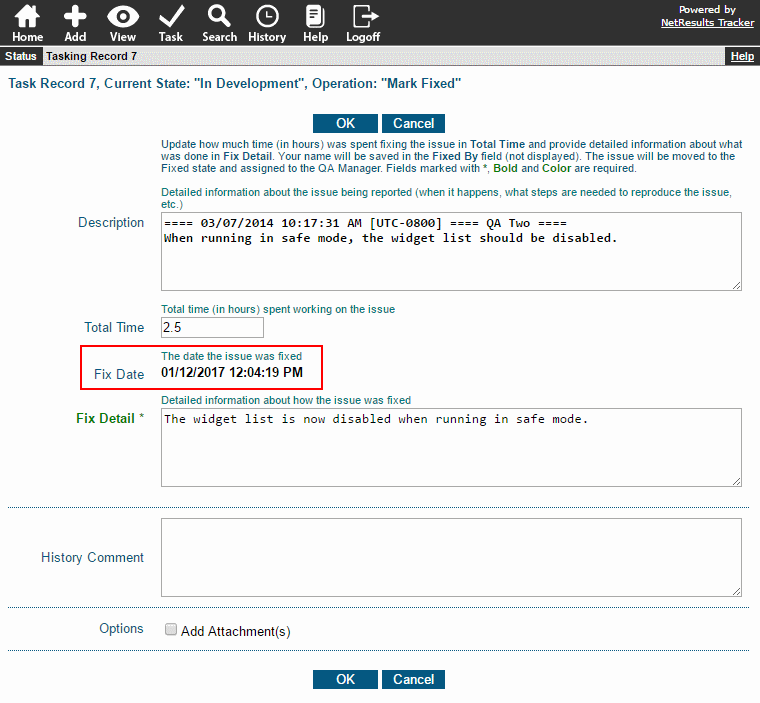
You can set a date field with the current date and time to capture when an action happened. For example, most of Tracker's templates have a Date Reported field that saves the date and time the record was created and can be used to generate reports. You may want to save other dates such as the date something was approved or closed.
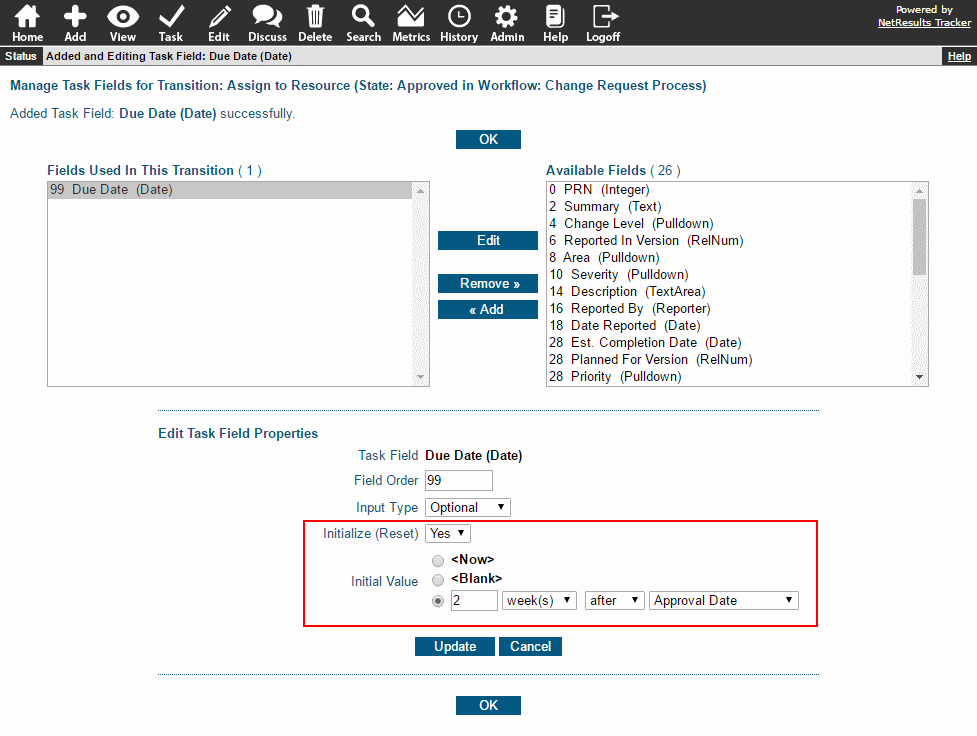
Date fields can also be set with values relative to other date fields (e.g. 2 days after Date Reported, 1 day before Due Date).
Format a Text or TextArea Field
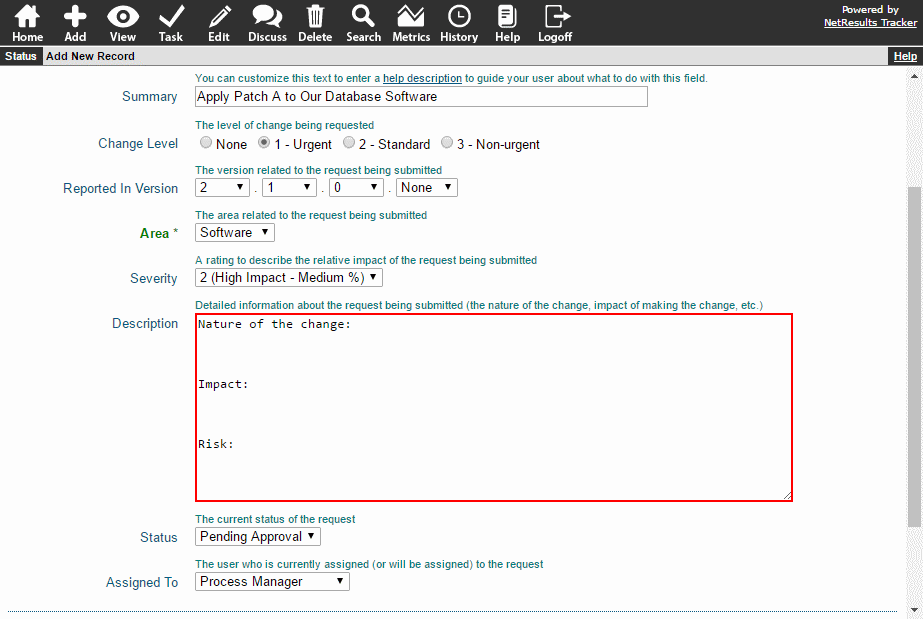
You can have a value saved in the field automatically. In the sample below, we've saved some text so users can enter information into the field using a specific format.
Other Field Types
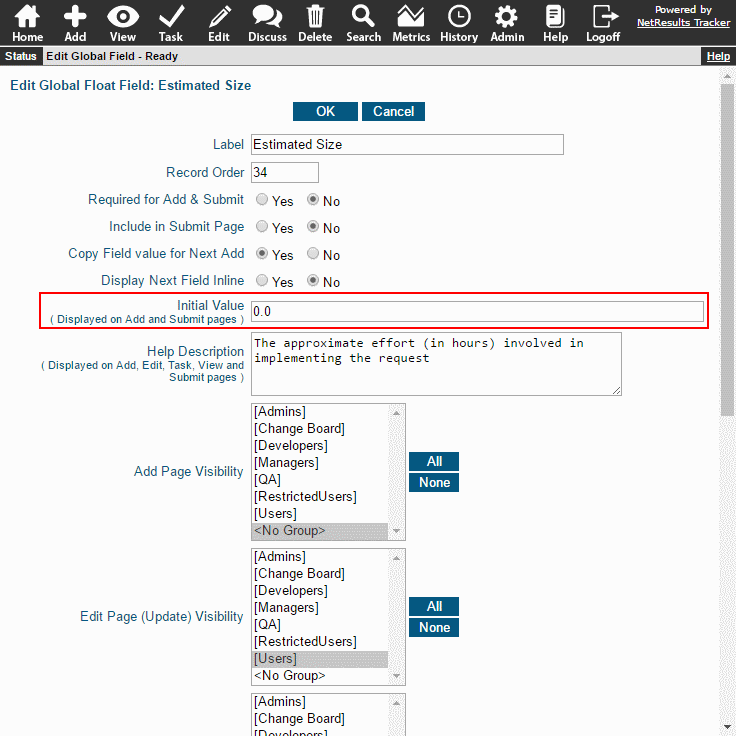
Most fields can be initialized including Floating Point, Integer, Pulldown, Url and YesNo fields.
An Important Caveat
Initializing a field means you're clearing out the existing value and setting it to something else. If you've already saved some text in a field and then are initializing it at some point in the workflow, any text already in the field will be deleted.
Set a Field On Add
To initialize a field when a record is added:
- Login as Admin and click on the Admin icon.
- Click on the Fields link.
- Click on the Edit button to the left of the desired field and set the property listed below based on the field type:
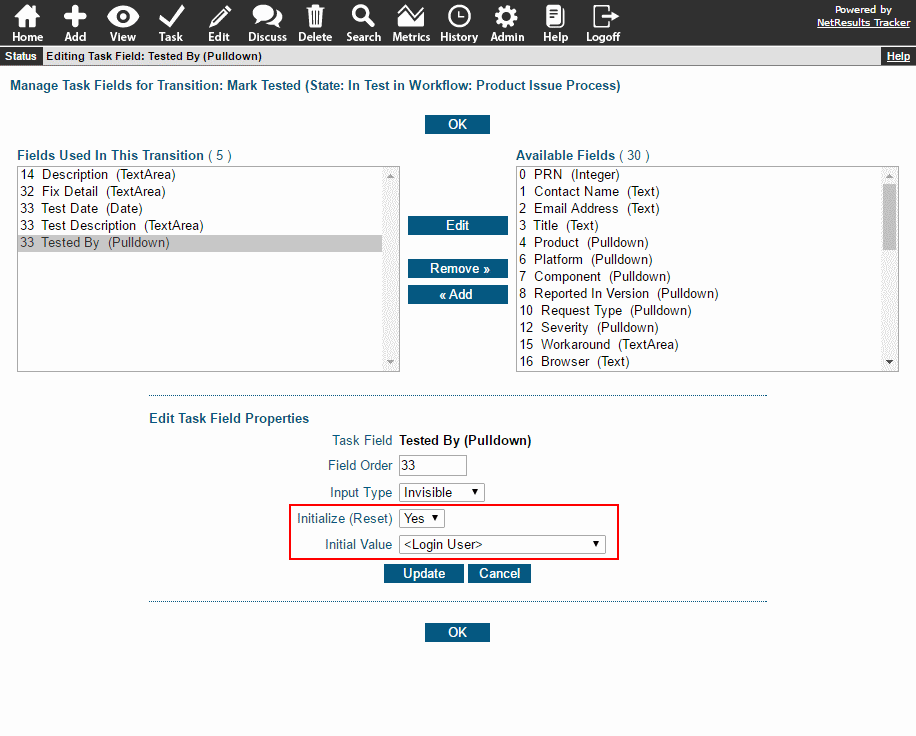
- Date fields: Set the Initialize on Add property to "Yes".
- Floating Point, Integer, Text, TextArea or Url fields: Set the Initial Value.
- Click OK to save the change.
Set a Field Later in the Workflow
To initialize a field during the Task operation:
- Login as Admin and click on the Admin icon.
- Click on the Workflows link.
- Select the desired workflow in the pulldown at the top.
- Locate the States section and click on the Manage link to the right.
- Click on the state that has the transition you wish to modify, then click on the Transitions button.
- Click on the Task Fields button.
- Click on the desired field in the right column and click Add (or simply click on the field if it's already added and click on the Edit button).
- Use the information about Task Field Properties in the Online Help Guide based on the field type.
- Click Update to save the change.