Date fields can be invisible!
Date fields, those magical rascals, can be set with a value without being displayed. Take, for example, Date Reported. Usually this represents the date and time a record was created. It's not typical to change this value to something else. Tracker's templates are configured to set this when a record is created without the field being visible on the Add form.
Perhaps you want to capture the date an action happened, such as the date something got approved, fixed or closed. This can be done using the steps for a transition below.
To set a Date field without displaying it:
On the Add Page
- Login as Admin and click on the Admin icon.
- Click on the Fields link.
- Click on the Edit button to the left of the date field.
- Set the option Initialize on Add to "Yes".
- Set the Add Page Visibility option to "None".
- Click OK to save the changes.
More information is available in the Fields Types and Properties section of the Online Help Guide.
In a Transition
- Login as Admin and click on the Admin icon.
- Click on the Workflows link.
- Select the desired workflow in the pulldown at the top.
- Click on the Manage link next to States.
- Click on the desired state and click on Transitions.
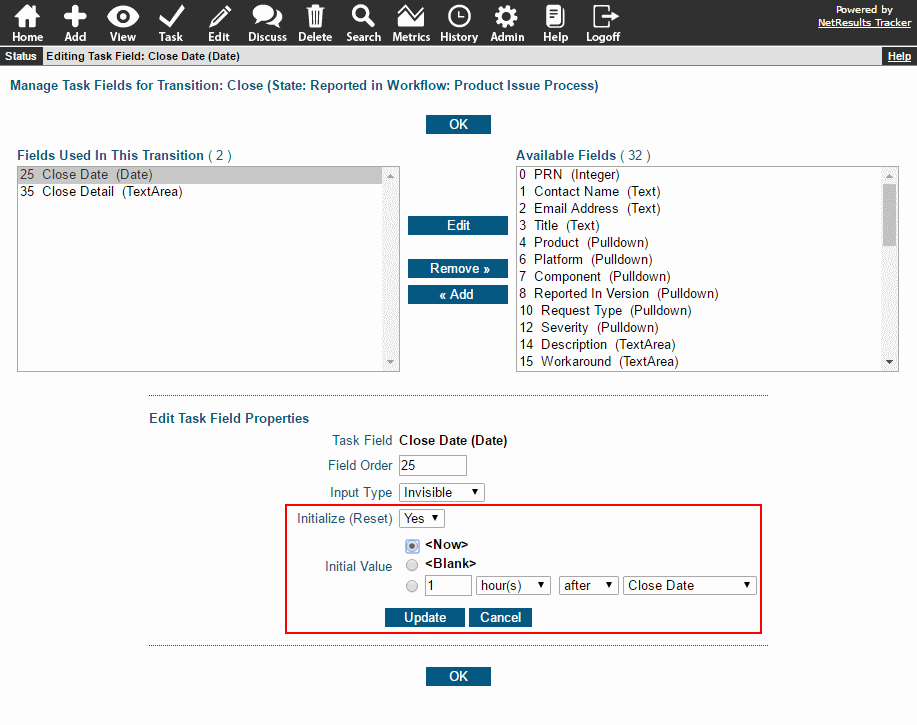
- Click on the Task Fields button next to the desired transition.
- In the right column, click on the date field and click Add.
- Set Input Type to "Invisible". This will set Initialize to "Yes".
- Set Initial Value as desired.
- Click Update to save the changes.
Additional details are available in the Task Field Properties Help Guide section.
On the Submit Page
- Login as Admin and click on the Admin icon.
- Click on the Fields link.
- Click on the Edit button to the left of the date field.
- Set the option Initialize on Add to "Yes".
- Set the Include in Submit Page option to "No".
- Click OK to save the changes.
The Fields Types and Properties section of the Online Help Guide has additional information.