Duplicate requests are inevitable. Use a link field to connect duplicates to the original record.
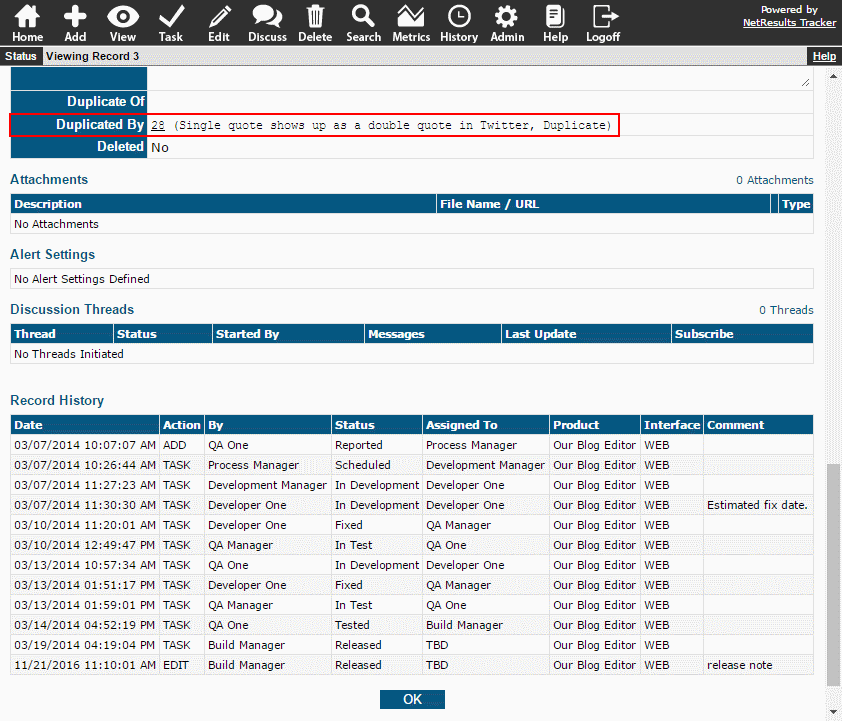
The link field displayed on the View Page of a record marked as a duplicate is a clickable link to view the details of the original record. The link in this example includes the status of the original record ("Released").

When viewing the original record, you can see links to any duplicates.
Add a Link Field
- Login as Admin and click on the Admin icon.
- Click on the Fields link.
- Click on the Add Field button.
- Select "Link" as the type, then click Continue.
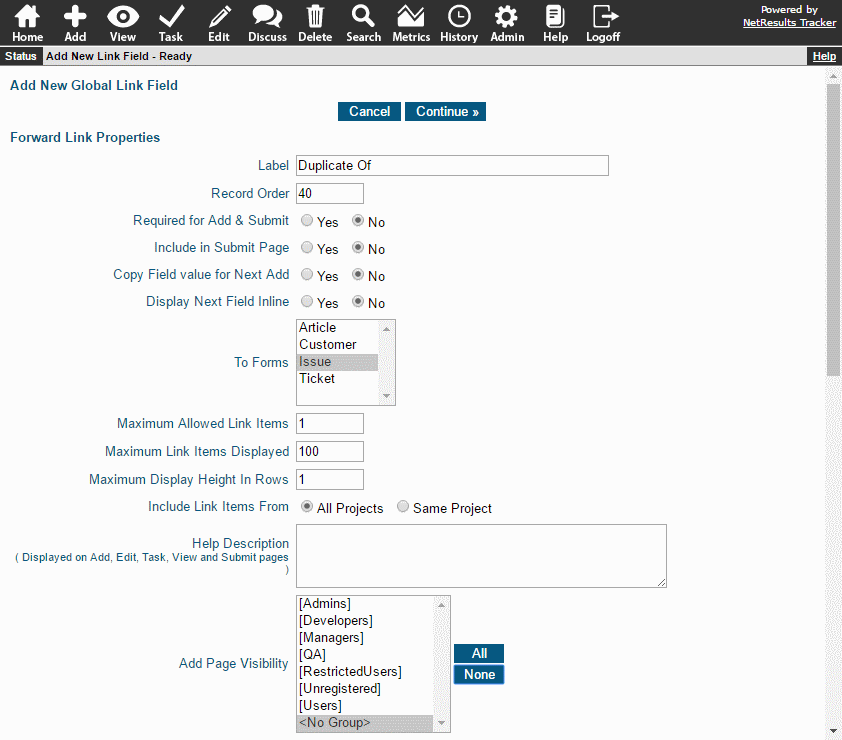
- Enter a Label for the field (e.g. "Duplicate Of" as this is where the original record will be selected). For "To Forms", select the form used to report issues. For "Add Page Visibility", select "None" since this field should not be available on the Add Page). Make selections for the rest of the options using the information in the Link field section of the Online Help Guide.
- Click Continue.
- Enter a Label for the Reverse Link (e.g. "Duplicated By" as this field will show any duplicates linked to the record). For "Allow Link Items to be Set", you can select "Yes" if you would like to be able to modify the original record to link duplicates.
- Click OK to save the field.
- Click on the Manage Forms for this Field button.
- Select the form used to report issues, then click Add.
Add a Workflow Transition
Create a workflow transition for marking a record as a duplicate in the step where records are dispositioned.
If desired, you can create a "Duplicate" state and route the records to it:
- Login as Admin and click on the Admin icon.
- Click on the Workflows link.
- Click on the Global States button.
- Click on the Add State button.
- Enter a Name and Order for the new state and click OK.
- Click OK after the new state has been saved.
- Click OK again to return to the Workflows section.
To create the transition:
- Login as Admin and click on the Admin icon.
- Click on the Workflows link.
- In the pulldown at the top, select the desired workflow.
- Locate the "States" section and click on Manage link to the right.
- If you created a new state, select it and click on the Add button.
- Click on the state where records are dispositioned, then click on the Transitions button.
- Click on the Add Transition button.
- Enter a Name (e.g. "Mark Duplicate") and order. For "New State", select the new state you created (if applicable) or select an existing state (e.g. "Closed"). For "New Assignee", select TBD (no one needs to work on it since it is being marked as a duplicate). For the rest of the options, review the Transition Properties section.
- Click OK to save the transition.
- Click on the Set Task Fields button.
- Select the Link field you created, then click on the Add button.
- If desired, set the "Input Type" to "Required" to force the user to link a record, then click on the Update button.