Make changes to the subject, body and other parts of Tracker email notifications.

You can customize the emails generated by actions in Tracker to include custom wording, field data from the record being referenced and more.
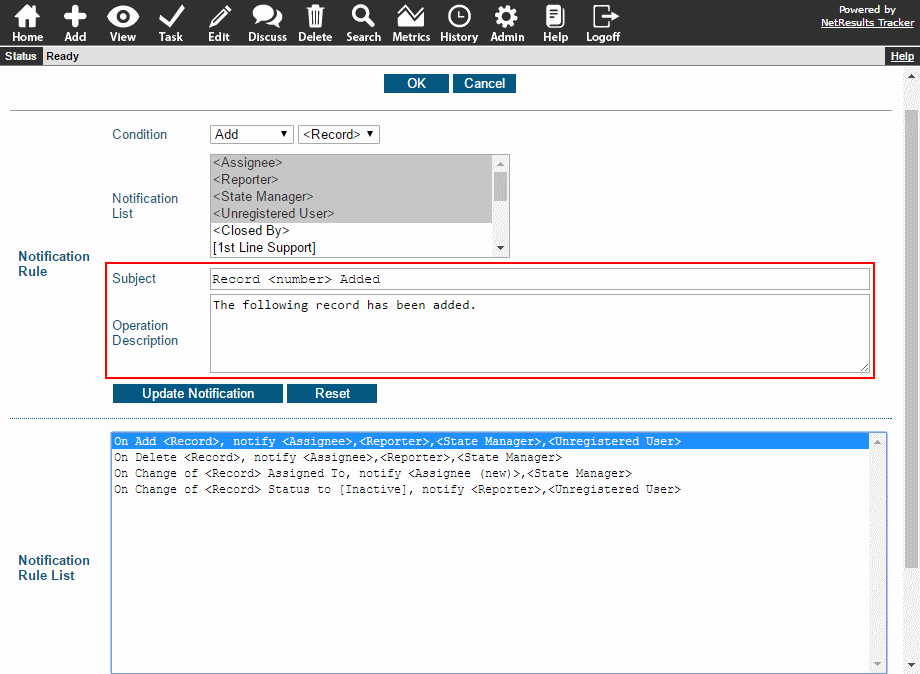
Subject

Modify the Subject in the email rule.

Email Rule

Body

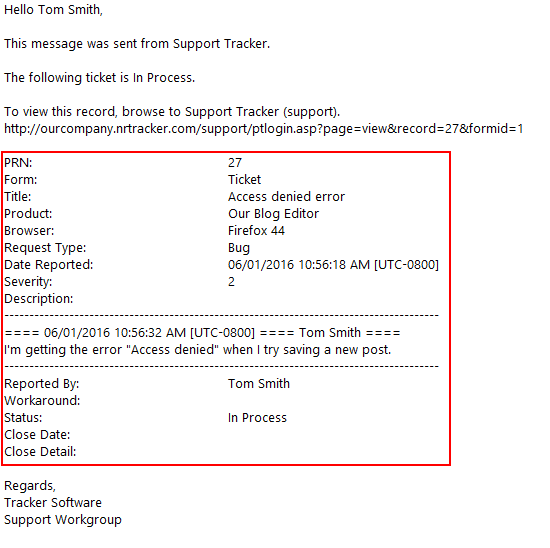
Here's a sample of the body of the email with the parts labeled.

Email Message Components

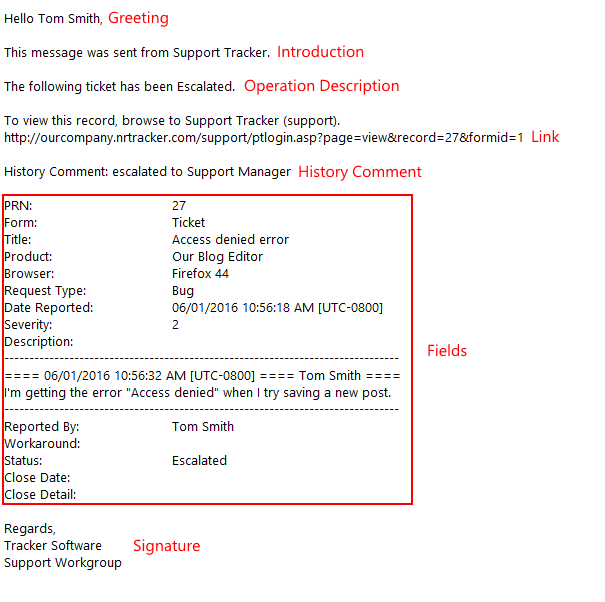
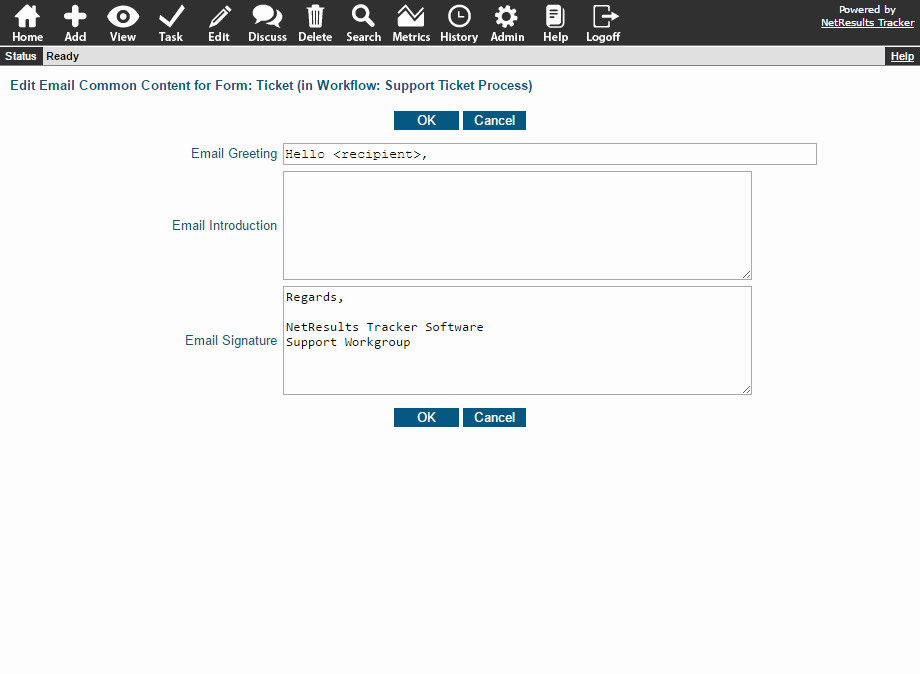
The Greeting & Introduction start it off. These are updated in the Email Common Content section.

Email Common Content

Then comes the Operation Description, which is configured in the email rule.

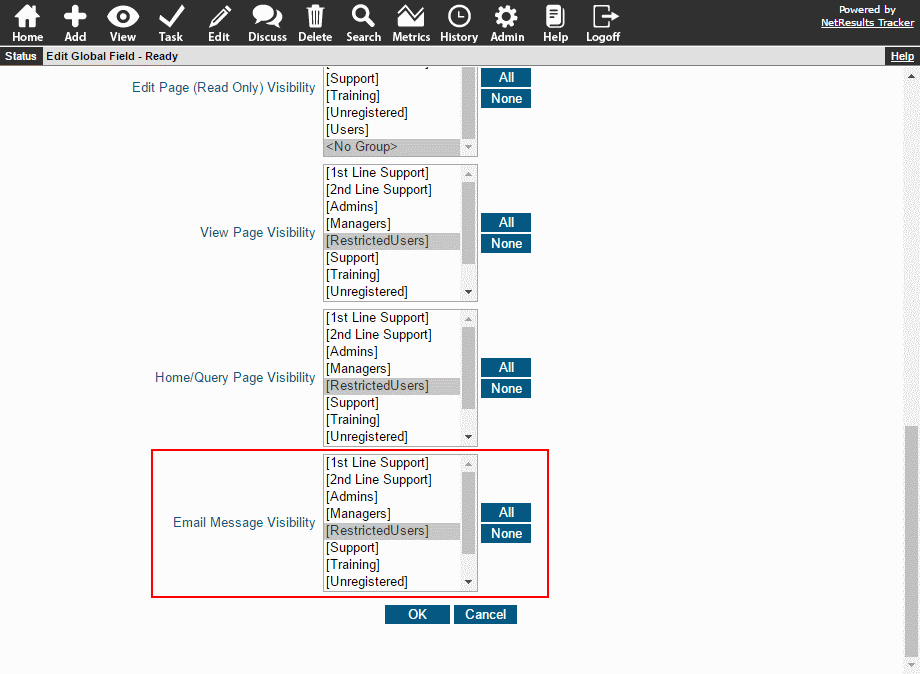
Any fields configured to be included in the body will follow the Operation Description. Whether a field is included is based on the user groups selected in the Email Visibility property explained in this blog post.

Email Visibility

The Signature ends the email and is configured in the Email Common Content section.
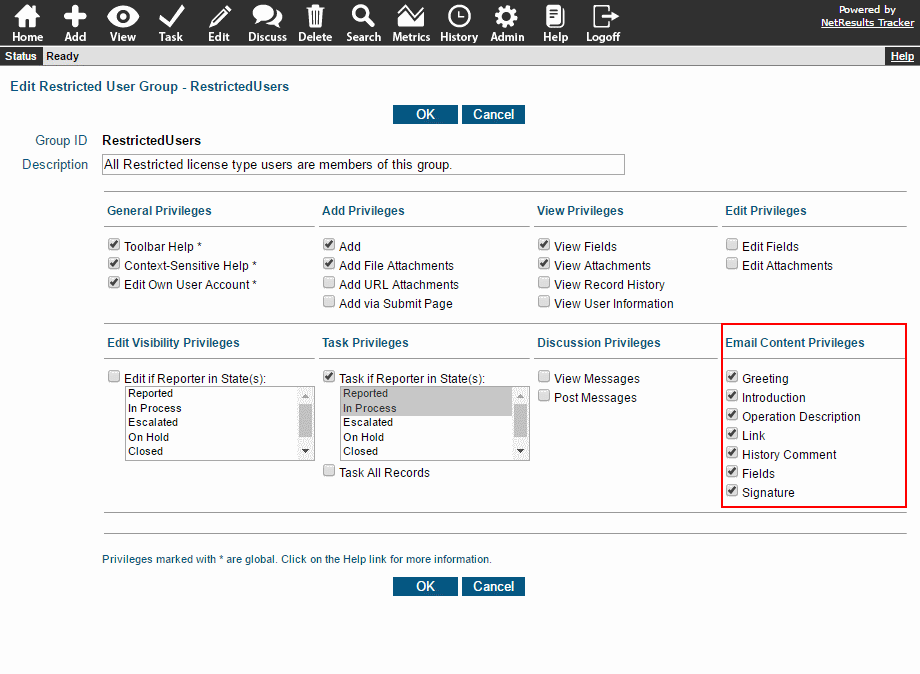
Privileges

You can include or exclude parts of the email by setting user group privileges in the Email Content section. You can include a Link to login and see the record and the History Comment that was entered when the record was processed (if applicable).

Email Privileges

Variables

Variables can be included in the Subject and Body options. For example, you can include the name of the user assigned to the record in the Subject by using <new assignee>. You can also include variables to include the value of a field. For instance, you can list the priority set for the record. The full list of variables is available in the Online Help Guide.

Choose which fields are displayed in email notification messages.

You control which fields are included in the body of the email notification messages sent from Tracker. They are configured by user group so you can include/exclude fields based on who's receiving the message.

Sample Email

Make Changes to the Fields Included in Email Notifications

  1. Login as Admin and click on the Admin icon.
  2. Click on the Fields link.
  3. Locate the field you want to include or exclude from email notifications. Check the Forms column. If this field is on more than one form and you only want to change it for one form, use the Multiple Forms steps instead.
  4. Click on the Edit button to the left of the field.
  5. Scroll down to find the Email Visibility field. Hold down the Ctrl button on your keyboard as you select the user groups that should have this field included in the email notification message. Or, de-select user groups who should not see the field included in the email message.
  6. Click OK to save the changes.

Fields Included in Multiple Forms

If a field is included on more than one form and you only want to make changes for one form:

  1. Login as Admin and click on the Admin icon.
  2. Click on the Fields link.
  3. Locate the field you want to include or exclude from email notifications.
  4. Click on the Forms button to the left of the field.
  5. Click on the form, then click on the Edit button.
  6. UNcheck the box for the option Use Global Field Properties.
  7. Scroll down to find the Email Visibility field. Hold down the Ctrl button on your keyboard as you select the user groups that should have this field included in the email notification message. Or, de-select user groups who should not see the field included in the email message.
  8. Click OK to save the changes.

Set up a field where an email address can be entered to be notified as a record is processed.

Email Address in a Record

Sometimes someone other than the reporter wants to be kept up to date about an issue or enhancement. Tracker has an "Unregistered Email Address" field that can be used for saving an email address within a record.

Email Address Field

Email notification rules can be set to notify this email address by selecting <Unregistered User>.

Email Rules

For step-by-step instructions for setting this up, check out the Per-Record Email Address Knowledge Base Article.

Use the Alerts feature to ensure issues get a timely response.

Alert email notifications can be sent as a reminder in advance of a deadline or to a manager / user group to flag a missed deadline. These alerts can be configured based on the value of a pulldown field. You can set different response time levels such as:

  • Severity 1 tickets trigger an alert within 1 hour
  • Severity 2 tickets trigger an alert within 4 hours
  • Severity 3 tickets trigger an alert within 1 day

Based on Alerts

See more in the video below or get detailed steps in this Alerts Knowledge Base article.