Update the hostname used in the link included in email notifications.

Email Link

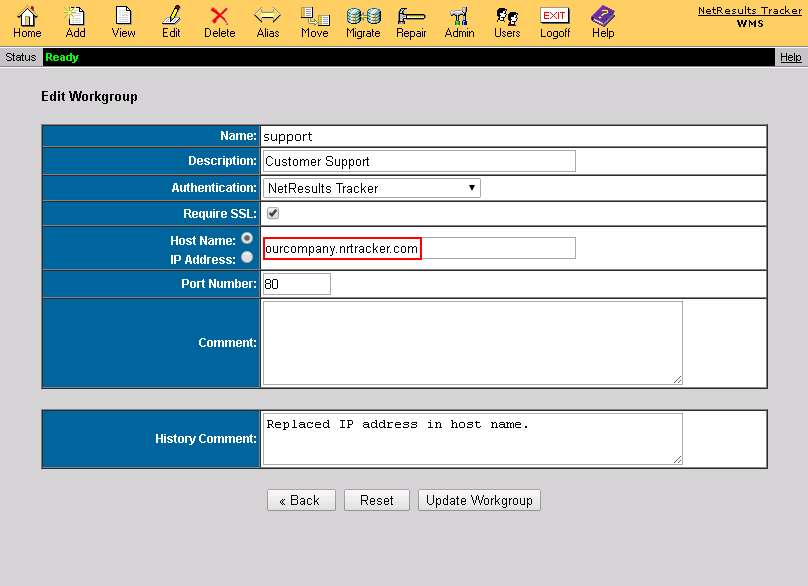
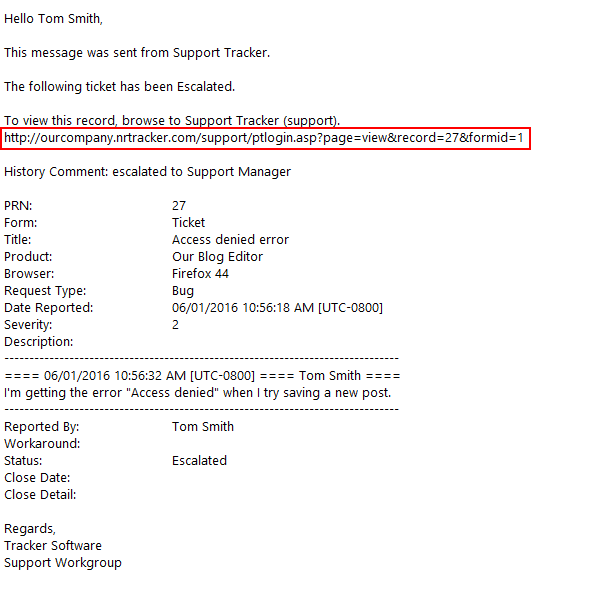
Email notifications can have a link to login to Tracker and view the related record. The link is based on what's set for the Hostname, Port Number and SSL settings in the Workgroup Management System. For example, an IP address is currently listed in the link and you want to use something like "ourcompany.nrtracker.com" instead. To change it, you would replace the IP address in the Hostname property with "ourcompany.nrtracker.com".

Edit Workgroup Settings

To update these settings:

  1. Login to the Workgroup Management System.
  2. Click on the Edit icon to the left of the workgroup.
  3. Make changes to the Hostname, Port Number and SSL settings.
  4. Enter a History Comment and click on the Update Workgroup button.

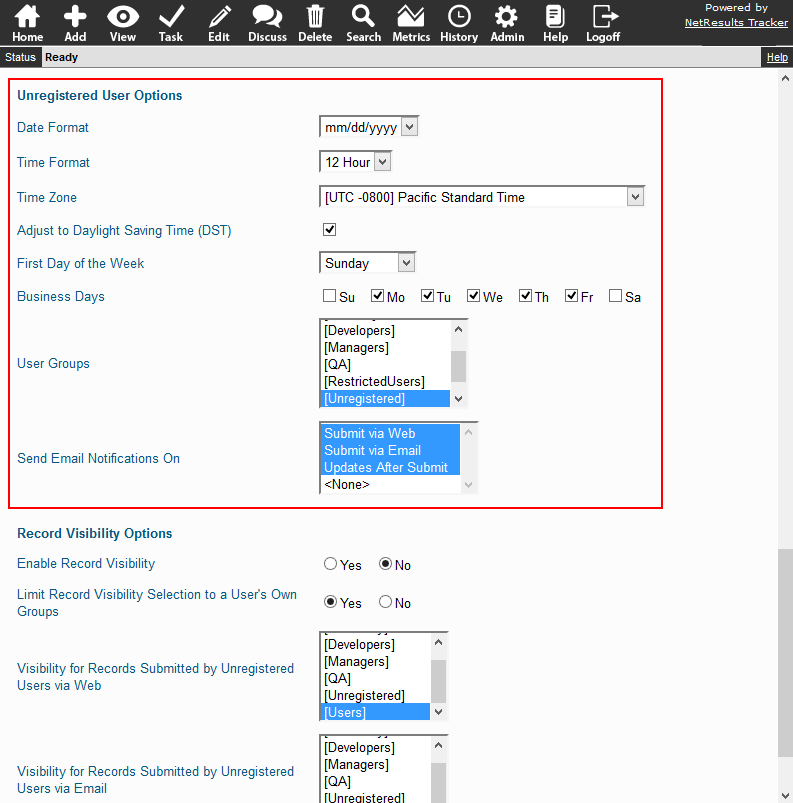
Choose date and time and other options applied to notifications sent to unregistered users.

Unregistered User Options

The date and time options are applied to date information in the email content sent to these users.

User Groups determines which pieces of the email content will be included.

There's also an option to select whether these users will be notified when adding a request and/or actions performed later in the workflow.

This Knowledge Base Article explains how to configure these options.

Take advantage of options available for using terminology specific to your process or project.

Login Page

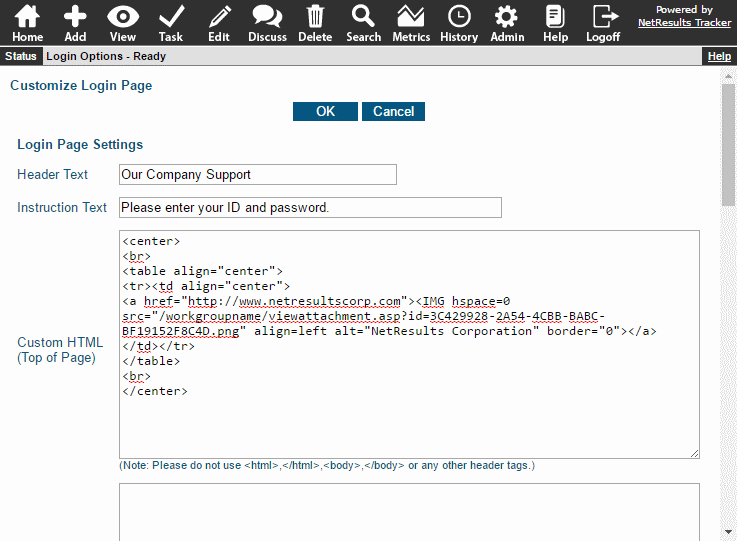
The first page end users see can have your logo and some instructions. You can also customize the Page Title displayed in the browser tab.

Login Page

Login Page Settings

Custom text can also be included on other external facing pages such as the Submit Page and Knowledge Base.

To set the Login Page settings:

  1. Login as Admin and click on the Admin icon.
  2. Click on the Login Options link.
  3. Make the desired changes and click OK to save them.

Home Page Message

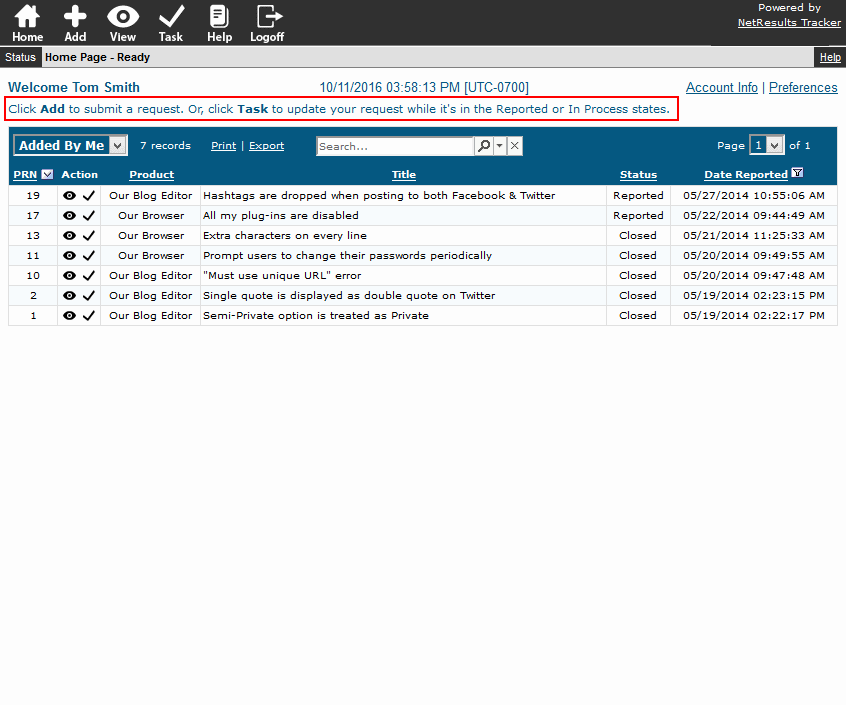
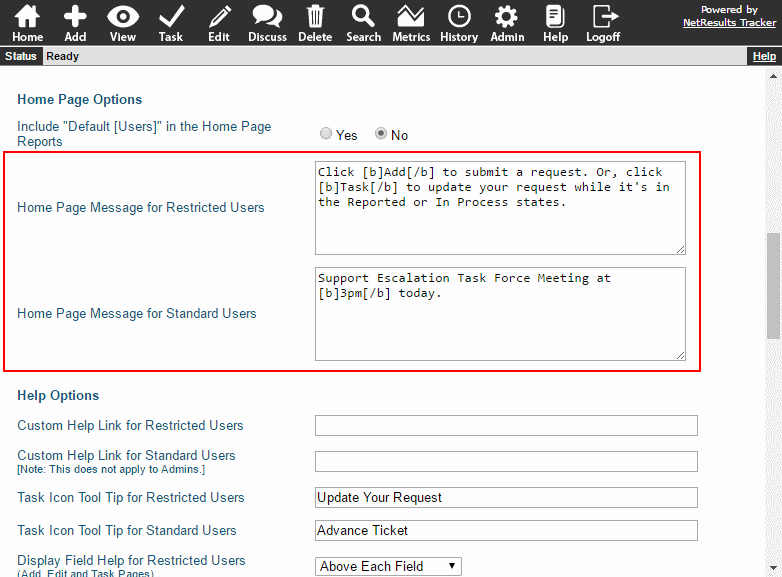
Enter a Home Page message for your end users. You can show a different message for Standard and Restricted users.

Home Page Message

Home Page Message Options

To set the Home Page message:

  1. Login as Admin and click on the Admin icon.
  2. Click on the General Preferences link.
  3. Scroll down to the Home Page Options section.
  4. Enter the Home Page messages for Standard and/or Restricted users. You can use format tags such as bold, italics, etc. to enhance your messages.
  5. Click OK to save them.

Add & Edit Page Instructions

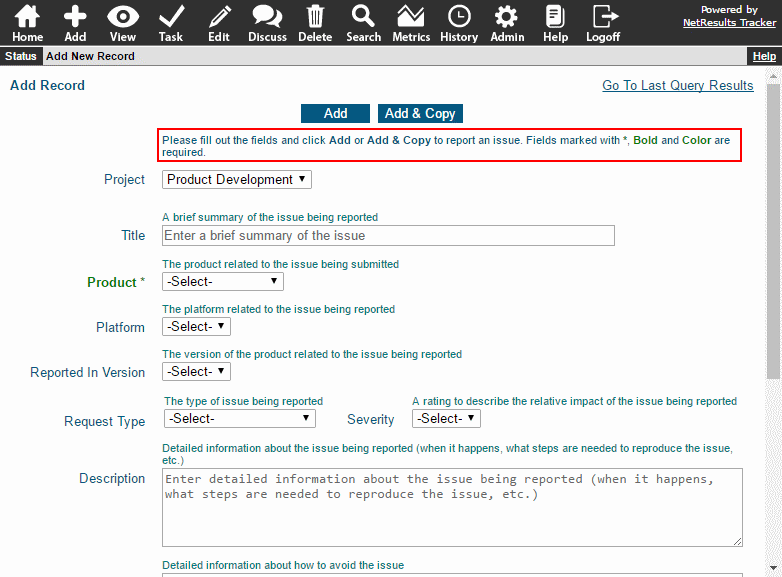
You can include some instructions at the top of the Add & Edit pages.

Add Page Message

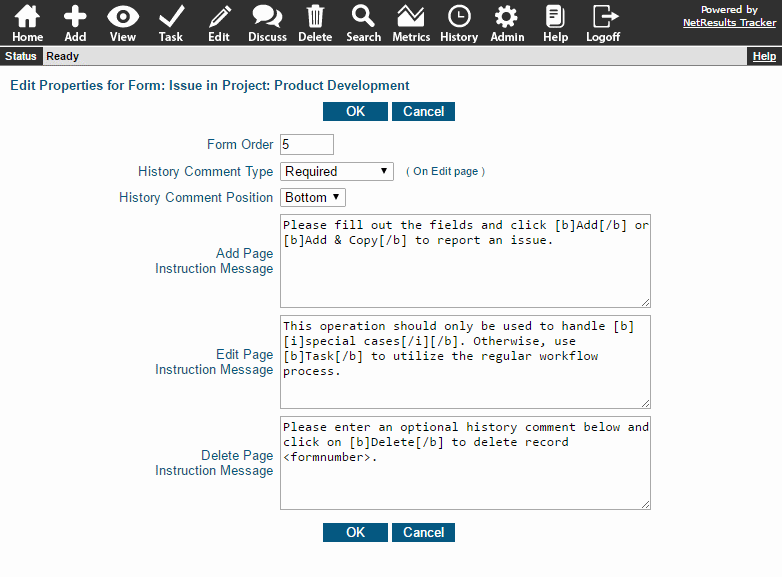
Each form can have its own set of instructions.

Form Properties

To add instructions to the top of the Add & Edit pages:

  1. Login as Admin and click on the Admin icon.
  2. Click on the Projects link.
  3. Locate the Forms section and expand the desired form.
  4. Find the entry called Other Properties and click on the Edit link to the right.
  5. Enter the instructions. You can use format tags such as bold, italics, etc. to enhance the text.
  6. Click OK to save the changes.

Workflow

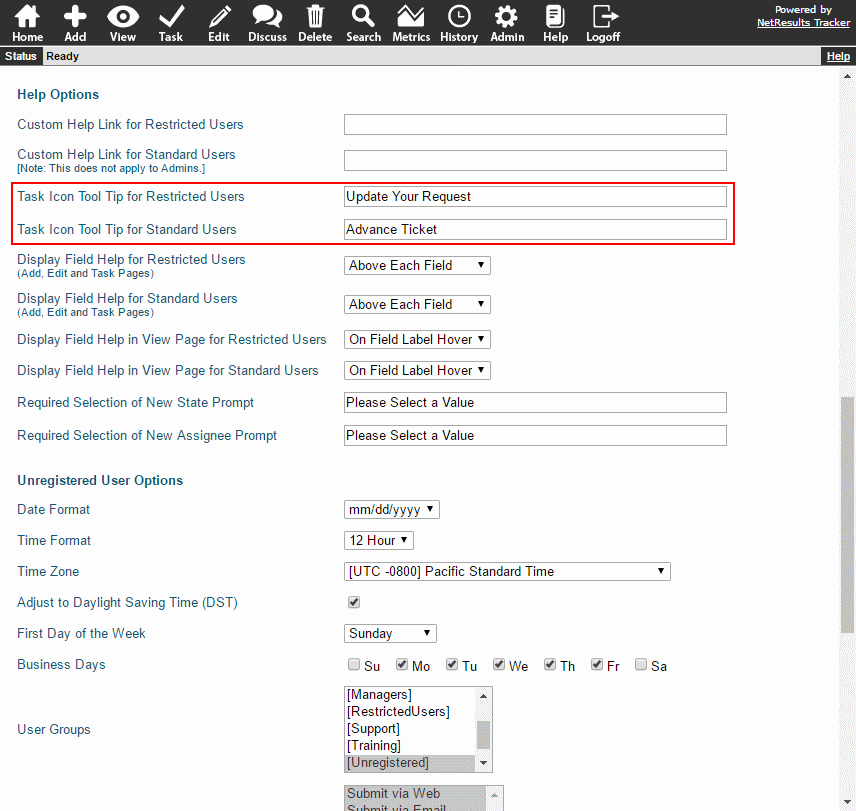
You can use your own wording for the tool tip for the Task icon. The tool tip can be different for Standard and Restricted users.

Tool Tip Options

To change the tool tip:

  1. Login as Admin and click on the Admin icon.
  2. Click on the General Preferences link.
  3. Scroll to the Help Options section.
  4. Set the tool tip for Standard and/or Restricted users.
  5. Click OK to save the changes.

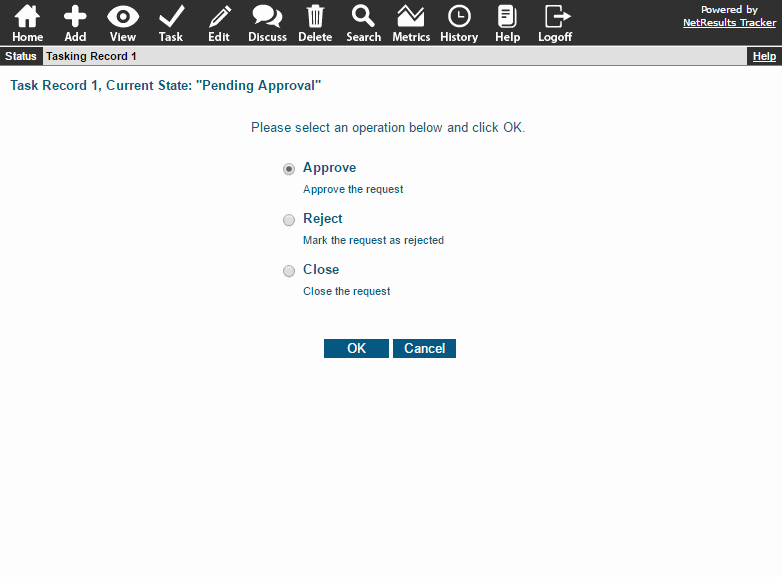
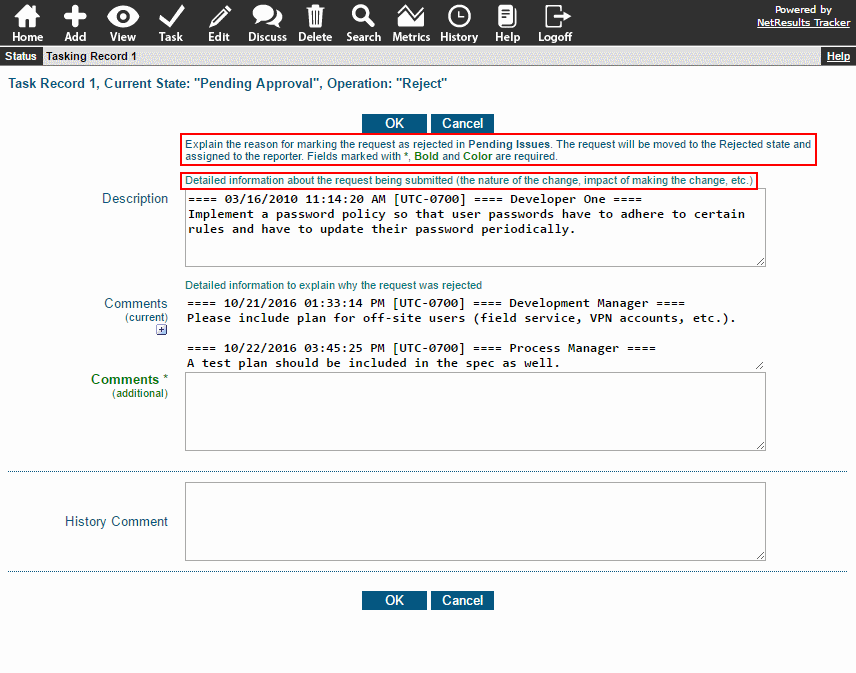
Instructions can be displayed above the transition list for each state in a workflow. Customize the name and descriptions of the transitions presented to the user when selecting a transition.

Task Instructions

Each transition can have instructions in addition to the help description available for each task field.

Transition Instructions

To set the instructions for a state:

  1. Login as Admin and click on the Admin icon.
  2. Click on the Workflows link.
  3. Click on the Global States button at the top.
  4. Click on the Edit button to the left of a state.
  5. Enter your text into the Instruction Message box. You can use format tags such as bold, italics, etc. to enhance the text.
  6. Click OK to save the changes.

To set the name and descriptions of a transition:

  1. Login as Admin and click on the Admin icon.
  2. Click on the Workflows link.
  3. Click on the Manage link to the right of States.
  4. Click on the state that contains the transition you want to modify, then click on the Transitions button.
  5. Click Edit to the left of the transition you want to change.
  6. Make changes to the Name, Help Description or Task Page Instruction Message. You can use format tags such as bold, italics, etc. to enhance the text.
  7. Click OK to save the changes.

To set the Help Description for a field:

  1. Login as Admin and click on the Admin icon.
  2. Click on the Fields link.
  3. Click on the Edit button to the left of the field.
  4. Make changes to the Help Description. You can use format tags such as bold, italics, etc. to enhance the text.
  5. Click OK to save the changes.

Email Rules

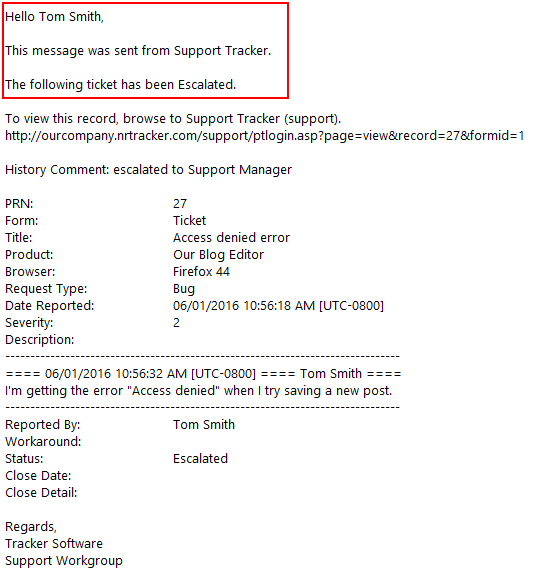
Tailor the text in your email rules to suit the recipients.

Sample Email

Email Rules

To set the Greeting, Introduction and Signature included in email notifications:

  1. Login as Admin and click on the Admin icon.
  2. Click on the Workflows link.
  3. Locate the Forms section and expand the desired form.
  4. Click on the Manage link to the right of Email Common Content.
  5. Make any desired changes and click OK to save them.

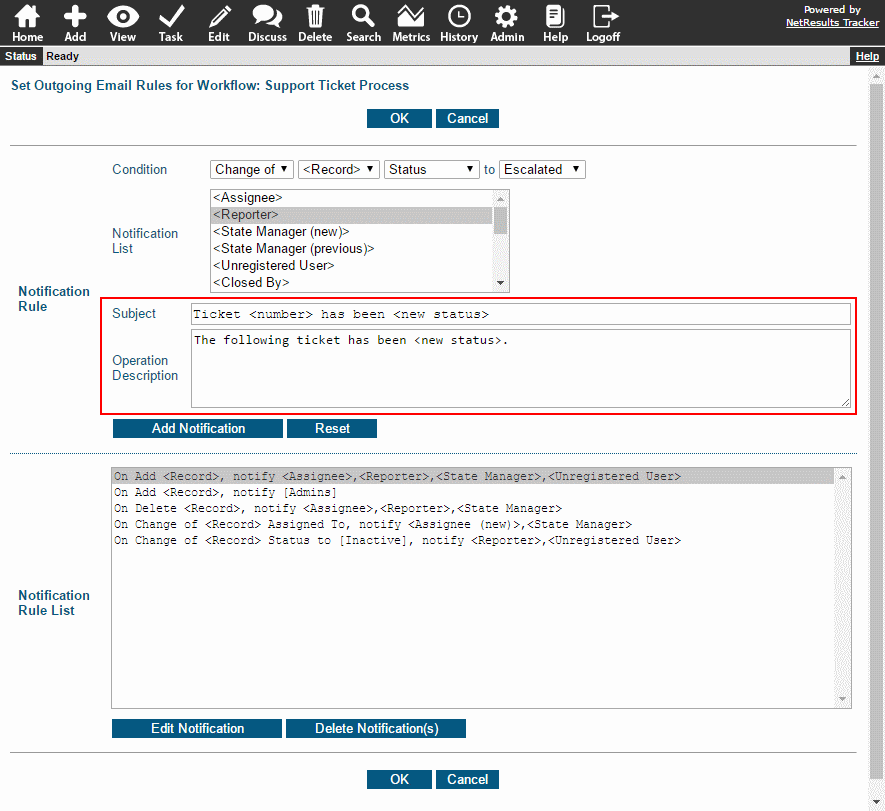
To customize the subject and body included in an email rule:

  1. Login as Admin and click on the Admin icon.
  2. Click on the Workflows link.
  3. Click on the Manage link to the right of Outgoing Email Rules.
  4. Double-click on a rule in the Notification Rule List.
  5. Make changes to the Subject and Operation Description (included in body of message). You can include variables or field values.
  6. Click on the Update Notification button to save the rule.
  7. Repeat steps 4-6 to modify any other rules.
  8. Click OK to apply all of the changes.

Set rules for notifying users throughout your process.

Notify Based On Actions

Trigger emails based on actions such as adding, editing, processing via the Task operation, change of status or assignment.
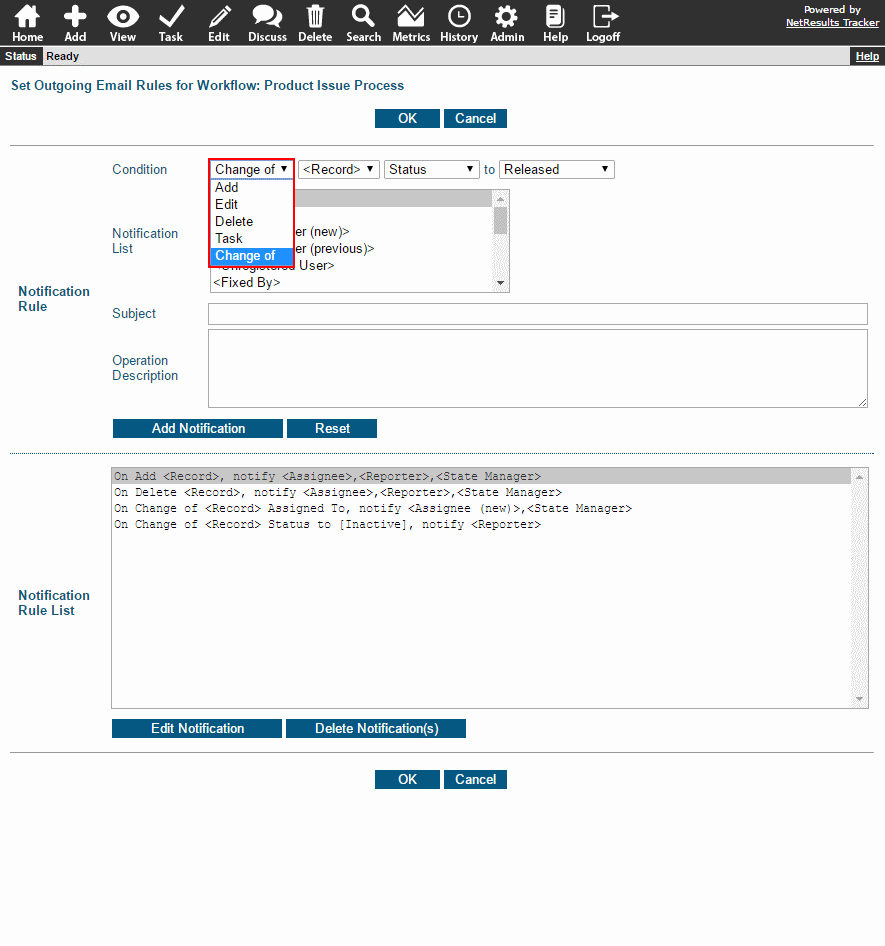
Email Rule Triggers

For each rule, you can choose who will be notified, the subject line and an operation description, which is a quick explanation of the notification.
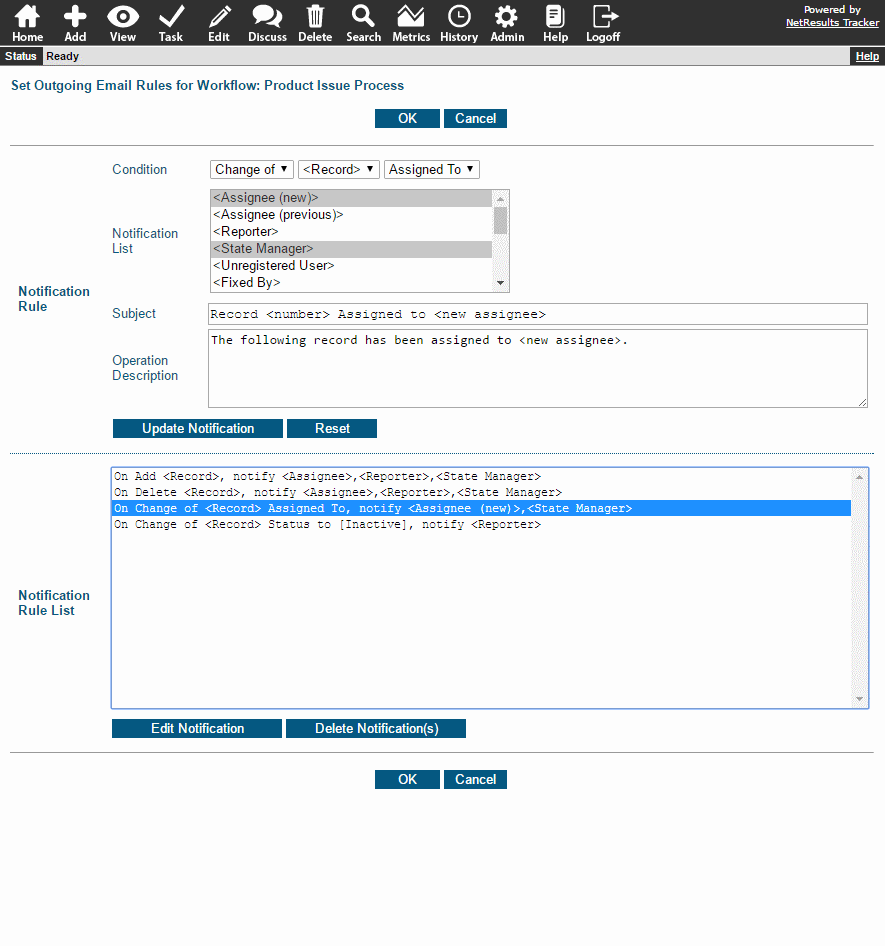
Sample Email Rule

Details for configuring rules can be found in the Online Help Guide.

Set Different Rules Based on a Pulldown

You can set up a different set of rules based on a pulldown. For example, if the rules are based on the Product field, you can have different content or actions triggering email notifications for each of your products.
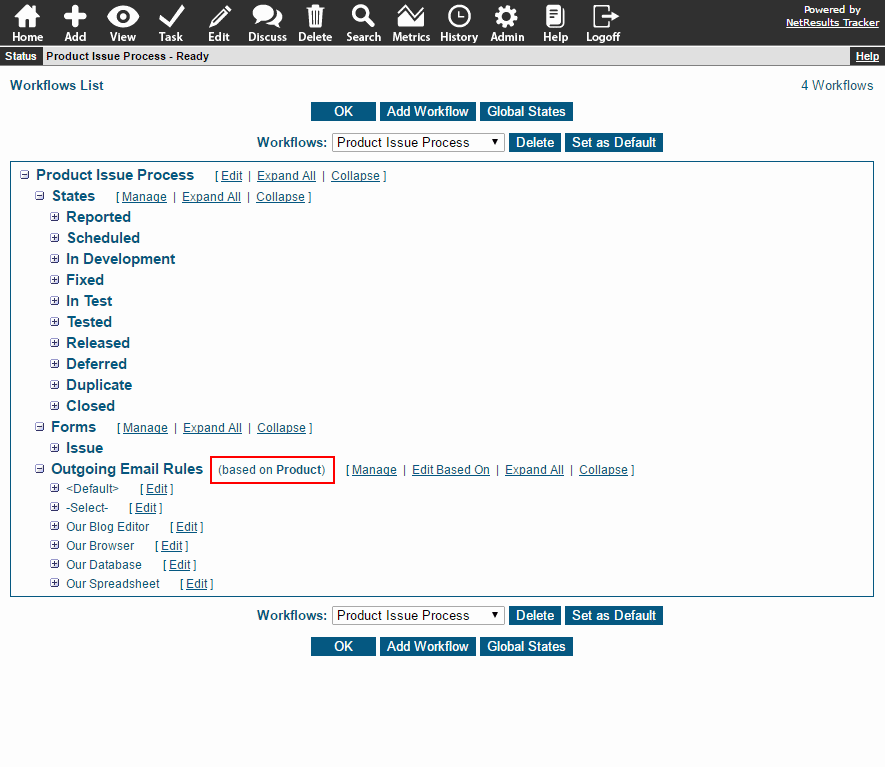
Rules Based on Product

Perhaps you have a new product and upper management wants to keep a close eye on the issues being reported for this product. You can set the Based On property to be "Product" and add a user group to be notified when issues are added for this product only. "<pulldown0>" is a variable that will include the product name in the email.
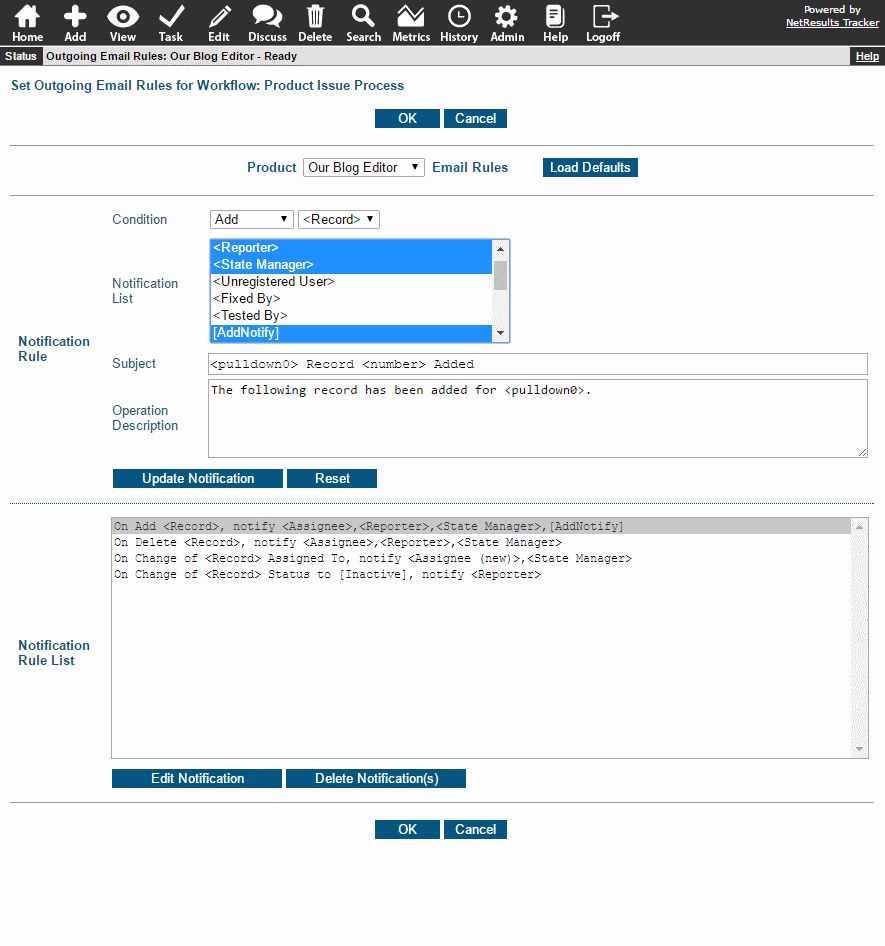
Add Rule Based on Product

Steps for setting the email rules to be based on a pulldown can be found in the Email Rules section of the Online Help Guide.

Include Record Details in the Email

There are variables you can use in the email content to include specific details from the record. For instance, if a notification is being sent because a record was re-assigned, you can include the name of the assignee in the subject line.
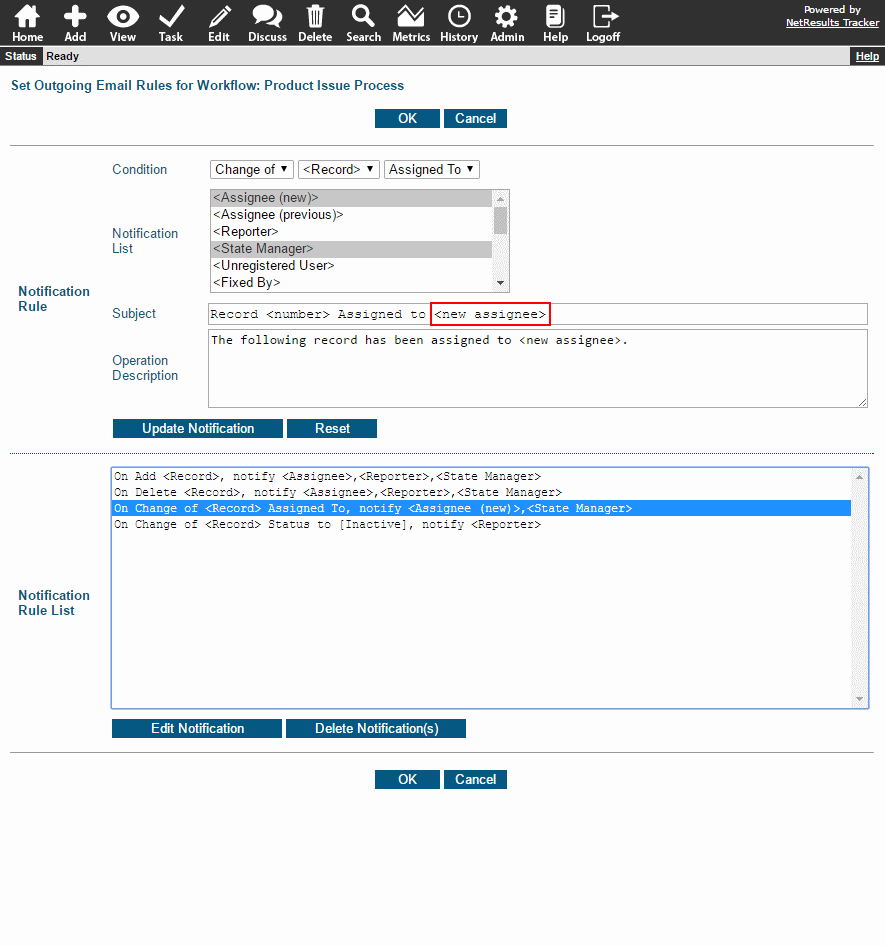
Email Rule with Variable

Use One Rule for Similar Actions

Sometimes one basic rule can be used for multiple actions. In this example, the reporter is notified for any action where the record will no longer be processed (e.g. the record was closed, deferred, marked as a duplicate of an existing issue, or included in a release). A single rule can handle all of these cases by setting up a state group called "Inactive". The <new status> variable in the Subject and Operation Description will fill in the appropriate state name in the email (Closed, Released, etc.).
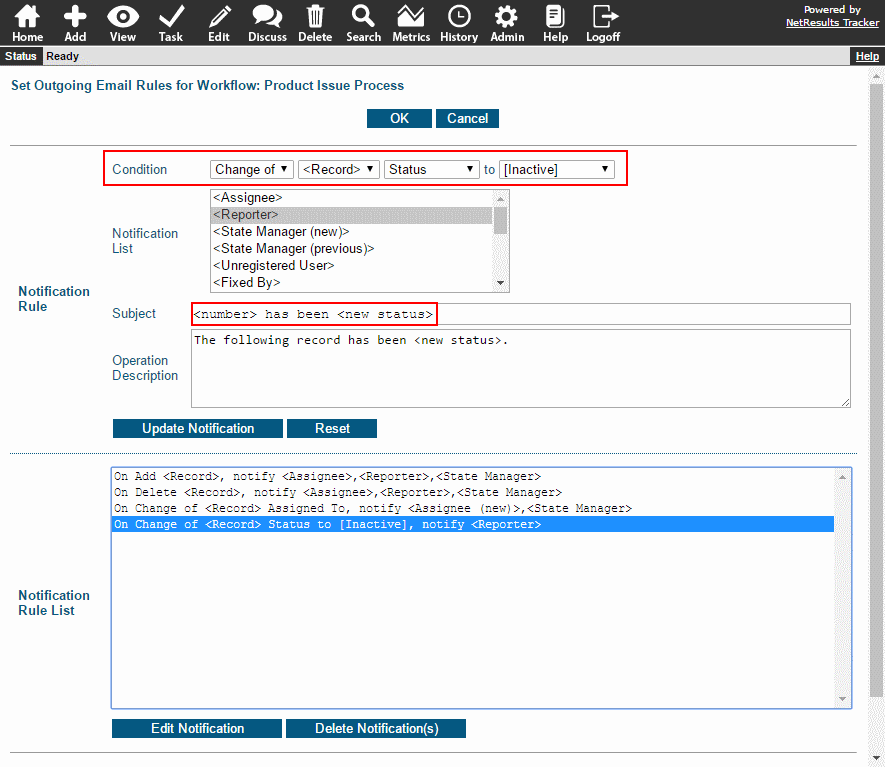
Use a State Group

The Workflow States section of the Online Help Guide explains how to add a state group.
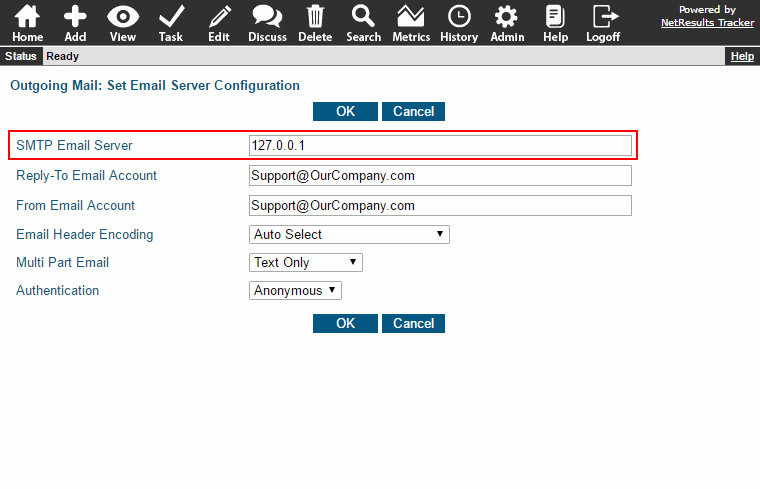
For on-premises Tracker installations, one item is critical for best performance: a local mail server.

Mail Server Configuration

We're not suggesting you move your company mail server. Just install the mail server included with Windows and use a smart host to route to your actual mail server. The benefit of this configuration is that it minimizes the time it takes for Tracker email notification messages to be sent. During any action that triggers an email (e.g. adding/editing/tasking records), Tracker will wait for the notifications to be generated before the action is completed. A local mail server makes quick work of sending the messages and can then forward (relay) to your actual mail server in the background while other Tracker operations are happening.

Step-by-step instructions for setting this up can be found in this Knowledge Base article