Take advantage of options available for using terminology specific to your process or project.
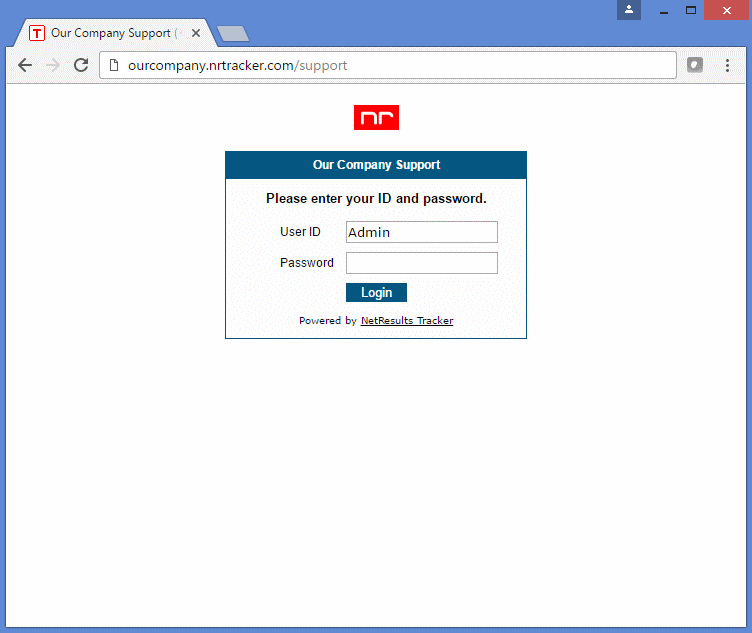
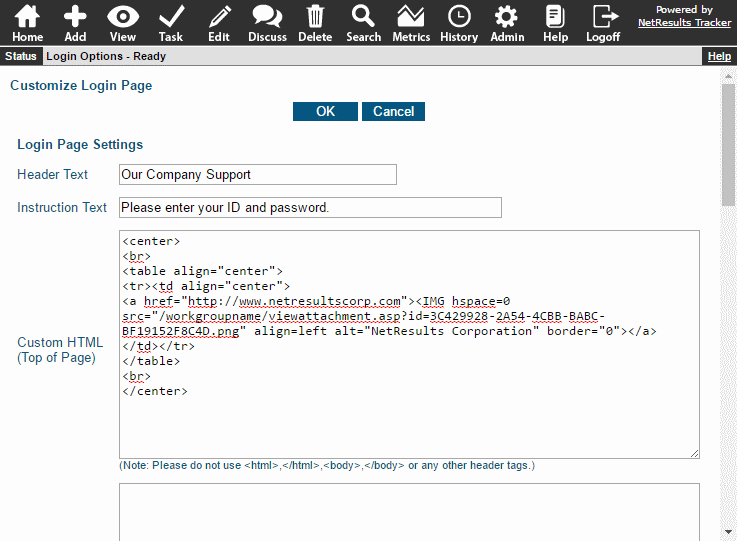
Login Page
The first page end users see can have your logo and some instructions. You can also customize the
Page Title displayed in the browser tab.
Custom text can also be included on other external facing pages such as the Submit Page and
Knowledge Base.
To set the Login Page settings:
- Login as Admin and click on the Admin icon.
- Click on the Login Options link.
- Make the desired changes and click OK to save them.
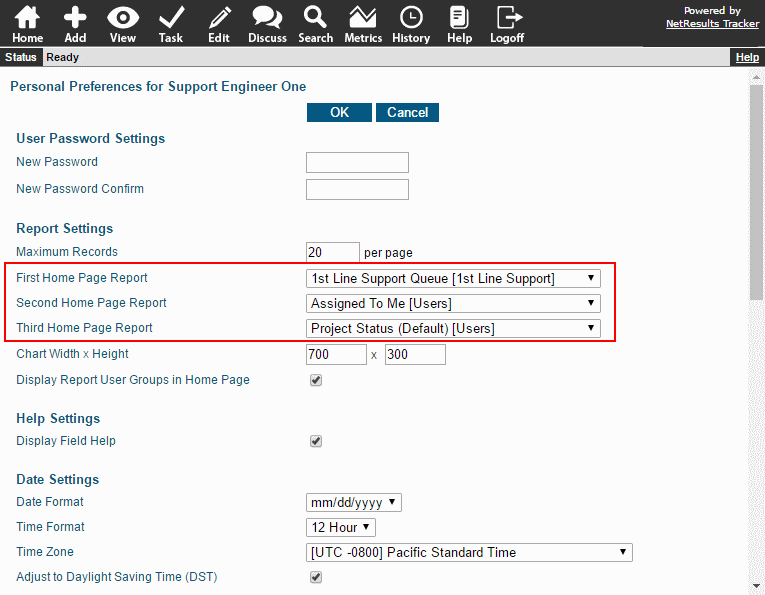
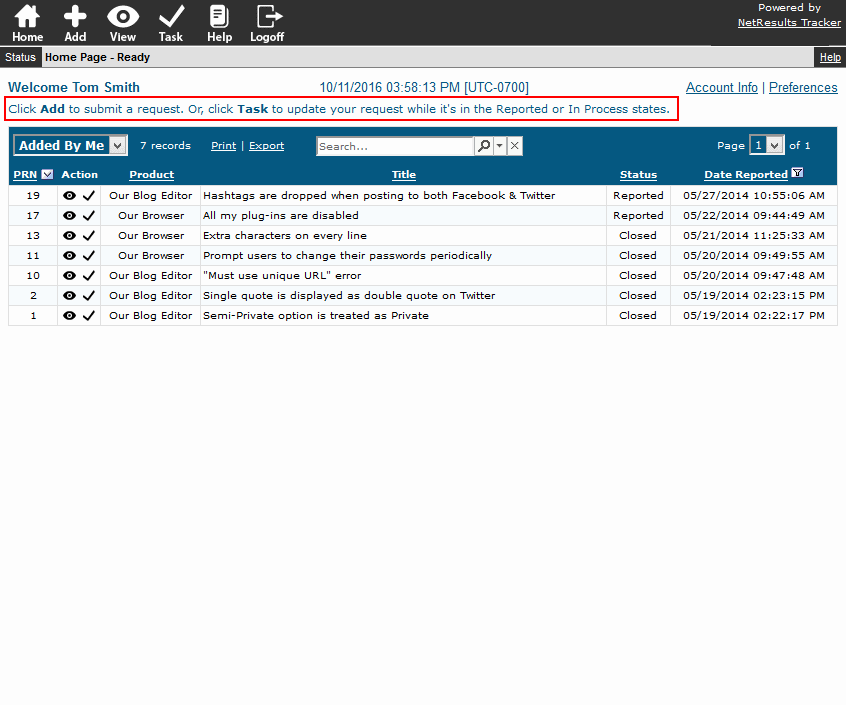
Home Page Message
Enter a Home Page message for your end users. You can show a different message for
Standard and Restricted users.
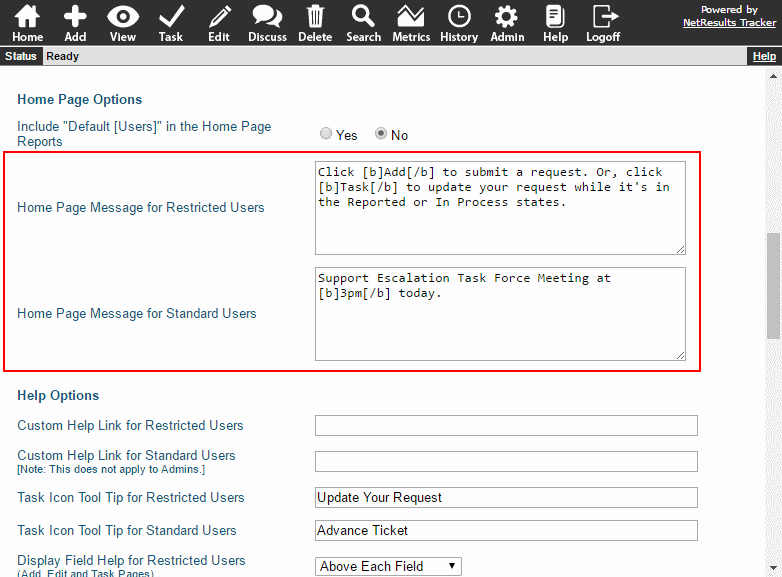
To set the Home Page message:
- Login as Admin and click on the Admin icon.
- Click on the General Preferences link.
- Scroll down to the Home Page Options section.
- Enter the Home Page messages for Standard and/or Restricted users. You can use format tags such as bold, italics, etc. to enhance your messages.
- Click OK to save them.
Add & Edit Page Instructions
You can include some instructions at the top of the Add & Edit pages.
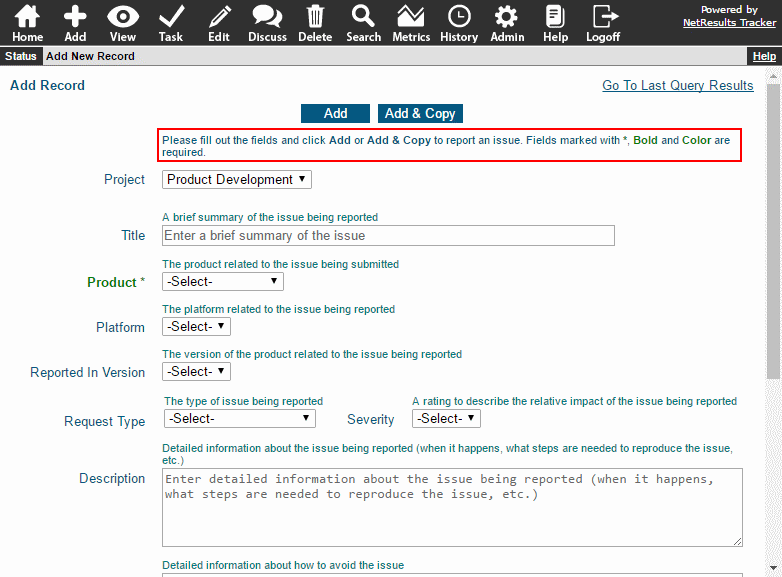
Each form can have its own set of instructions.
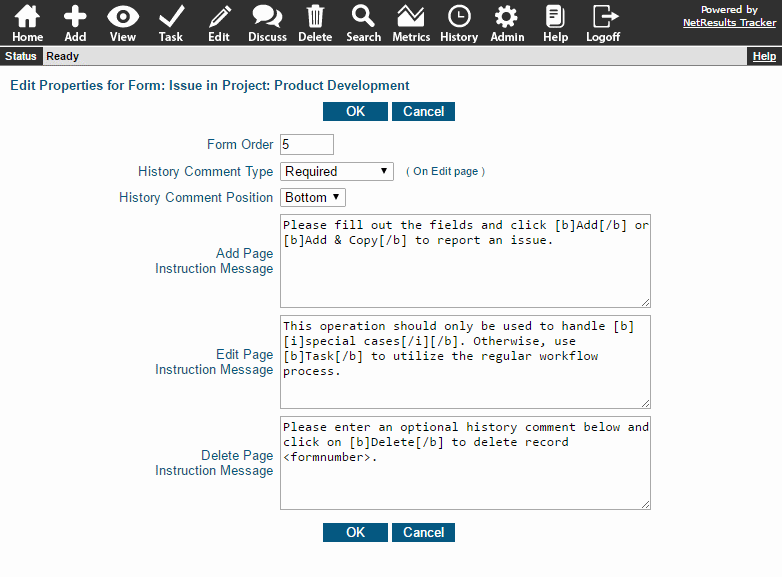
To add instructions to the top of the Add & Edit pages:
- Login as Admin and click on the Admin icon.
- Click on the Projects link.
- Locate the Forms section and expand the desired form.
- Find the entry called Other Properties and click on the Edit link to the right.
- Enter the instructions. You can use format tags such as bold, italics, etc. to enhance the text.
- Click OK to save the changes.
Workflow
You can use your own wording for the tool tip for the Task icon. The tool tip can
be different for Standard and Restricted users.
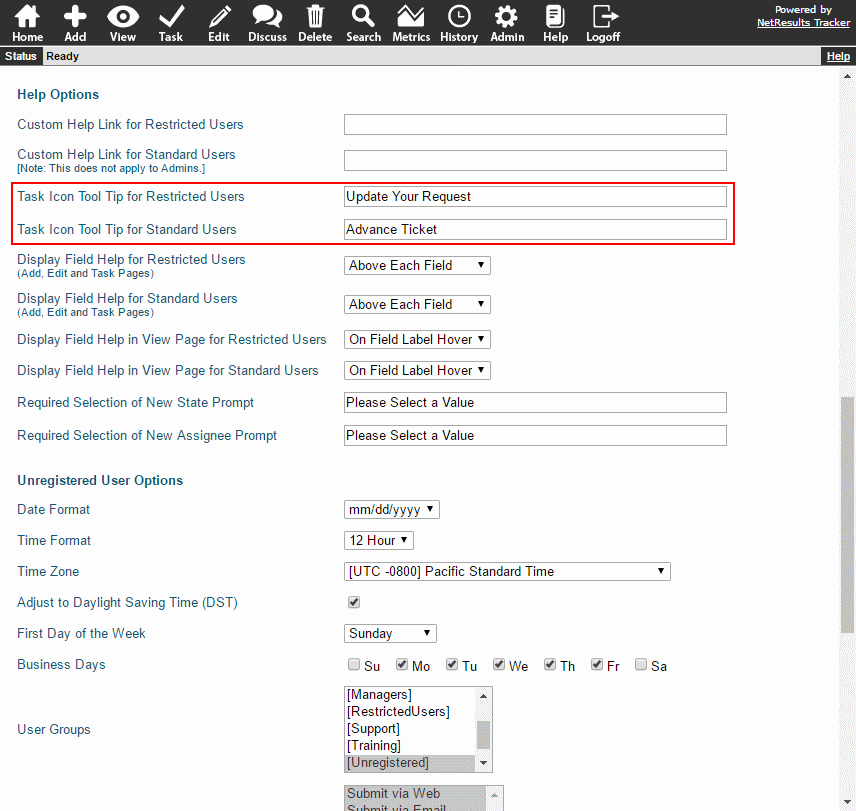
To change the tool tip:
- Login as Admin and click on the Admin icon.
- Click on the General Preferences link.
- Scroll to the Help Options section.
- Set the tool tip for Standard and/or Restricted users.
- Click OK to save the changes.
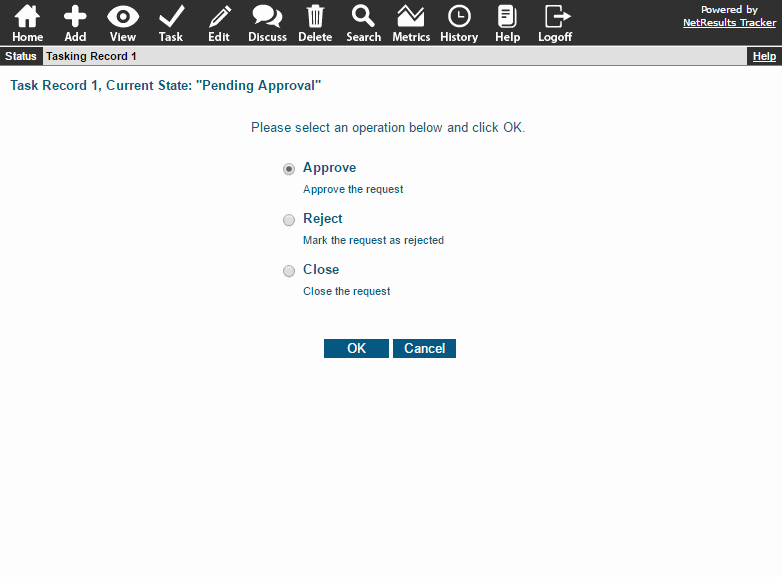
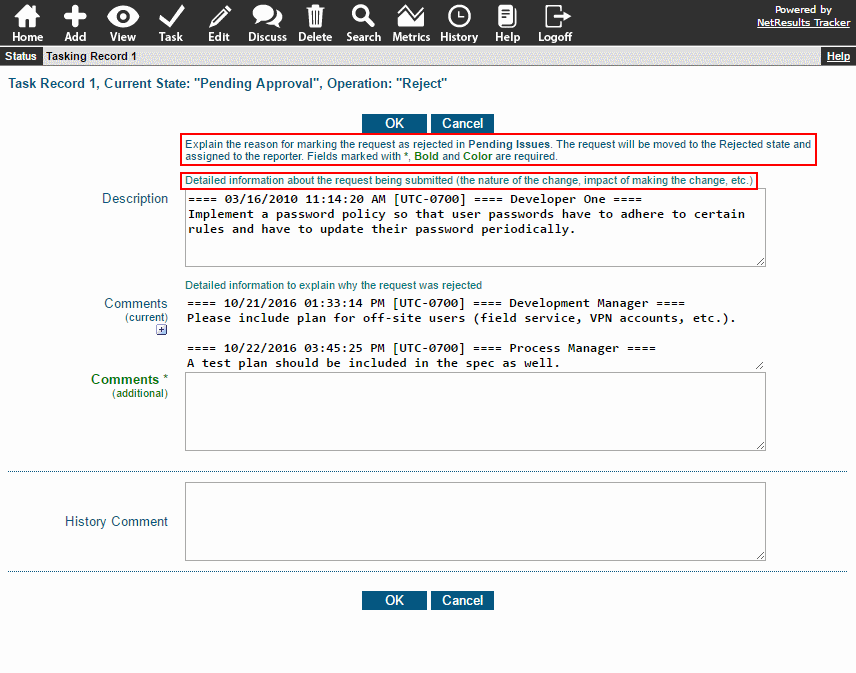
Instructions can be displayed above the transition list for each state in a workflow. Customize the name
and descriptions of the transitions presented to the user when selecting a transition.
Each transition can have instructions in addition to the help description available for
each task field.
To set the instructions for a state:
- Login as Admin and click on the Admin icon.
- Click on the Workflows link.
- Click on the Global States button at the top.
- Click on the Edit button to the left of a state.
- Enter your text into the Instruction Message box. You can use format tags such as bold, italics, etc. to enhance the text.
- Click OK to save the changes.
To set the name and descriptions of a transition:
- Login as Admin and click on the Admin icon.
- Click on the Workflows link.
- Click on the Manage link to the right of States.
- Click on the state that contains the transition you want to modify, then click on the Transitions button.
- Click Edit to the left of the transition you want to change.
- Make changes to the Name, Help Description or Task Page Instruction Message. You can use format tags such as bold, italics, etc. to enhance the text.
- Click OK to save the changes.
To set the Help Description for a field:
- Login as Admin and click on the Admin icon.
- Click on the Fields link.
- Click on the Edit button to the left of the field.
- Make changes to the Help Description. You can use format tags such as bold, italics, etc. to enhance the text.
- Click OK to save the changes.
Email Rules
Tailor the text in your email rules to suit the recipients.
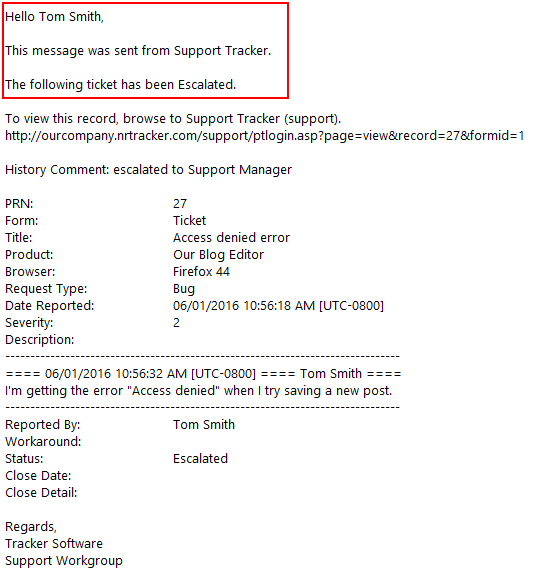
To set the Greeting, Introduction and Signature included in email notifications:
- Login as Admin and click on the Admin icon.
- Click on the Workflows link.
- Locate the Forms section and expand the desired form.
- Click on the Manage link to the right of Email Common Content.
- Make any desired changes and click OK to save them.
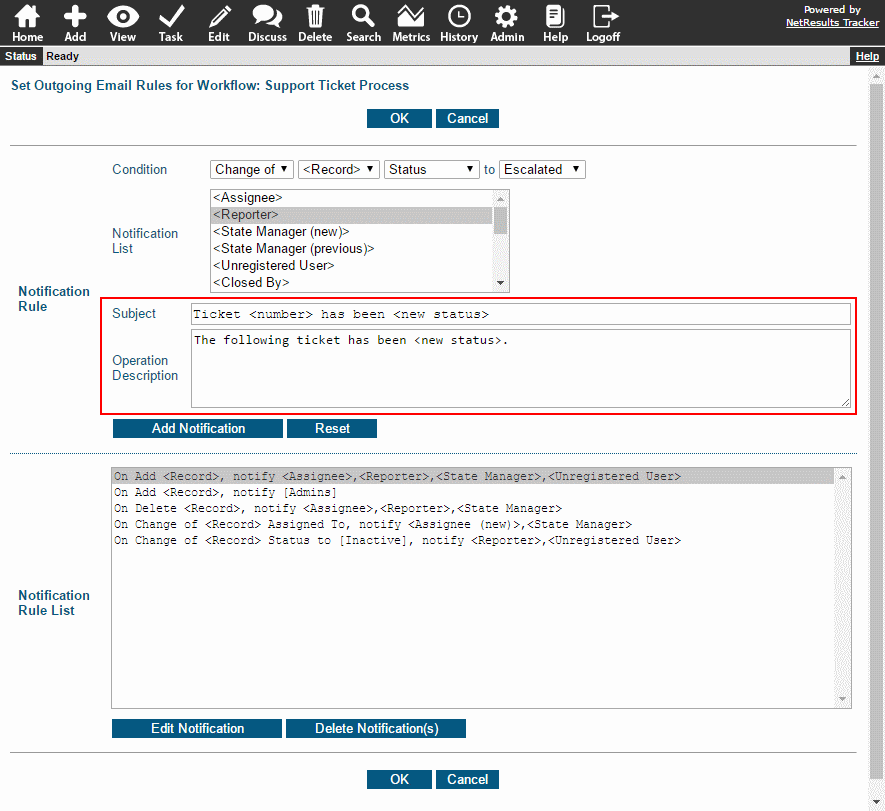
To customize the subject and body included in an email rule:
- Login as Admin and click on the Admin icon.
- Click on the Workflows link.
- Click on the Manage link to the right of Outgoing Email Rules.
- Double-click on a rule in the Notification Rule List.
- Make changes to the Subject and Operation Description (included in body of message). You can include variables or field values.
- Click on the Update Notification button to save the rule.
- Repeat steps 4-6 to modify any other rules.
- Click OK to apply all of the changes.