Use the Annotate option to include a user's name and a date and time stamp above their comments in a TextArea field so it's easy to distinguish what each user has contributed.
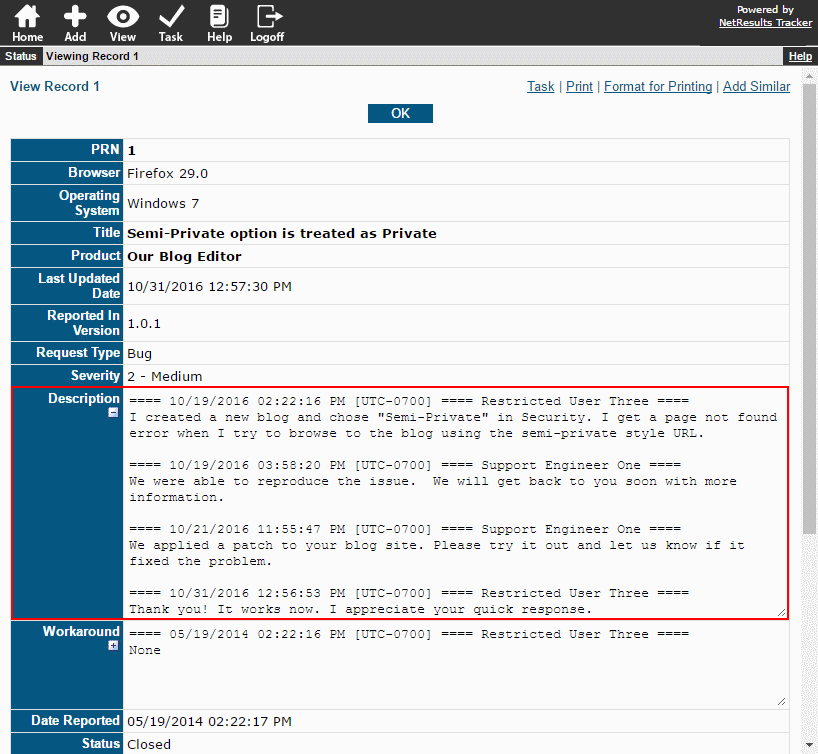
Annotated Conversation

TextArea fields are used for large amounts of text such as long explanations, descriptions or conversations between users.

Automatic

The annotation can be done automatically on the Add or Submit pages or when modifying a record using the Task operation. This allows the user to simply enter their comments without having to remember to click on the Annotate button.
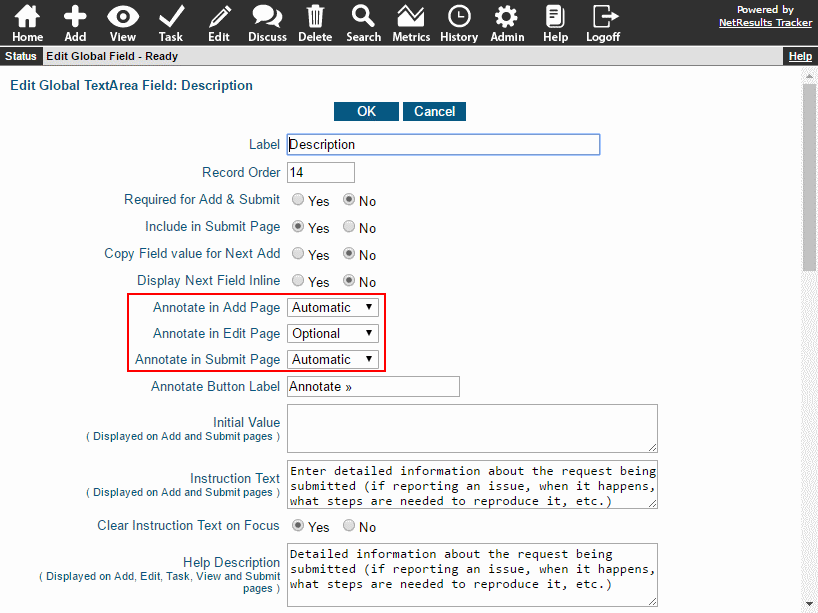
Annotate Options for Add, Submit, Edit

Optional

When the annotation is optional, the Annotate button will be available for the user to click to add the date and time stamp.
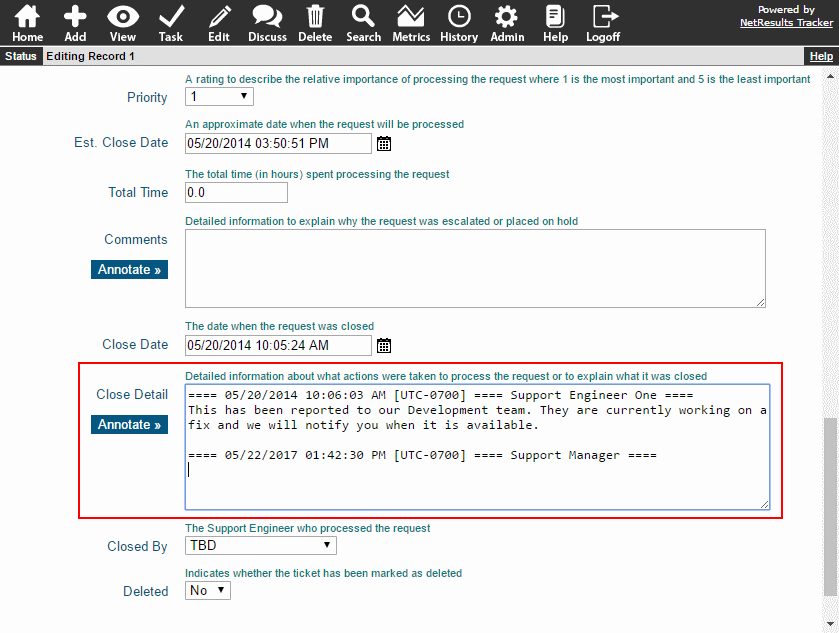
Optional Annotation

Unavailable

An annotation may not apply in some situations. For example, when the field is being used to publish information, such as in a Knowledge Base, an annotation may not be appropriate. The "Unavailable" option prevents an annotation from being added.

Configuration

To set the Annotate option on the Add, Submit and Edit pages:

  1. Login as Admin and click on the Admin icon.
  2. Click on the Fields link.
  3. Click on the Edit button to the left of the field you wish to modify.
  4. Make a selection for the Annotate options, then click OK to save them.

To configure the Annotate option for a field presented during the Task operation:

  1. Login as Admin and click on the Admin icon.
  2. Click on the Workflows link.
  3. Locate the States section and click on the Manage link to the right.
  4. Click on the desired state, then click on the Transitions button.
  5. Click on the Task Fields button to the left of the desired transition.
  6. Click on the TextArea field in left column and click on the Edit button (or click on a field in the right column, then click Add).
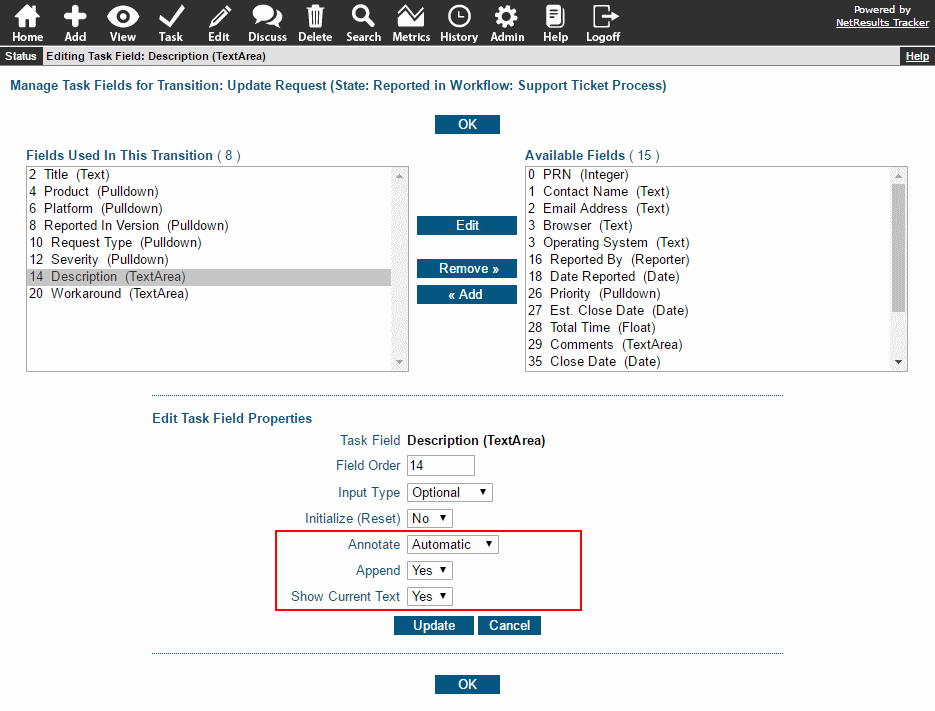
  7. Set the Annotate option. Then, set the Append and Show Current Text options accordingly. Detailed information about setting these options is available in the Online Help Guide.
  8. Click Update to save the changes.
Annotation Options During Task

Limit the states that can be selected for newly added records.

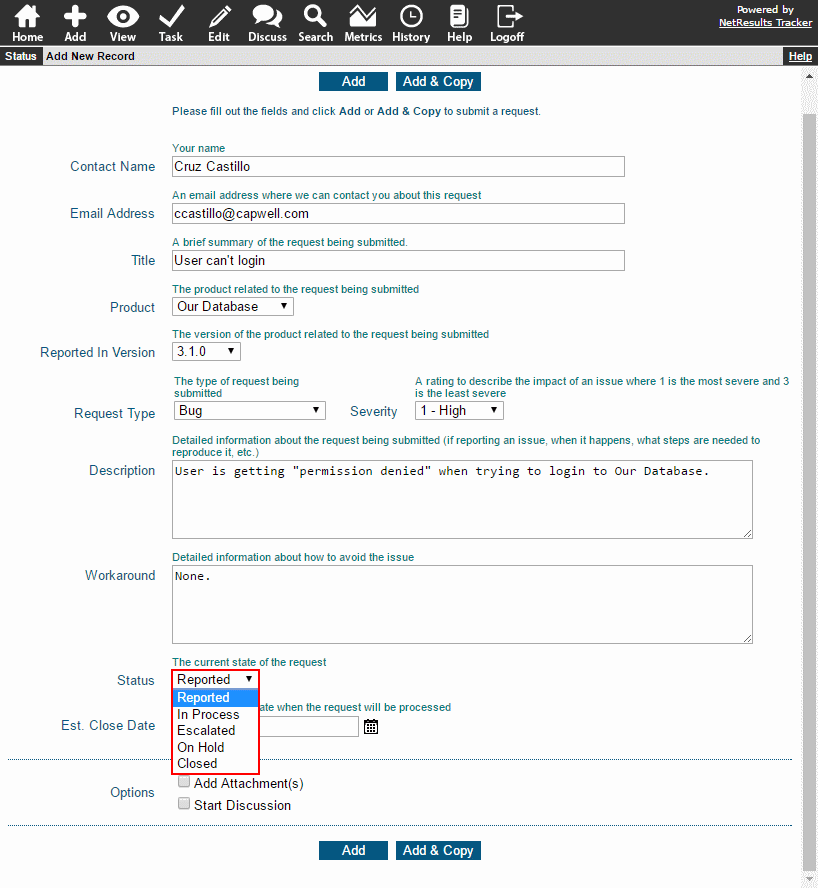
Status on Add Page

Perhaps there are two or three different paths for new records in your workflow. You can allow users to pick where the record will be routed by showing the Status field on the Add Page. You can show the field to only specific users rather than showing it to everyone. This is done by creating a state group and selecting that state group for the Allowed Add States workflow option.

Use the steps in the Online Help Guide to add a state group.

To use the state group in your workflow:

  1. Login as Admin and click on the Admin icon.
  2. Click on the Workflows link.
  3. Select the desired workflow in the pulldown at the top.
  4. Locate the Forms section and expand the desired form.
  5. Click on the Manage link to the right of Default Add State Settings.
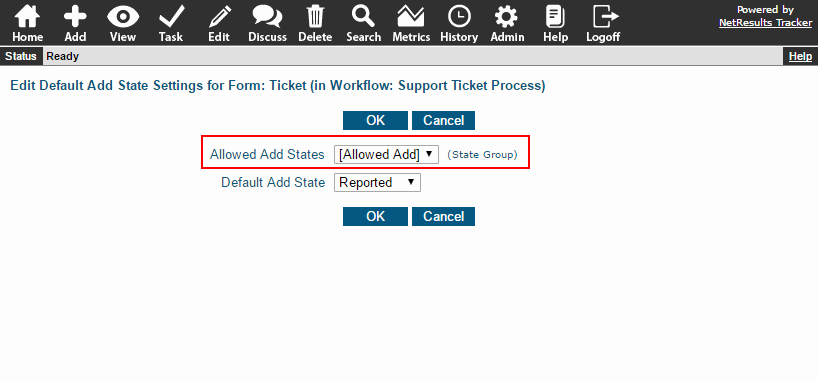
  6. For Allowed Add States, select the state group you created, then click OK.

Allowed Add States Option

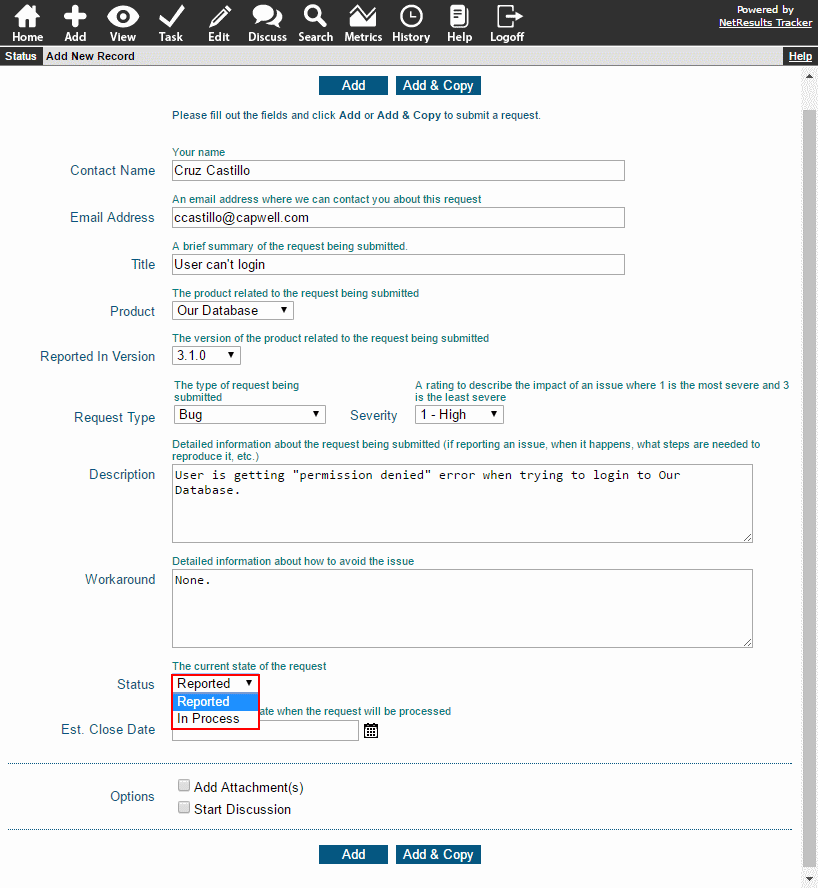
Now, users who are allowed to set the Status field on the Add Page will see the desired states.

Allowed Add States

Use invisible fields to modify fields behind the scenes. Most of fields available in Tracker can be set as Invisible. Here are some examples.

Set Up Future Dates

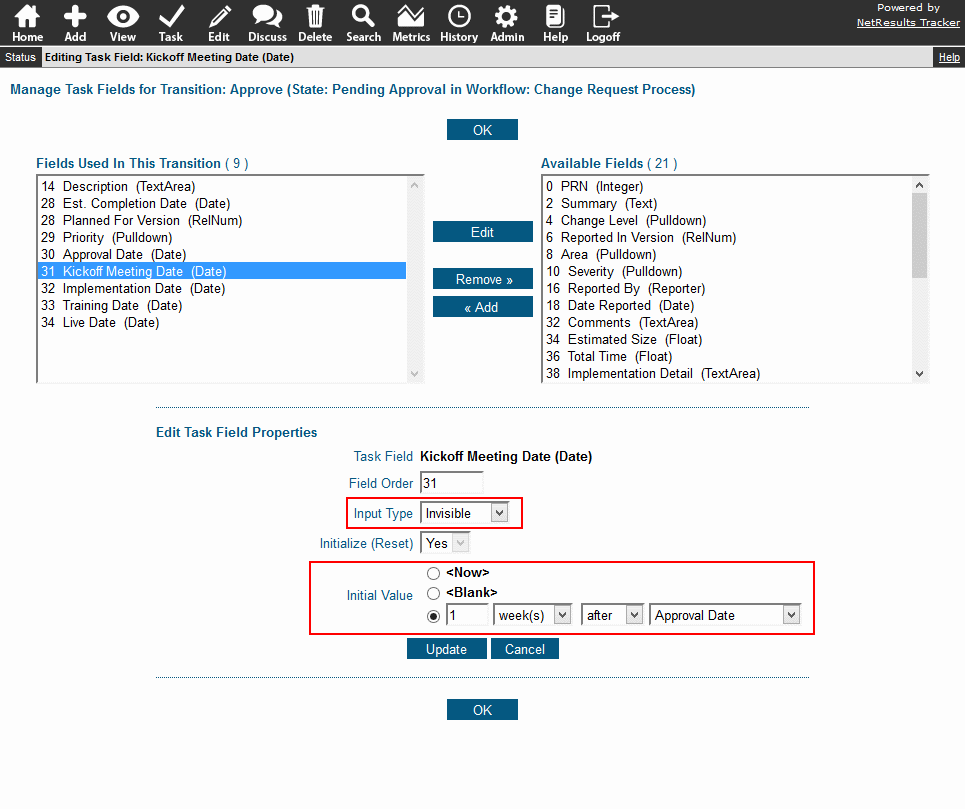
Date fields that represent milestones can be set up. For example, let's say an approval kicks off a process with 4 key dates. These can all be set at once based on the approval date.

Invisible Date Fields

To set a date field to be filled with a value, but not displayed:

  1. Login as Admin and click on the Admin icon.
  2. Click on the Workflows link.
  3. Locate the States section and click on the Manage link to the right.
  4. Click on the state that contains the transition you wish to modify and click on the Transitions button.
  5. Click on the Task Fields button next to the transition.
  6. In the right column, locate the desired date field, click on it and click on the Add button.
  7. Set Input Type to "Invisible", then set the Initial Value as desired.
  8. Click Update to save the changes.
Save a User Who Performed an Action

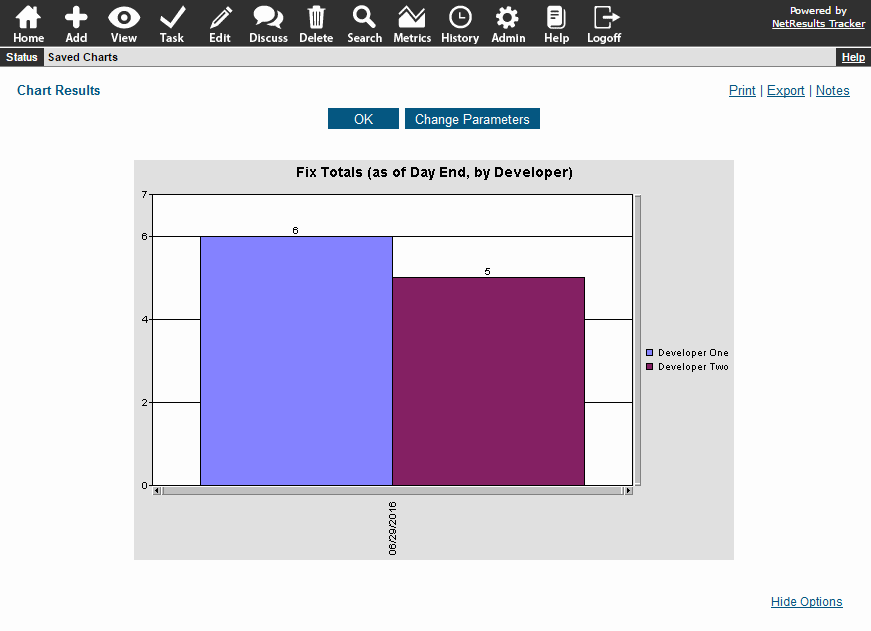
User Pulldowns are fields that can be configured to show members of a group as values. They can be used to save a user who performed an action to be included in reports. For example, you can save the user who fixed an issue. This data can be used to generate a report such as the number of issues fixed last month by each developer.

Fixed By Chart

Check out the User Pulldown Knowledge Base article for details on how to create this type of field.

Configure fields, reports and other text in the system to support multiple languages.

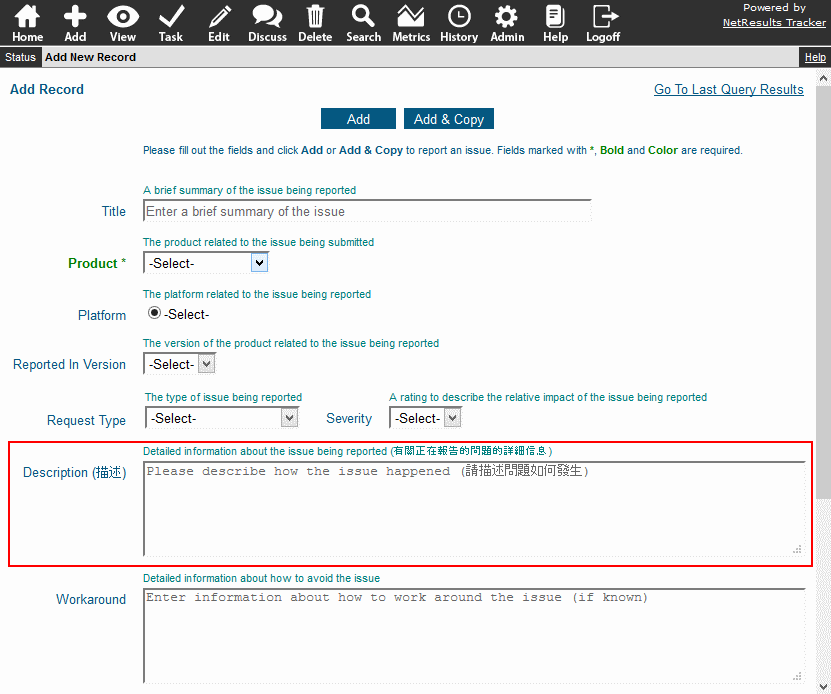
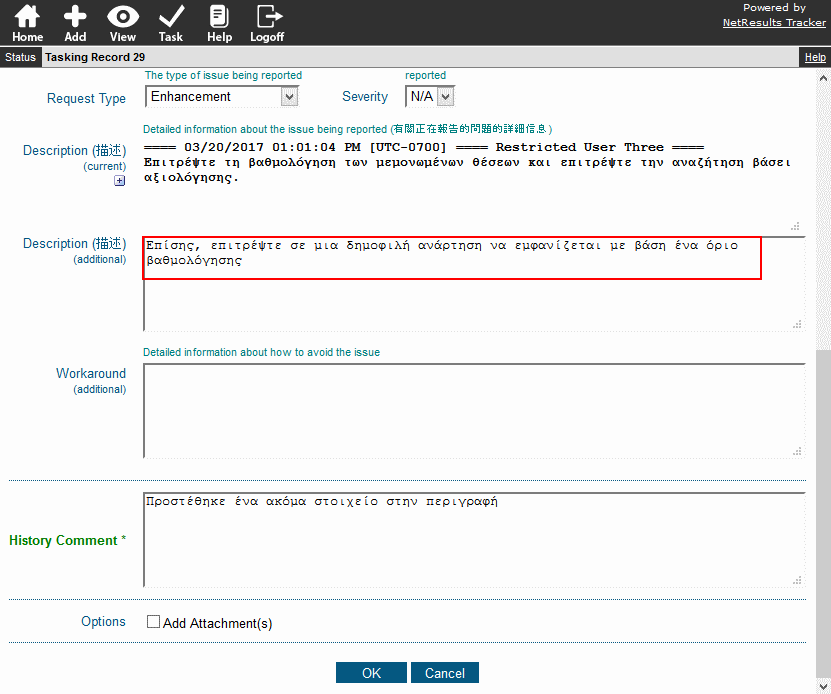
Tracker can support any language, including those with double-byte characters such as Arabic, Chinese, Greek, and others. You can add text from multiple languages throughout the system to assist users in their preferred language.

Fields

A field's name can have text in any language. There's also a Help Description, customizable text that can be displayed near a field to provide more information about how to use the field.

Field with Text in Multiple Languages

To edit a field name or description:

  1. Login as Admin and click on the Admin icon.
  2. Click on the Fields link.
  3. Click on the Edit button to the left of the field you wish to modify.
  4. Make changes to the Label and/or Help Description and click OK to save them.

Users can also enter text from any language into the text fields you've added to your forms.

Enter Any Language

Reports

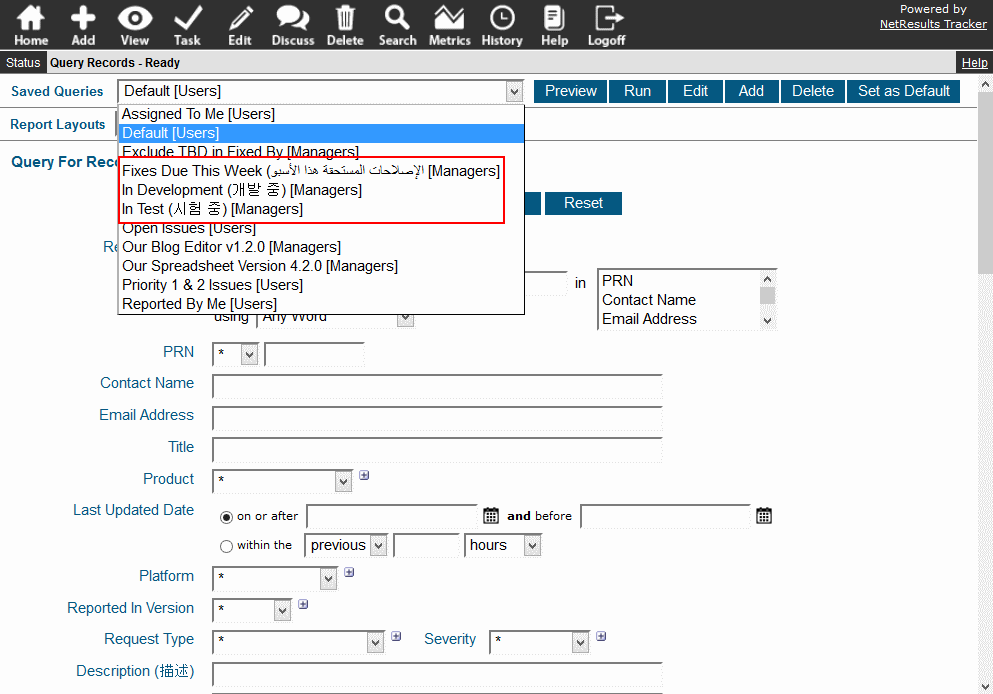
Report names can be in any language. You can create reports for groups or users can create their own personal reports. More information on adding or editing reports can be found in the Using Saved Queries & Reports or Metrics sections of the Online Help Guide.

Multi-Language Report Names

Workflow Options

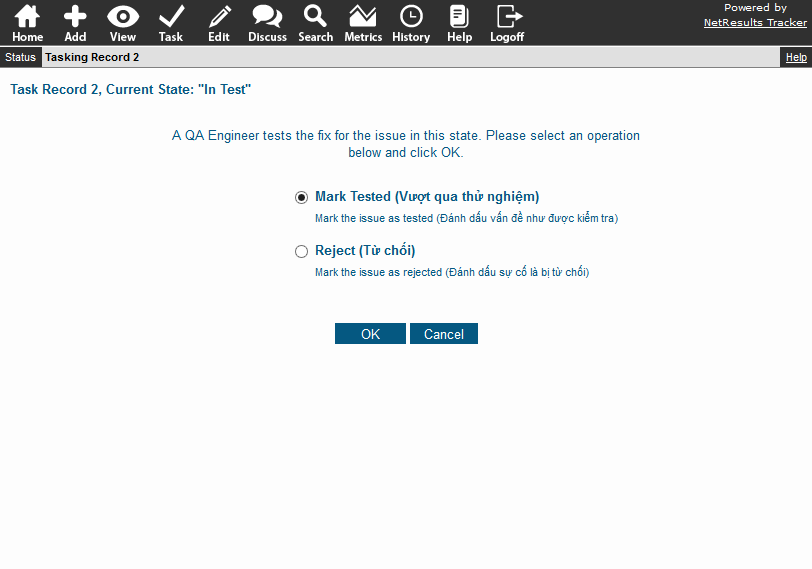
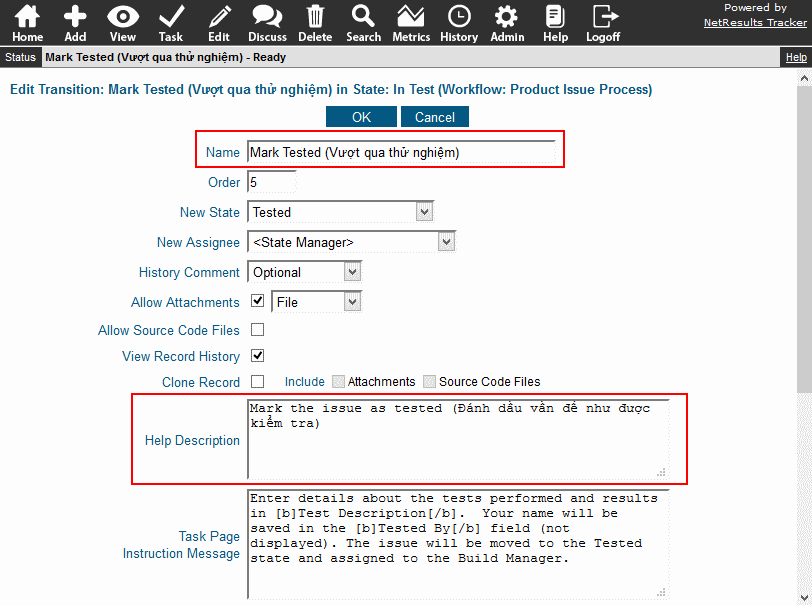
The names of workflow transitions and their descriptions can also be customized to use any language.

Multi-Language Transitions

To customize a transition name and its Help Description:

  1. Login as Admin and click on the Admin icon.
  2. Click on the Workflows link.
  3. Locate the States section and click on the Manage link to the right.
  4. Click on the state that has the transition you want to change, then click on the Transitions button.
  5. Click on the Edit button to the left of the transition.
  6. Make any changes to the Name, Help Description or Instruction Message.
  7. Click OK.

Multiple Languages in Transition Options

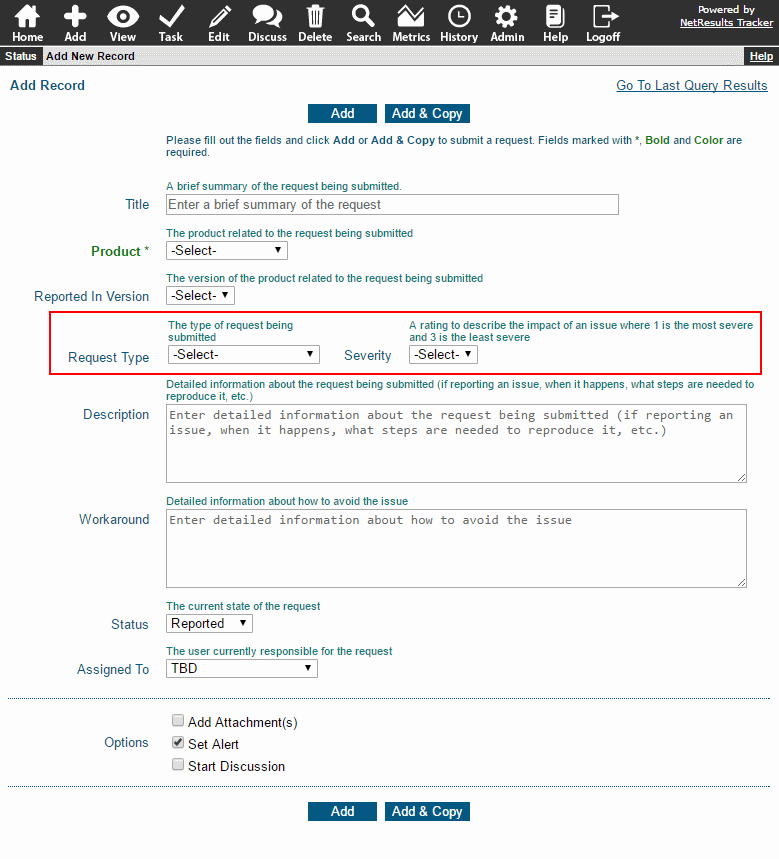
Arrange multiple fields on a single line to make your form more compact.

Multiple Fields on a Line

To display multiple fields on a line:

  1. Login as Admin and click on the Admin icon.
  2. Click on the Fields link.
  3. Click on the Edit button to the left of the first field that should appear on the line.
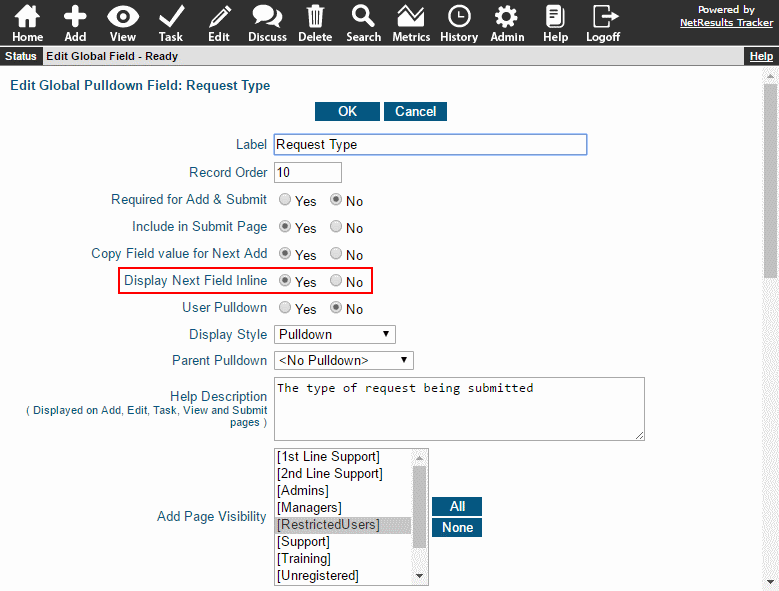
  4. Set the option Display Next Field Inline to "Yes".
  5. Click OK to save the change.

Multiple Fields on a Line Option

For more information, please review the Field Types & Properties section on the Online Help Guide.