Ensure important data is gathered by making a field required.

You can require information to be entered or a value other than the default be selected in a field by configuring it to be required on the Add and Submit pages or during the Task operation.

Set a Field to be Required on the Add or Submit Pages

  1. Login as Admin and click on the Admin icon.
  2. Click on the Fields link.
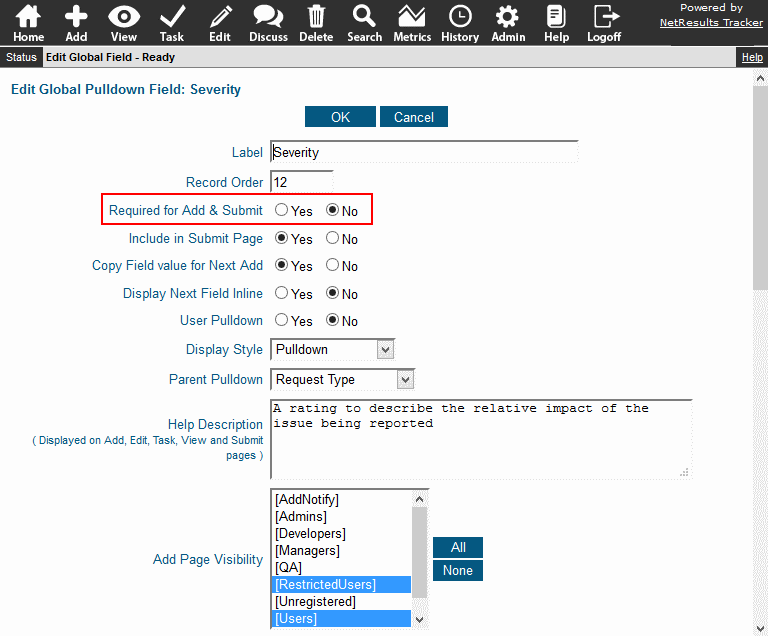
  3. Click on the Edit button to the left of the field.
  4. Set the option "Required for Add & Submit" to "Yes" and click OK.

Require on Add & Submit Pages

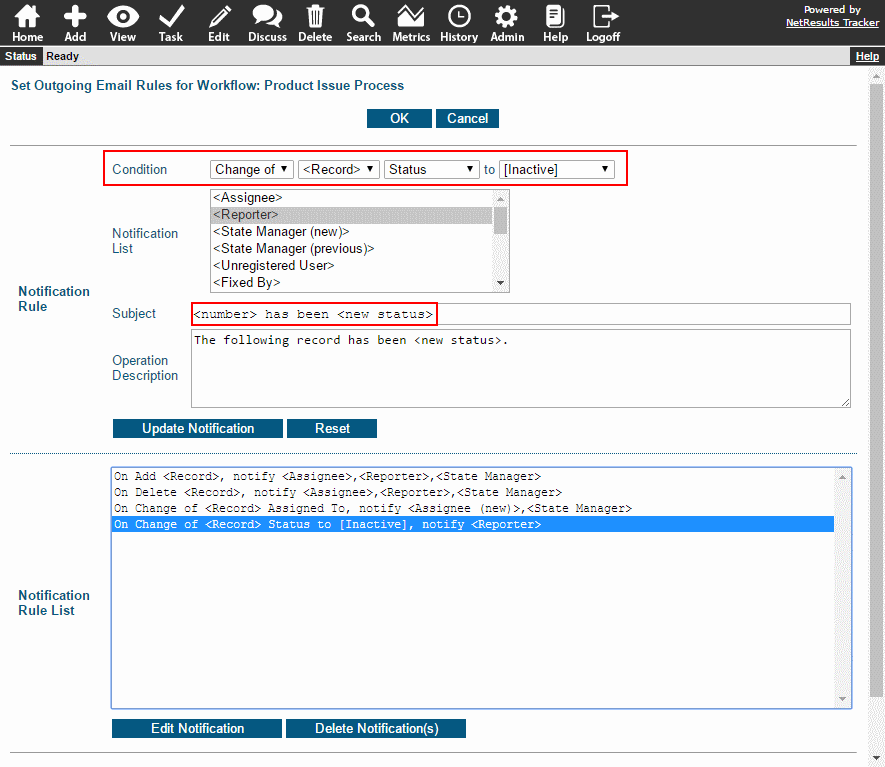
Make a Field Required During the Task Operation

  1. Login as Admin and click on the Admin icon.
  2. Click on the Workflows link.
  3. In the pulldown at the top select the desired workflow.
  4. Locate the States section and click on the Manage link to the right.
  5. Click on the state that contains the transition you wish to modify, then click on the Transitions button.
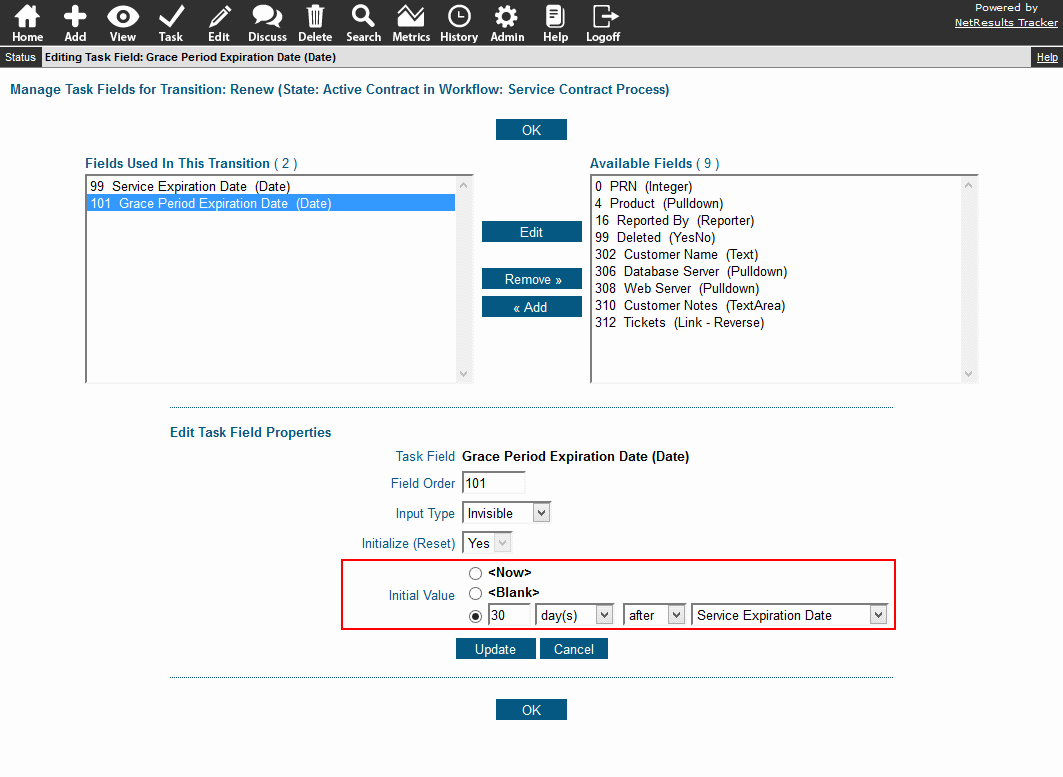
  6. Click on the Task Fields button to the left of the desired transition.
  7. Click on the field to be changed, then click on the Edit button.
  8. Set Input Type to be "Required", then use the information in the Task Field Properties Help section to set any related options.
  9. Click on the Update button to save the changes.

Require during Task

Use a single email rule to cover notification for a group of similar states.

Let's create a state group for "Inactive" states: Deferred, Closed, Released, Duplicate. We can then set up one email rule that will notify the reporter in any of those cases.

Email Rule for Inactive States

To add a state group:

  1. Login as Admin and click on the Admin icon.
  2. Click on the Workflows link.
  3. Click on the Global States button.
  4. Click on the State Groups button.
  5. Click on the Add State Group button.
  6. Enter a name and click OK.
  7. Click on the Add States to this State Group button.
  8. Click on a state and click on the Add button. Repeat to add each desired state. Then, click OK.

State Groups

Add an email rule that uses the new state group:

  1. Login as Admin and click on the Admin icon.
  2. Click on the Workflows link.
  3. Locate the Outgoing Email Rules section and click on the Manage link to the right.
  4. For Condition, select "Change of", "<Record>", "Status", to "[New State Group]".
  5. For Notification List, select the users and/or groups that should be notified. To select multiple users and groups, hold down the Ctrl button on your keyboard as you select the desired users and groups.
  6. Enter a Subject and Operation Description. Variables can be used to customize the content included in these parts of the email notification message. Using the "Inactive" states example, the Subject can be something like "<number> has been <new status>" where <number> will fill in the record number and <new status> will fill in the state to which the record is being routed. The Operation Description can use similar wording: "The following record has been <new status>."
  7. Click on the Add Notification button to save the email rule to the Notification list. Then, you must click OK to fully save the new rule and return to the Workflows page.

More details can be found in the Email Rules Help section.

Date fields can be automatically set with a value relative to another date.

Perhaps you want to set up a roadmap based on an event like an approval. Or, the example below shows a grace period date being set based on a service contract expiration date.

Relative Dates

To set a date field based on another date:

  1. Login as Admin and click on the Admin icon.
  2. Click on the Workflows link.
  3. Locate the States section and click on the Manage link to the right.
  4. Click on the state that contains the transition you wish to modify and click on the Transitions button.
  5. Click on the Task Fields button next to the transition.
  6. In the right column, locate the desired date field, click on it and click on the Add button.
  7. Set the Input Type, set Initialize to "Yes", then Set the Initial Value as desired.
  8. Click Update to save the changes.

Records can be marked as deleted so they don't show up in reports, but still remain in the system.

Delete Operation

When the Delete operation is used, it is set to do a "soft" delete by default. The Deleted field in the record is set to "Yes" so that the record is not displayed in reports, but the record can still be accessed, if needed. You can edit the record to set the Deleted field back to "No" at any time.

Deleted Record

A record can be permanently deleted using the steps below. PLEASE NOTE: The steps below CANNOT be undone except by restoring a backup of your data.

  1. Login as Admin and click on the Admin icon.
  2. Click on the General Preferences link.
  3. Set the option "Remove Records from Database on 'Delete' Operation" to "Yes".
  4. Click OK to save the change.
  5. Use the Delete operation to permanently delete desired records.
  6. Click on the Admin icon.
  7. Click on the General Preferences link.
  8. Set the option "Remove Records from Database on 'Delete' Operation" back to "No".
  9. Click OK to save the change.

More information can be found in the Permanently Deleting Records section of the Online Help Guide.

Start off with a template that has a form, fields and workflow modeled for your intended use already set up.

When you create a new workgroup, you can select from different templates for popular uses of Tracker such as Product Development, Support or Change Management. If none of the templates matches the process you are implementing, there is a Base template with a minimal configuration so that you can add your own fields workflow.

Choose a Template

Learn about the configuration of a template by clicking on a template's link in the Online Help Guide.

This blog post provides helpful information for implementing a new process or project.