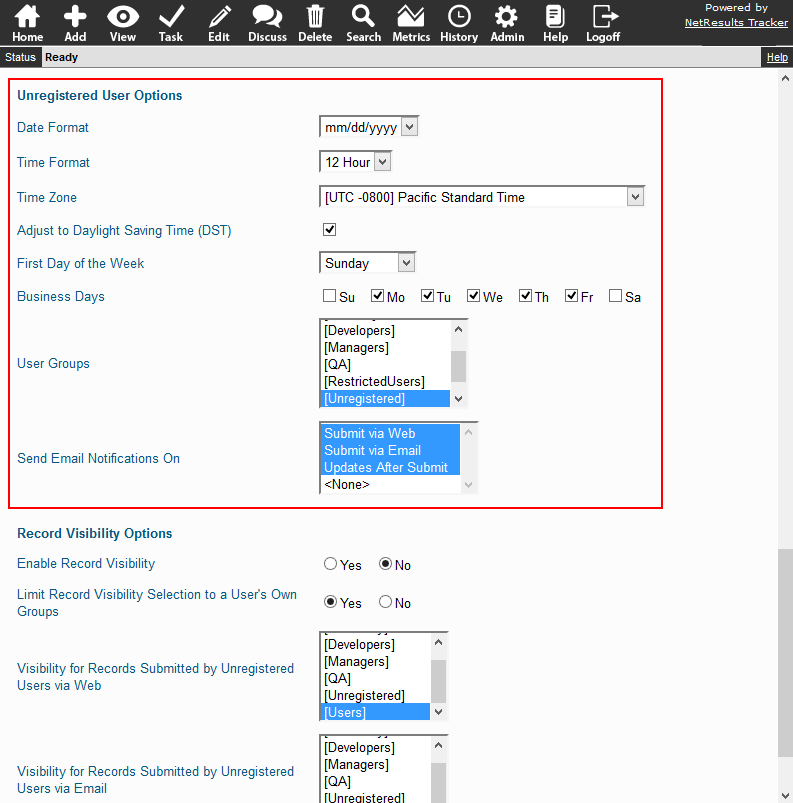
How to configure which users show up in the Assigned To list on the Add Page.

Assignee List

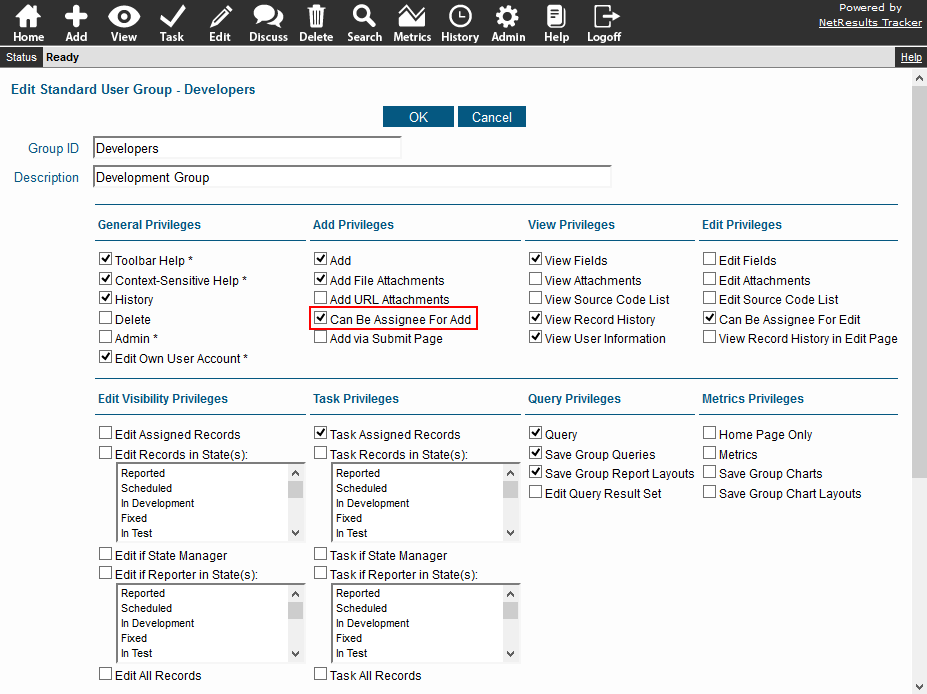
The user group privilege Can Be Assignee for Add determines which users show up in the Assigned To field on the Add Page.

Can Be Assignee On Add

To enable this privilege:

  1. Login as Admin and click on the Admin icon.
  2. Click on the User Accounts link.
  3. Click on the Manage Groups button.
  4. Click on the Edit button to the left of the desired user group.
  5. In Add Privileges section, check the box for Can Be Assignee for Add.
  6. Click OK to save the change.

Check out the Online Help Guide for more information about User Group Privileges.

Add a logo and update the page title and instructions to better match your company and process.

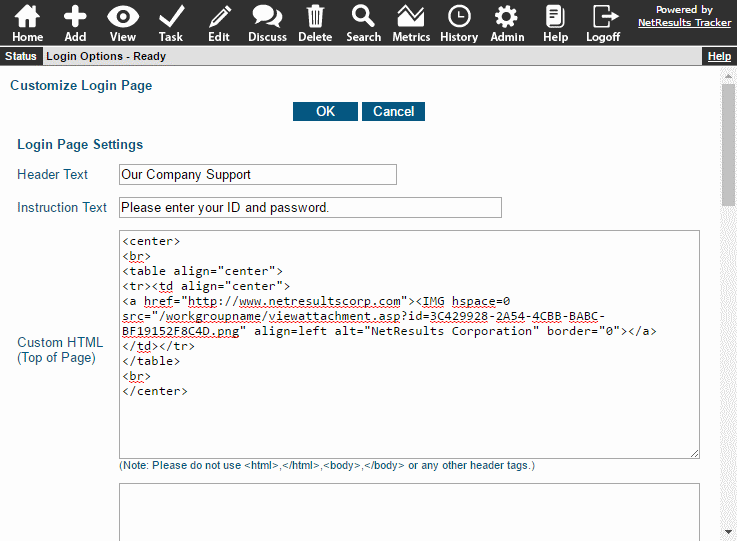
The first page end users see can have your logo and some instructions. You can also customize the Page Title displayed in the browser tab.

Login Page

Login Page Settings

Custom text can also be included on other external facing pages such as the Submit Page and Knowledge Base.

To set the Login Page settings:

  1. Login as Admin and click on the Admin icon.
  2. Click on the Login Options link.
  3. Make the desired changes. The Online Help Guide has more information about the available settings.
  4. Click OK.

Update the hostname used in the link included in email notifications.

Email Link

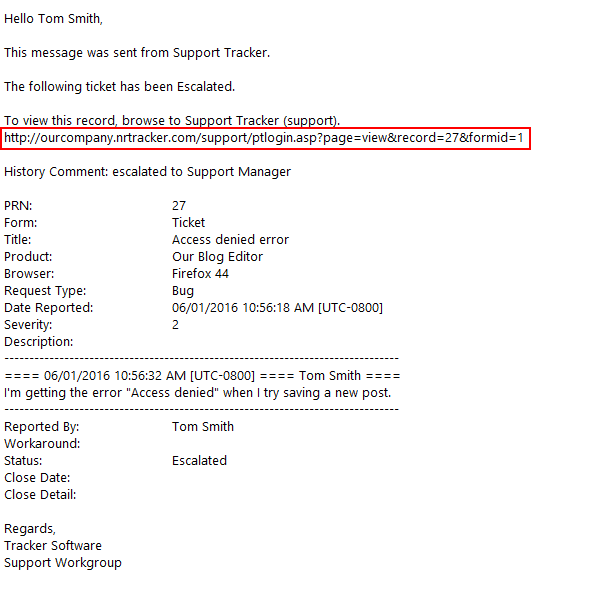
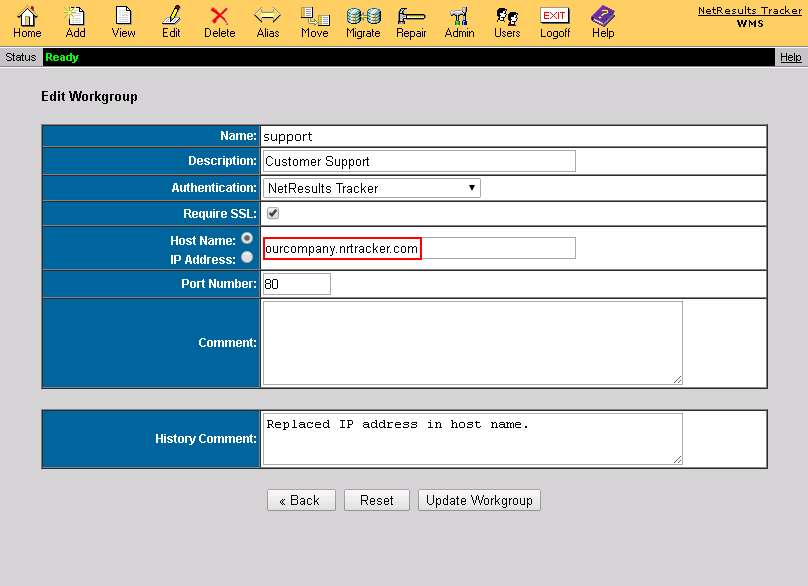
Email notifications can have a link to login to Tracker and view the related record. The link is based on what's set for the Hostname, Port Number and SSL settings in the Workgroup Management System. For example, an IP address is currently listed in the link and you want to use something like "ourcompany.nrtracker.com" instead. To change it, you would replace the IP address in the Hostname property with "ourcompany.nrtracker.com".

Edit Workgroup Settings

To update these settings:

  1. Login to the Workgroup Management System.
  2. Click on the Edit icon to the left of the workgroup.
  3. Make changes to the Hostname, Port Number and SSL settings.
  4. Enter a History Comment and click on the Update Workgroup button.

What you'll need to know if you have a server failure.

The main components of your Tracker installation are:

  • Web Server - this is the server where the Tracker software is installed
  • Database Server - A separate database server is not is use if you are using Access. For SQL Server or Oracle, it may be located on the same server as your web server or it may be remote.

To recover from a server failure, you'll need:

  • backup copies of the databases for the Workgroup Management System & User Management System
  • backup copies of the workgroup databases and their corresponding file attachments

This Knowledge Base article explains where to find these items.

Depending on the specifics of your situation, one of the following articles might be needed to set up your installation on a different server.

Need Help?

Not sure what procedure to use to recover your installation? Contact NetResults Technical Support for assistance.

Let NetResults Host Tracker For You

Want to break free of maintaining your installation? Migrate to the cloud service and let NetResults do the work for you. We have plans that will preserve your existing investment in Tracker licenses. Our Sales department can provide more information.
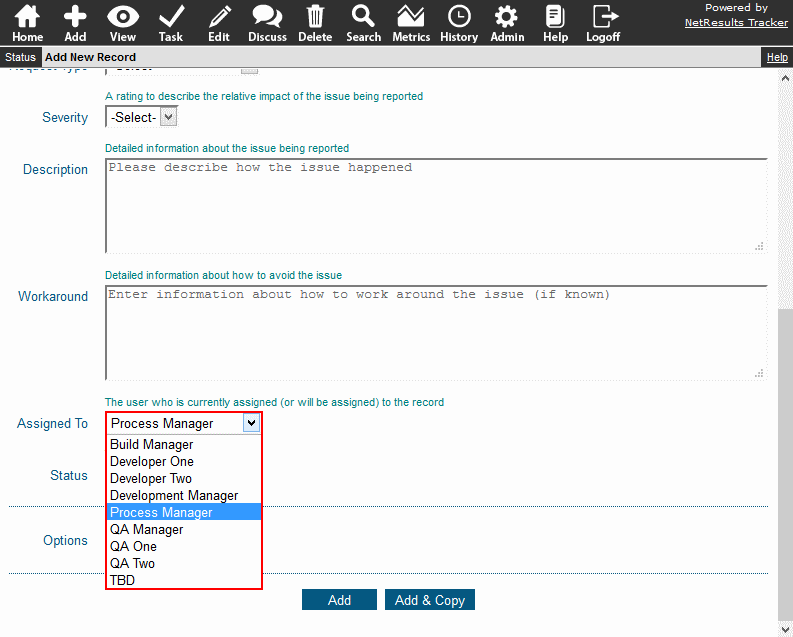
Choose date and time and other options applied to notifications sent to unregistered users.

Unregistered User Options

The date and time options are applied to date information in the email content sent to these users.

User Groups determines which pieces of the email content will be included.

There's also an option to select whether these users will be notified when adding a request and/or actions performed later in the workflow.

This Knowledge Base Article explains how to configure these options.