You can choose to hide specific pulldown option menu items so they do not appear on external pages.

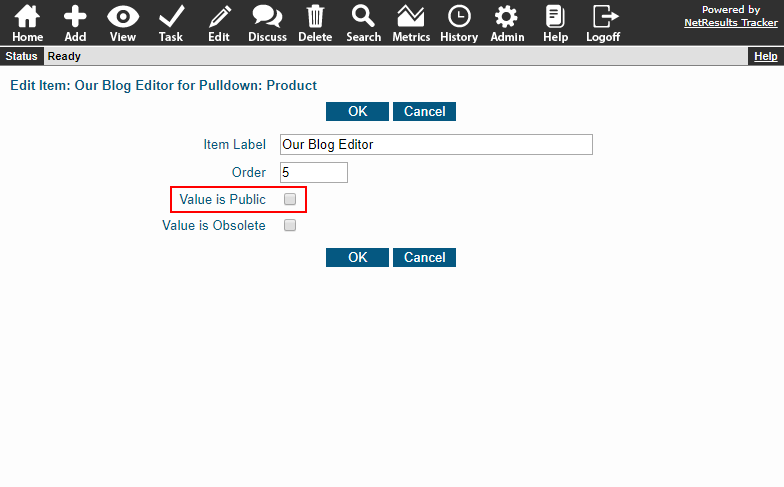
Perhaps you're working on a new product and only want that option to appear inside of Tracker and not on public facing pages (Submit Page, Knowledge Base). This can be done using the Value is Public option available for a pulldown menu item.

Value is Public Option

To hide a pulldown option menu item from external pages:

  1. Login as Admin and click on the Admin icon.
  2. Click on the Fields link.
  3. Click on the Edit button to the left of the field.
  4. Click on the Edit button to the left of the option you want to hide.
  5. UNcheck the box for the option Value is Public.
  6. Click OK to save the change.

Find out the requirements for accessing the Workgroup Management System (WMS).

When you attempt to login to WMS, you might be prompted with a pop-up requesting credentials.

Prompt for Credentials

You should enter the credentials for a Windows user that is local to the server where Tracker is installed and has Administrator rights. The optimal user is the local "Administrator" account. A user with Domain Admin rights is not sufficient. This is a Windows requirement (not a Tracker requirement) because operations available in WMS make changes to the registry, file permissions and IIS settings. You may still be able to login as a user that does not meet the criteria above, but you may get errors like permission denied when trying to use WMS operations.

More information about logging into WMS is available in this Knowledge Base article.

Add a user that was previously deleted.

To restore a user:

  1. Login as Admin and click on the Admin icon.
  2. Click on the User Accounts link.
  3. Click on the Add User button.
  4. Click on the Add Existing Users link in the upper right corner.
  5. Users available to be restored will be listed. Click on the user, select any user groups to which you want to add the user, then click on the Add button.
  6. Click OK to confirm that you want to restore the user.

Existing Users

User Not Available to Restore

In on-premises installations, the user may not be available on the Existing Users list due to the User Management System configuration for deleting user accounts. If the Delete User option is checked, that indicates that a user will also be deleted from UMS when it is deleted from the User Accounts section of a workgroup. Uncheck this option if you want users deleted from a workgroup to remain in UMS.

UMS Options

Update your workflow to cover a user out on vacation or leave.

If you use State Managers for automatic assignment, you can easily substitute a different user when needed.

State Managers

To replace a user:

  1. Login as Admin and click on the Admin icon.
  2. Click on the Projects link.
  3. In the pulldown at the top, select the desired project. The page will be updated to display its properties.
  4. In the Forms section, locate the desired form, then click on the Manage link to the right of State Managers.
  5. Locate the user to be changed, select the replacement and click OK to save.

Any workflow configuration, email rules or alerts that reference <State Manager> will automatically go to the appropriate user without any further changes.

Re-Assign Records

If you also need to re-assign records to the replacement, this blog post explains how.

Invite other users or groups to a conversation related to a record. Perhaps you have a subtle issue that needs input from several departments. Or, you have a document or specification that needs to be reviewed. A discussion thread allows those cases to be handled at the time most convenient to each user involved.

Discussion Thread

Start One on a New Record

A discussion thread can be created when adding a new record by checking the Start Discussion box at the bottom of the form.

Start Thread on Add Page

Start One Later

You can start a discussion thread at any time:

  1. Click on the Discussion icon
  2. Enter the record number and click Go.
  3. Enter a Subject, Message and select users and/or user groups to participate. Or, if any other discussion threads exist for the record, you'll see a thread list. Click on the Start New Thread button.
  4. Click OK to save the new thread. Users and groups you selected will receive an email invitation with a link to see the new thread.

Start a New Thread

The Online Help Guide has everything you need to know about Discussions.