Find records where a value has not been entered into a field.

Perhaps you'd like to see action items that don't yet have a deadline or other key information. You can search for empty Date, Text, TextArea or Url fields using an advanced query.

Advanced Query Criteria

The Online Help Guide provides steps for adding an advanced query.

Use features available for different field types to customize your Add Page.
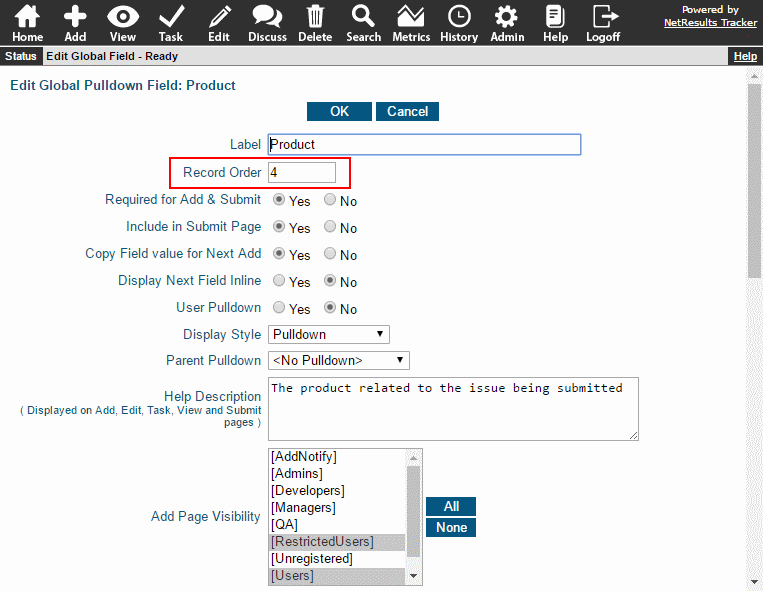
Set Field Order

You can control the order of the fields using the Order property:

  1. Login as Admin and click on the Admin icon.
  2. Click on the Fields link.
  3. Click on the Edit button to the left of the field you wish to modify.
  4. Set the order relative to other fields. Fields with the same order value will be displayed in alphabetical order.
  5. Click OK to save the change.

Order Property

Use Different Display Styles

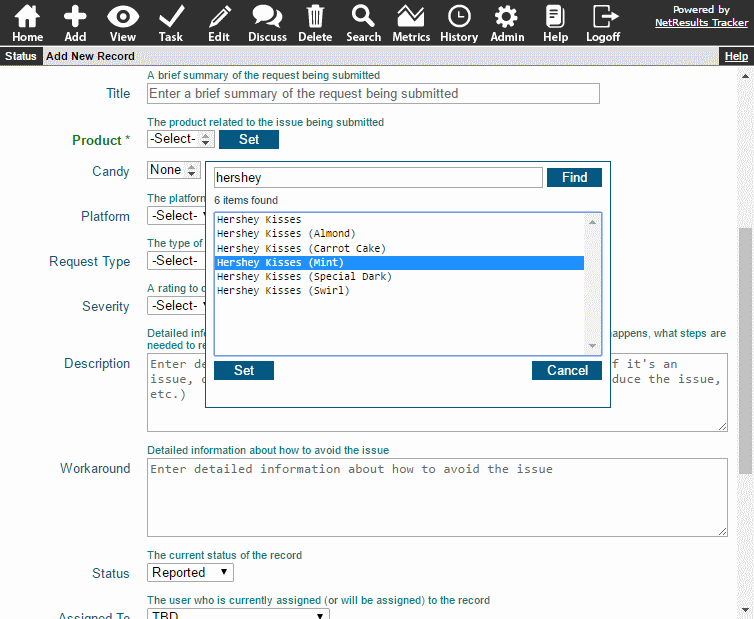
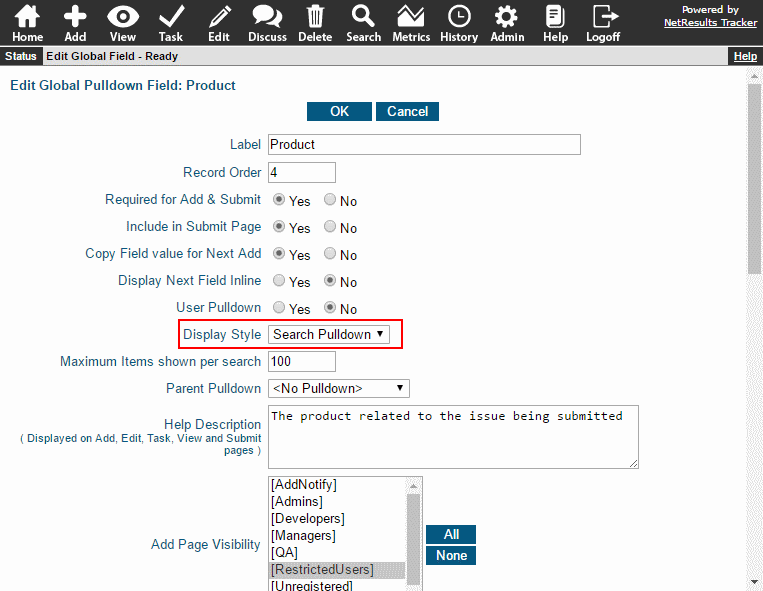
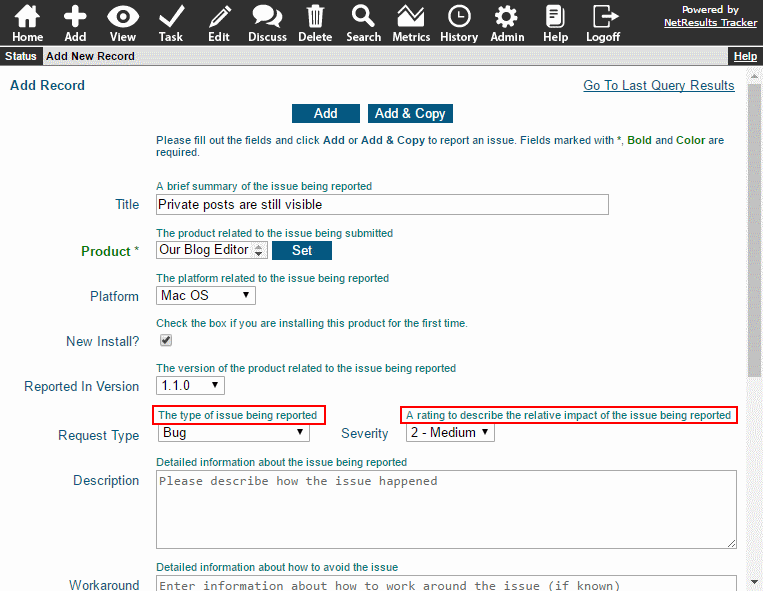
Pulldown and YesNo fields have different styles available.

Pulldowns can be displayed as a standard Pulldown, Radio or Vertical Radio. There is also a "Search" style that allows a key word search to be used to locate menu items quickly when there are a large number of values.

Search Pulldown

YesNo fields can be displayed as a standard Pulldown or Checkbox.

Checkbox

To set the Display Style property:

  1. Login as Admin and click on the Admin icon.
  2. Click on the Fields link.
  3. Click on the Edit button to the left of the field.
  4. Change Display Style and click OK to save it.

Pulldown Display Style

Field Help

Provide information about how to use each field by providing a Help Description.

Field Help

  1. Login as Admin and click on the Admin icon.
  2. Click on the Fields link.
  3. Click on the Edit button to the left of the field.
  4. Enter text into the Help Description and click OK to save it. Tags can be used to format the text in bold, italics or different sizes.
  5. Click OK to save the changes.

Show Different Fields Based on User Group

The Add Page can be set up such that specific fields can be shown/hidden based on user group. For example, you may want to keep the form simple for end users by having them fill out only a handful of fields. Show additional fields to internal users to gather more information when they add records. This is done using the Field Visibility option explained in this blog post.

Comparing Views for 2 User Groups

End a user's session after a specific length of inactivity via the session timeout.

By default, Tracker is set to end a user's session after 12 hours of inactivity. On-premises installations using Floating licenses benefit from this action because floating users are not blocked from accessing the system if a user forgets to click Logoff when done with his/her session. This Knowledge Base article explains how the session timeout can be shortened in on-premises installations.

Techniques for prioritizing change requests and collecting data that can be used to monitor performance.

Approval Step

Approval Step

Configure a step for requests to be reviewed to decide which ones will be implemented. The Change Management template available in Tracker has an approval step where a request is assigned to a group. There are other ways to set up this step. For example, requests can be routed to a specific approver by department, product or request type.

See detailed steps in this Knowledge Base article.

Track Time Spent

Total Time

Track the amount of time spent implementing a change, then run reports to dissect the data. Check out this blog post for details.

Analyze Performance

Performance Report

Set up a User Pulldown field to capture who approved or implemented each change. This allows you to generate performance metrics. This blog post explains how to set this up.

Experiment on a new process or try the latest version of Tracker before you upgrade.

Request a Personal Live Trial to explore without impacting your production environment. It's a free, full-featured 30-day trial.

Need Help?

NetResults Technical Support can help you get started on a new project or process.