Adding another process or project to Tracker is easy, allowing you to incorporate additional procedures or organizations into your system.

Project Hierarchy

Tracker supports an unlimited number of projects. When creating a project, you can configure which user groups are allowed to access the project as well as the privileges available (e.g. ability to create/modify/query for records). This allows you to keep a project isolated. Or, Link Fields can be used to cross-reference records in different projects.
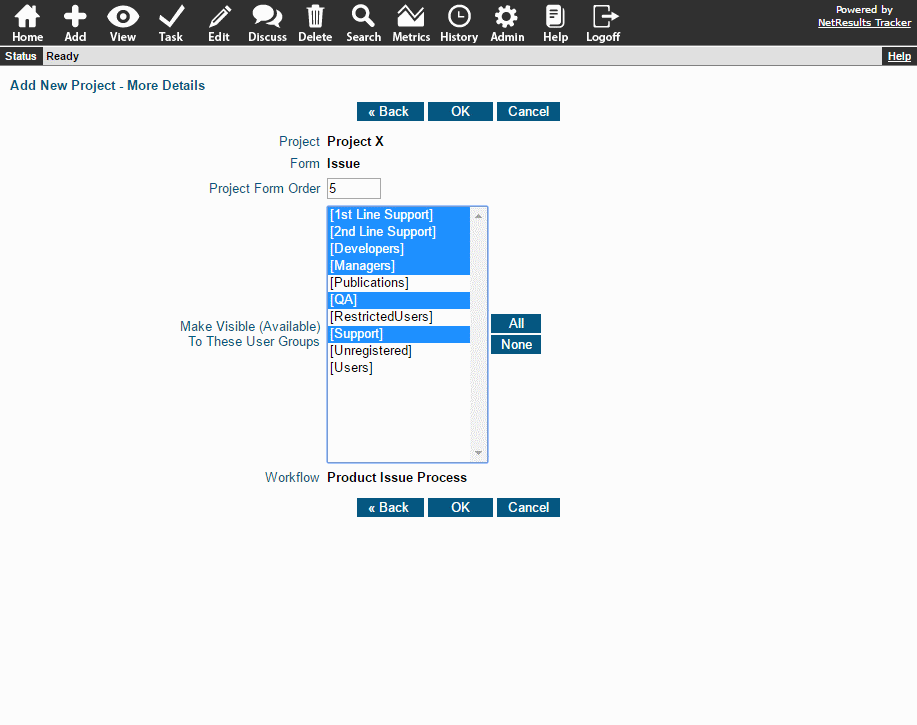
Project Visibility

Forms and Workflows

You can customize the forms and workflows that will be used in each project.
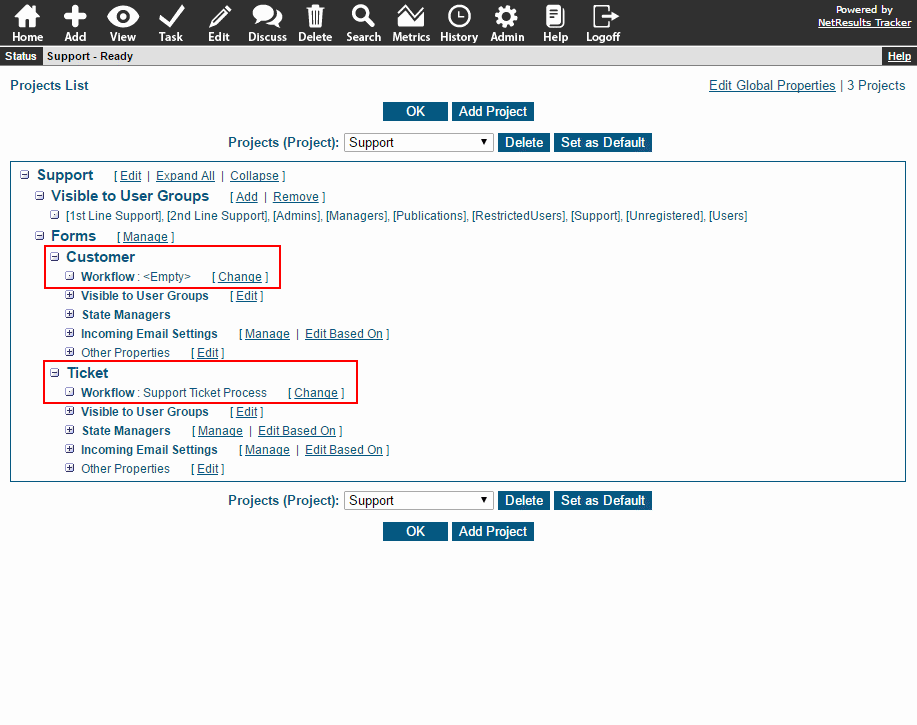
Multiple Forms in a Project

Examples

  • Another department in your company wants to use Tracker for their processes.
  • You're launching a new product that has a team and/or procedures that are independent of existing products.
  • You're using Tracker for a customer-facing process and want to add a Knowledge Base.
  • Your company acquired another one and you need to add some new processes.

How to Add Projects or Processes

The Getting Started Guide available for the cloud service or on-premises installations provides detailed steps for setting up a new project or process. It also provides suggestions for defining a brand new process, if that's needed.

Need Help?

If you need some pointers to getting started or have some questions about your situation, contact Technical Support. Or, you can have our Professional Services team set it up for you.

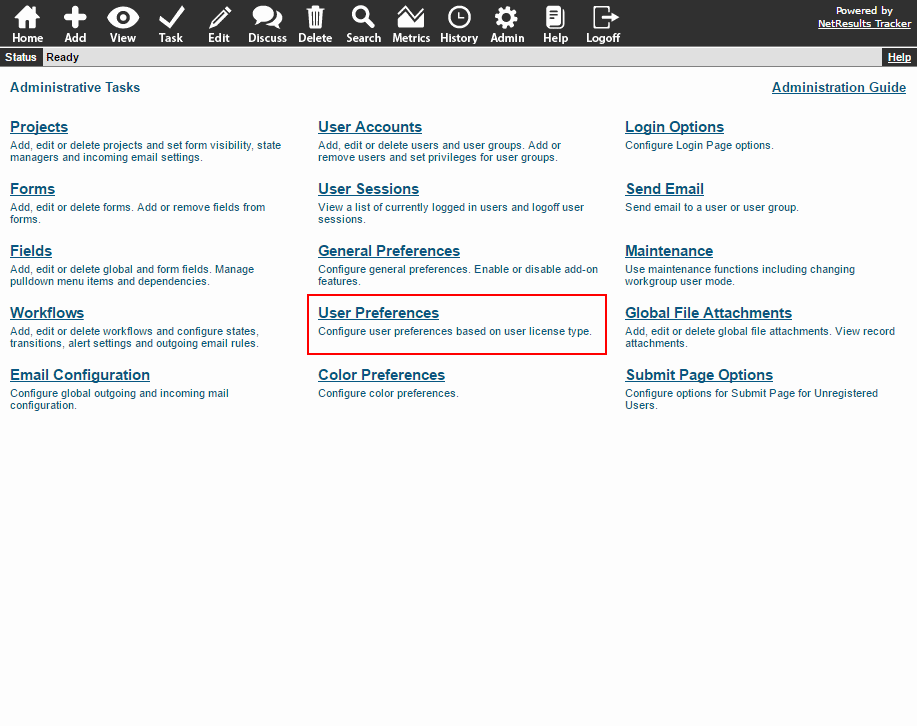
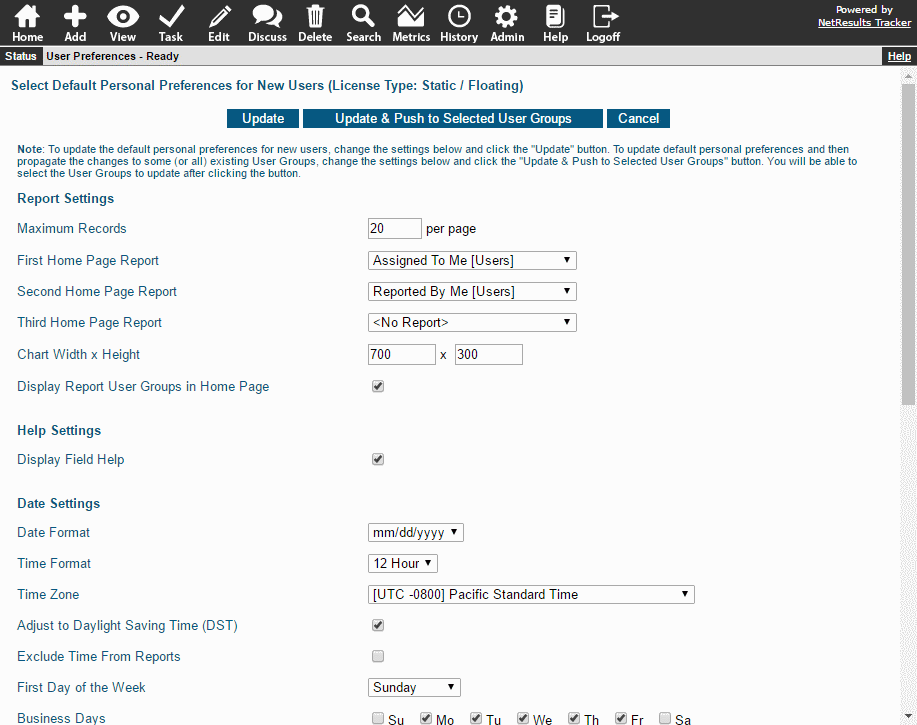
When a new user is added to Tracker, the time zone, date settings and reports applied to their account by default are based on what's set in the User Preferences section of the Admin interface.

User Preferences Link

So if you expect to add a number of users from a particular location or area, you can change the time zone and other related settings.

To Check Settings and Change the Defaults

  1. Login as Admin and click on the Admin icon.
  2. Click on the User Preferences link.
  3. Select the user license type: either "Standard/Floating" or "Restricted" and click Continue.

User Preferences for Standard/Floating Users

Information on making changes can be found in the User Preferences section of the Online Help Guide.

Existing Users Can Change Their Preferences

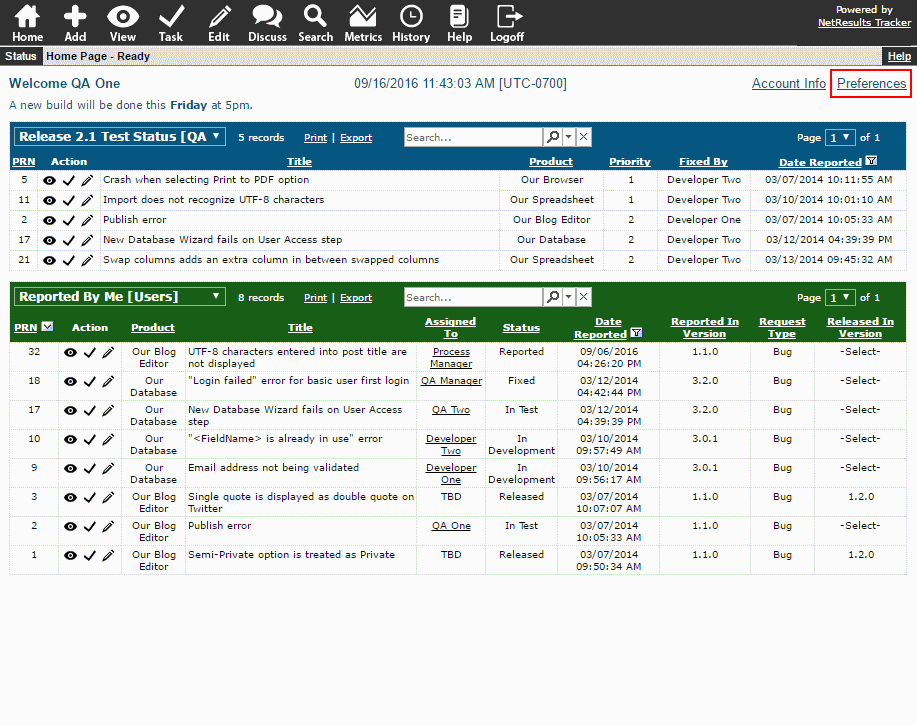
Users that have already been added to the system can change their settings using the Preferences link in the upper right of the Home Page.

Set Personal Preferences

Date fields can be invisible!

Date fields, those magical rascals, can be set with a value without being displayed. Take, for example, Date Reported. Usually this represents the date and time a record was created. It's not typical to change this value to something else. Tracker's templates are configured to set this when a record is created without the field being visible on the Add form.

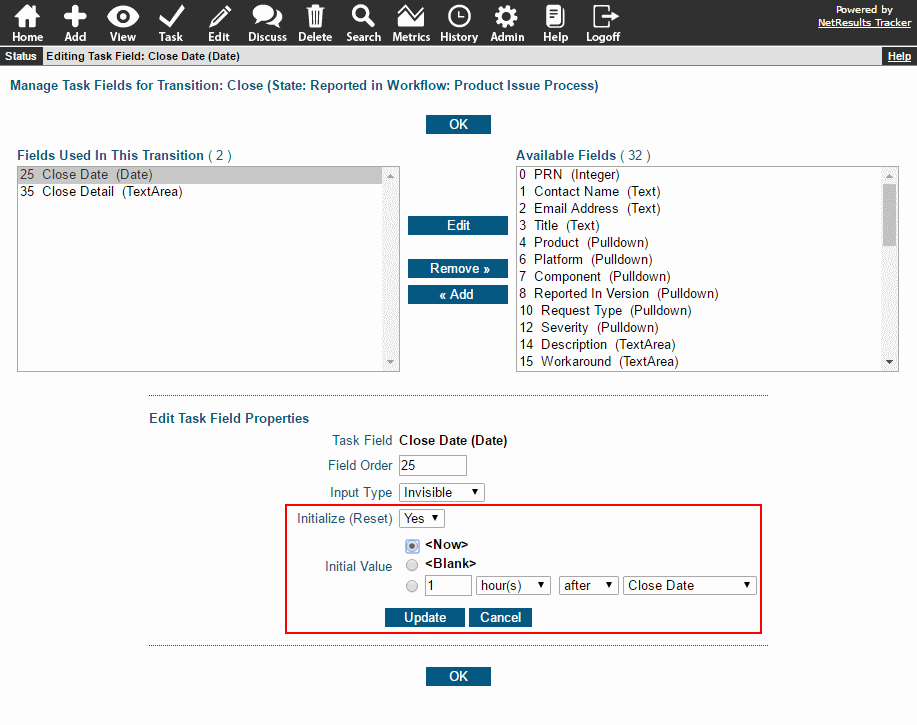
Perhaps you want to capture the date an action happened, such as the date something got approved, fixed or closed. This can be done using the steps for a transition below.

Task Field Properties

To set a Date field without displaying it:

On the Add Page

  1. Login as Admin and click on the Admin icon.
  2. Click on the Fields link.
  3. Click on the Edit button to the left of the date field.
  4. Set the option Initialize on Add to "Yes".
  5. Set the Add Page Visibility option to "None".
  6. Click OK to save the changes.

More information is available in the Fields Types and Properties section of the Online Help Guide.

In a Transition

  1. Login as Admin and click on the Admin icon.
  2. Click on the Workflows link.
  3. Select the desired workflow in the pulldown at the top.
  4. Click on the Manage link next to States.
  5. Click on the desired state and click on Transitions.
  6. Click on the Task Fields button next to the desired transition.
  7. In the right column, click on the date field and click Add.
  8. Set Input Type to "Invisible". This will set Initialize to "Yes".
  9. Set Initial Value as desired.
  10. Click Update to save the changes.

Additional details are available in the Task Field Properties Help Guide section.

On the Submit Page

  1. Login as Admin and click on the Admin icon.
  2. Click on the Fields link.
  3. Click on the Edit button to the left of the date field.
  4. Set the option Initialize on Add to "Yes".
  5. Set the Include in Submit Page option to "No".
  6. Click OK to save the changes.

The Fields Types and Properties section of the Online Help Guide has additional information.

Have a conversation related to a record while it moves through the workflow.

Discussion Thread

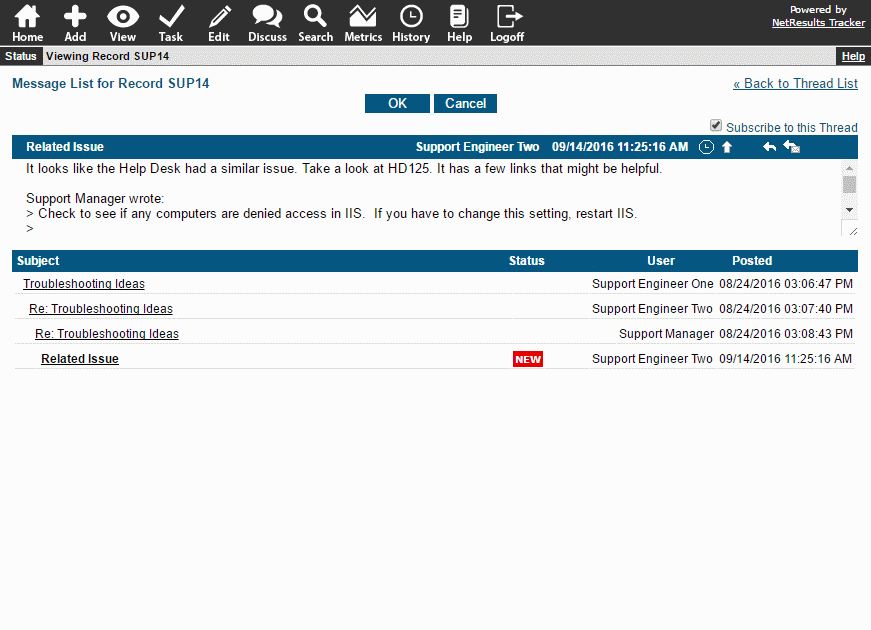
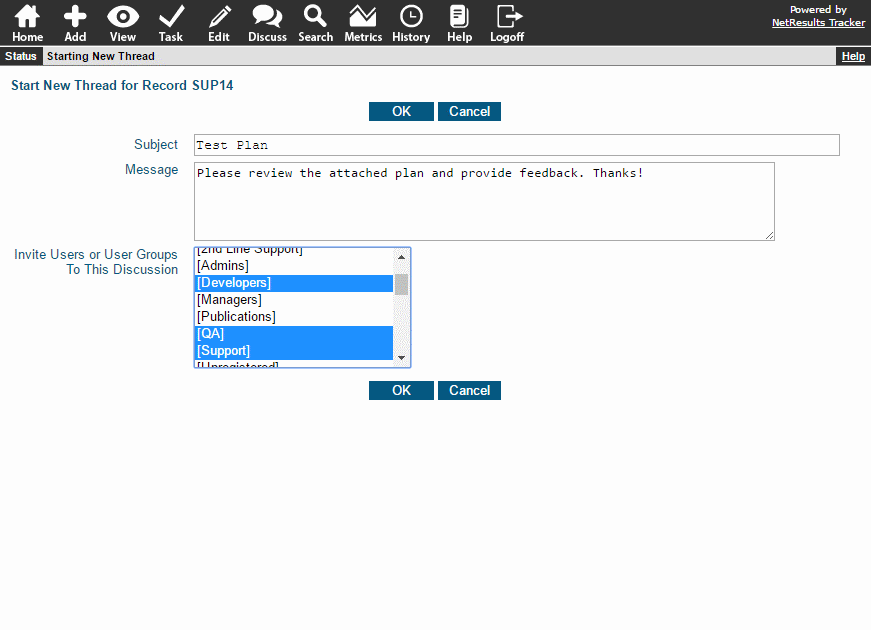
Sometimes an issue related to a record needs to be discussed by various users. For example, a Support or Help Desk Engineer is troubleshooting an issue and needs some more ideas. Or, a prototype, specification or test plan needs some feedback. There's no need to set up a meeting that requires everyone to be at the same place at the same time. Instead, start a discussion thread and invite users and/or groups to participate.

Start a Discussion

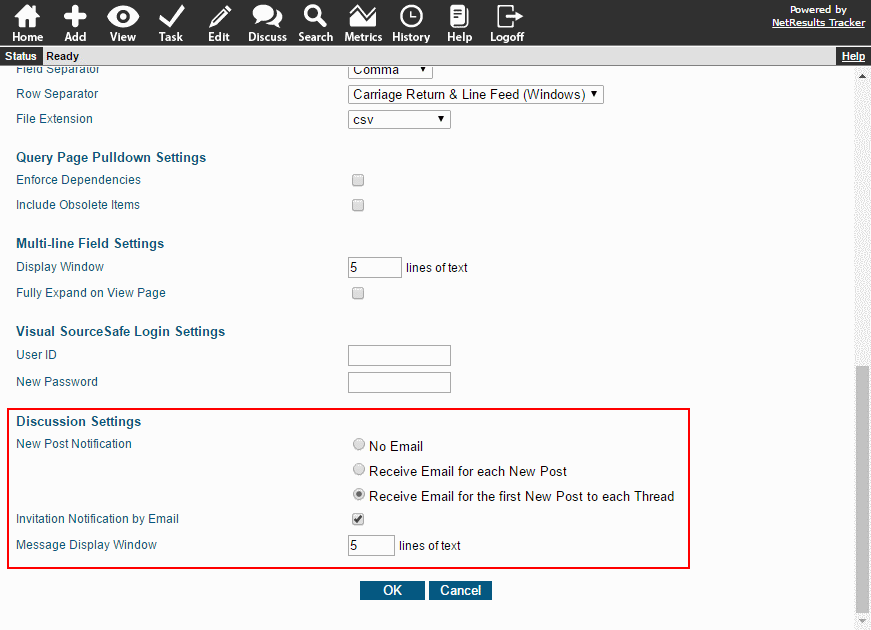
Email notifications will let each user know their input is needed and send updates. Users can choose whether they get notified for each new post or just the first one for each thread.

Discussion Preferences

For more information, check out the Discussion section of the Online Help Guide.

Send a record back to a previous workflow step and automatically assign it to the person who worked on it at that point.

In a QA step or user acceptance testing, a record may need to be sent back for re-work. Tracker has workflow options that will automatically route the record back to the user who worked on it.

Transition Options

Send Back to a State

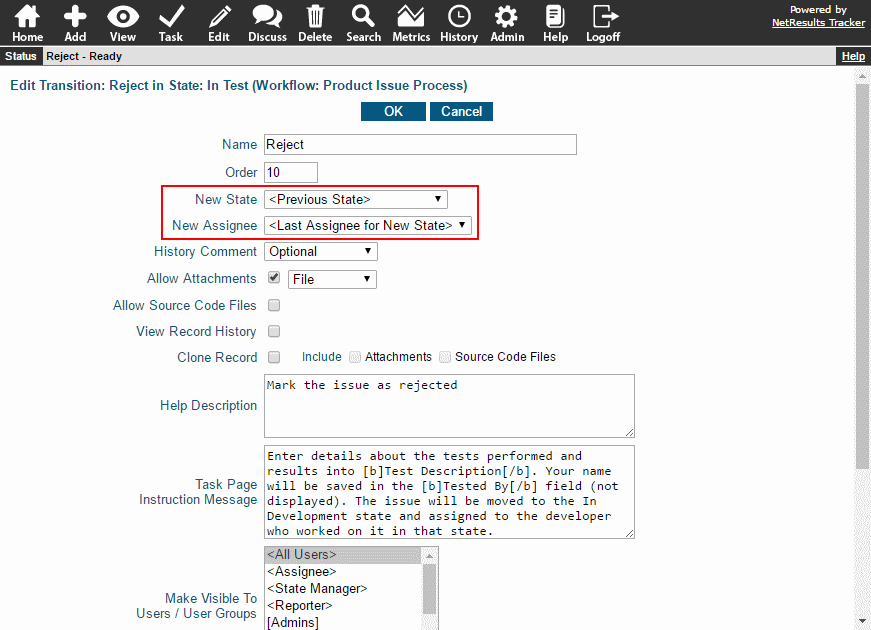
To send a record back to a state, set the transition with the New State option set to "<Previous State>". Tracker will use the record's history to find the appropriate state. Or, you can select a specific state name instead if the state you want isn't the last one.

Send Back to a User

Send a record back to the user who worked on it using the "<Last Assignee for New State>" option in New Assignee. There's also an option called "<Last Assignee for State X>". This is useful in cases where the record will be routed to a state it hasn't previously been through. For example, a fix fails testing and gets sent to a state called "Rejected", but you want to assign it to the user who fixed it while it was "In Development". Select Rejected for New State. Then, for New Assignee, pick "<Last Assignee for State X>" and choose "In Development" for X.

For more detail about workflow routing options, check out the Transition Properties section of the Online Help Guide.