Update your workflow to cover a user out on vacation or leave.

If you use State Managers for automatic assignment, you can easily substitute a different user when needed.

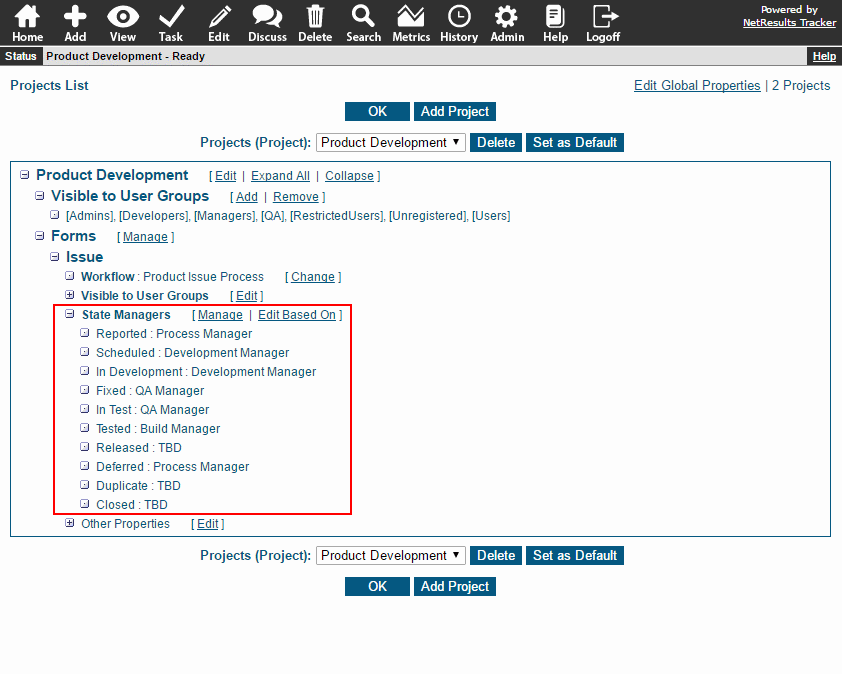
State Managers

To replace a user:

  1. Login as Admin and click on the Admin icon.
  2. Click on the Projects link.
  3. In the pulldown at the top, select the desired project. The page will be updated to display its properties.
  4. In the Forms section, locate the desired form, then click on the Manage link to the right of State Managers.
  5. Locate the user to be changed, select the replacement and click OK to save.

Any workflow configuration, email rules or alerts that reference <State Manager> will automatically go to the appropriate user without any further changes.

Re-Assign Records

If you also need to re-assign records to the replacement, this blog post explains how.

Add a user that was previously deleted.

To restore a user:

  1. Login as Admin and click on the Admin icon.
  2. Click on the User Accounts link.
  3. Click on the Add User button.
  4. Click on the Add Existing Users link in the upper right corner.
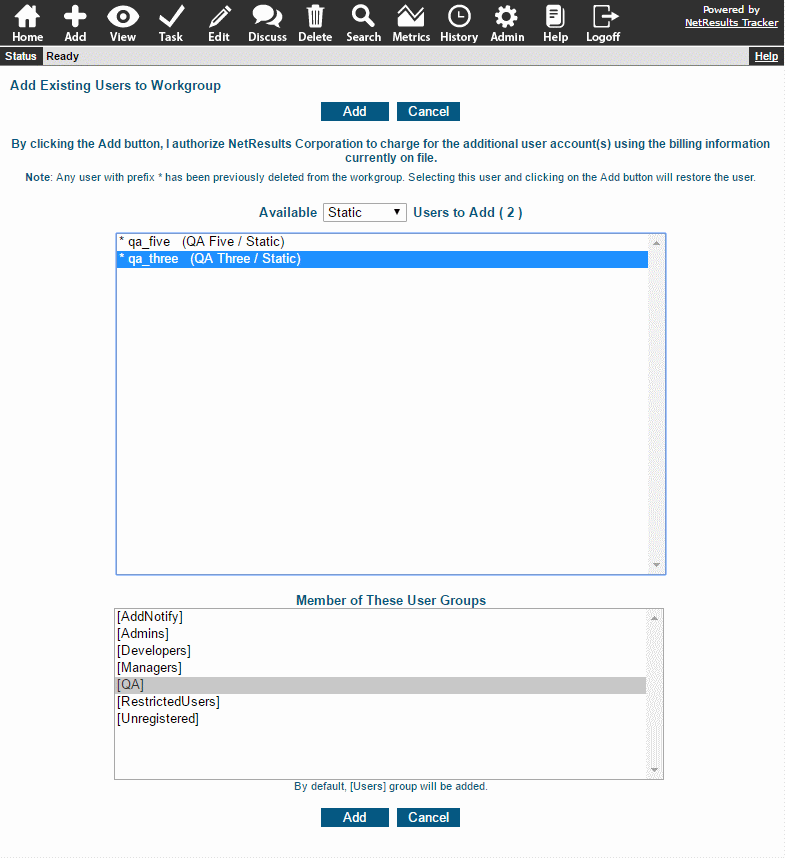
  5. Users available to be restored will be listed. Click on the user, select any user groups to which you want to add the user, then click on the Add button.
  6. Click OK to confirm that you want to restore the user.

Existing Users

User Not Available to Restore

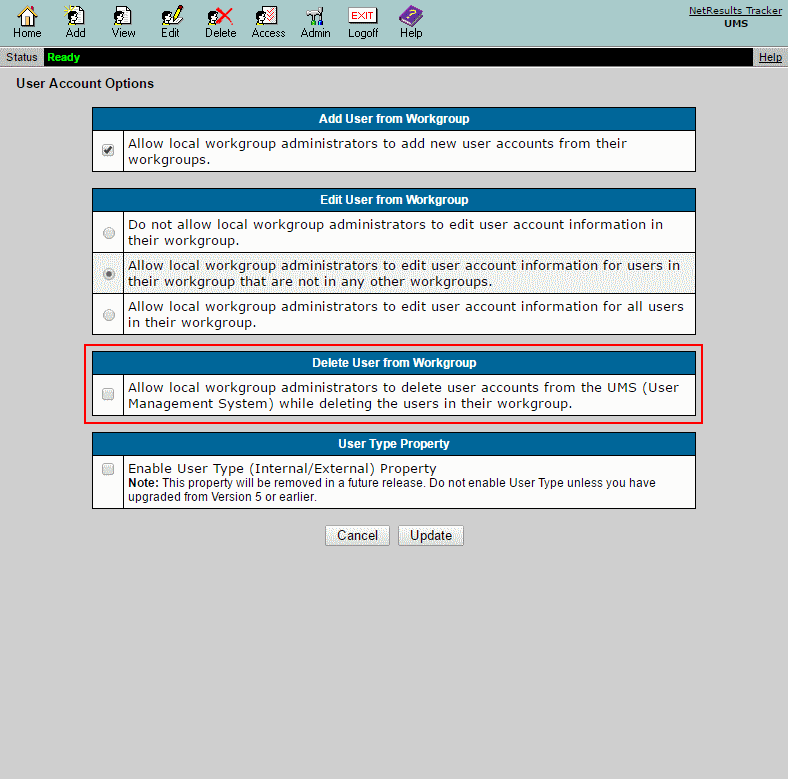
In on-premises installations, the user may not be available on the Existing Users list due to the User Management System configuration for deleting user accounts. If the Delete User option is checked, that indicates that a user will also be deleted from UMS when it is deleted from the User Accounts section of a workgroup. Uncheck this option if you want users deleted from a workgroup to remain in UMS.

UMS Options

Lock a user account to prevent login access.

If a user goes on leave or there is another reason for temporarily disabling a user account, it can be locked by an administrator.

To lock a user account:

  1. Login as Admin and click on the Admin icon.
  2. Click on the User Accounts link.
  3. Click on the Edit button to the left of the user account.
  4. Check the Account Locked option.
  5. Click OK to save the change.

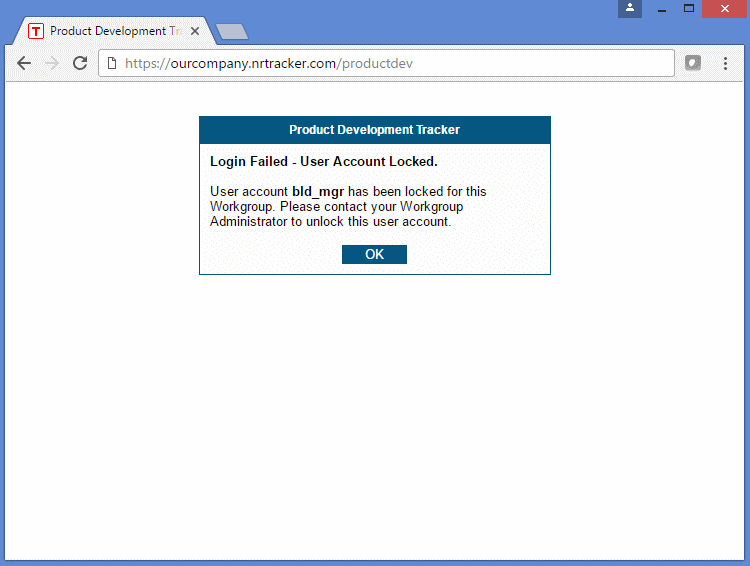
The following message is displayed when a login is attempted on a locked account.

Account Locked

Re-assign records and preserve the old user's actions when replacing a user.

Turnover is inevitable. When a user changes roles or leaves the company, it's best to add the replacement (if needed) before deleting the old user. This makes it easy to assign any active records to the new user while saving the information about actions performed by the old user.

Renaming Isn't Recommended

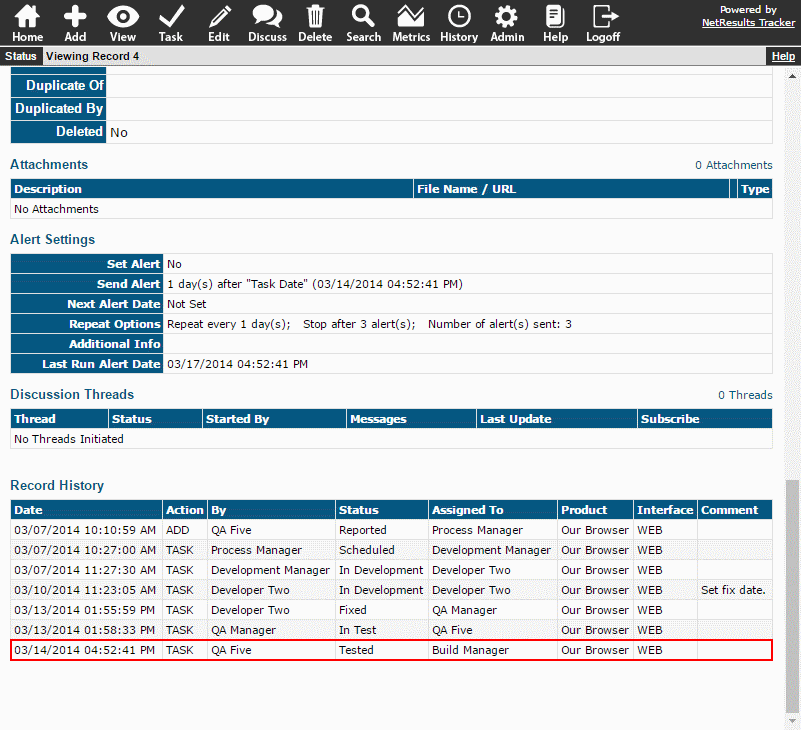
Renaming a user might seem easier, but it will cause confusion. When you rename a user, all of the actions performed by the old user will have the new user's name. So if someone asks the new user why something failed testing two years ago, they won't know the answer.

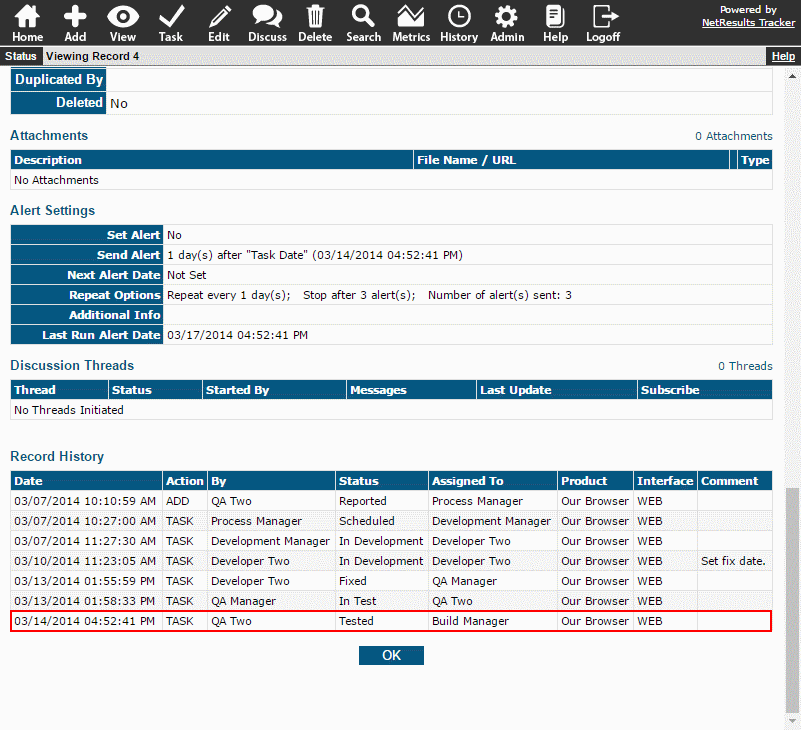
Here's the history of a record QA Two tested.

Before Renaming

Here's the same history after the user QA Two was renamed to be QA Five.

After Renaming

Recommended Method

To replace a user:

  1. Add the new user using the information in the Online Help Guide.
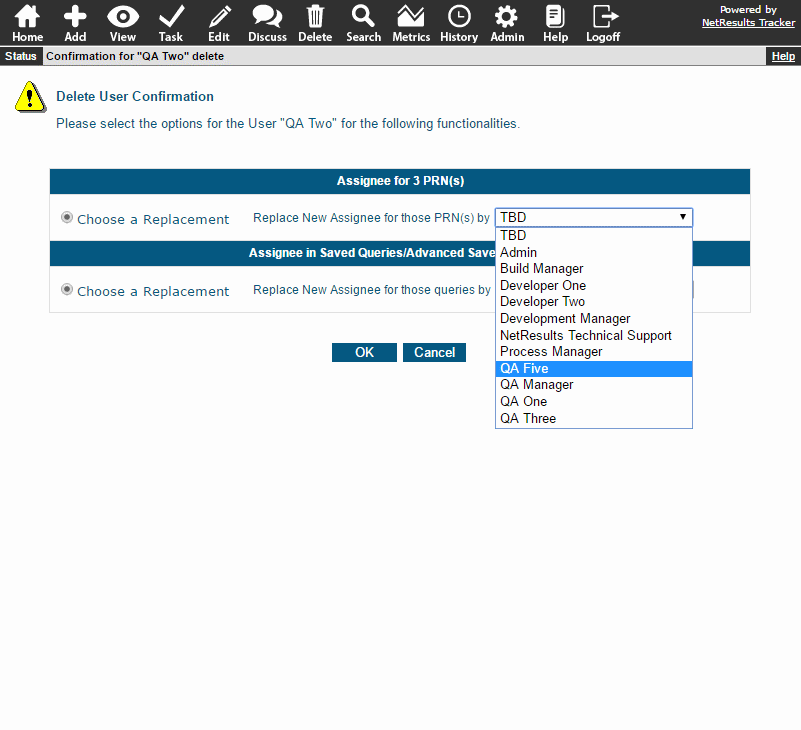
  2. Delete the old user using the steps in this Help section. The system will prompt you to select the replacement user for records assigned to the old user.

Select a Replacement

The history remains intact after deleting the user and selecting a replacement.

Preserved History

Set the options in the interface for managing users to suit your environment.

The on-premises version of Tracker includes access to the User Management System (UMS). You can create, edit or delete user accounts as well as manage their access to different workgroups (databases). Let's take a look at different configurations for the options available in this interface.

Single Workgroup

If you only have one workgroup (database), you can set the options as shown below such that users can be added and deleted from the workgroup so the administrator does not need to login to UMS to perform these actions. For the Delete User From Workgroup section, if you would like a user to also be deleted in UMS when they are deleted in the workgroup, check the box for that option.
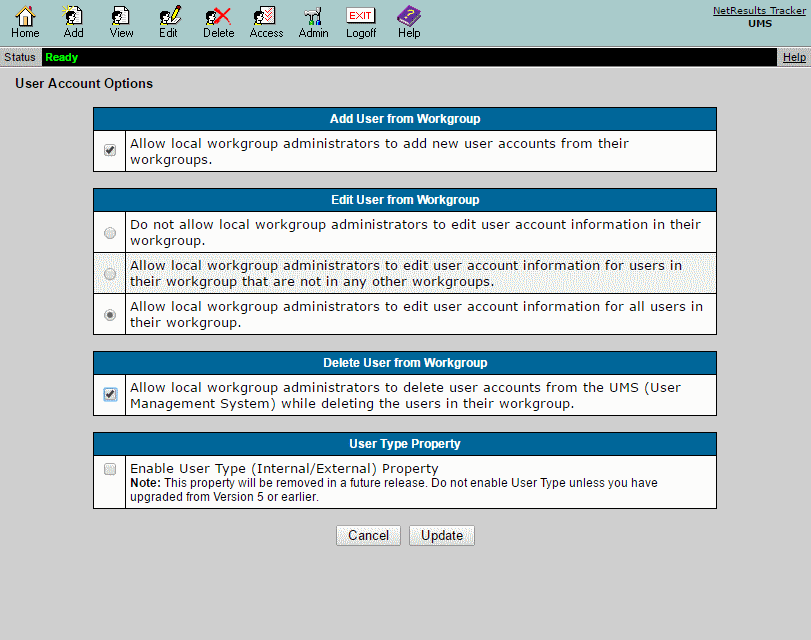
Singe Workgroup Settings

Multiple Workgroups or Multiple Administrators

The following are the recommended settings if you have:

  • more than one workgroup (database) or
  • multiple administrators (one admin handles Tracker upgrades, multiple workgroups with different administrators)

To allow a user to access a workgroup, there are two steps that need to occur:

  1. The user needs to given access to the workgroup
  2. The user needs to be added to the workgroup

If you want to allow the workgroup administrator to add users without having to login to UMS (perform both steps listed above), check the box for the Add User From Workgroup option. Or, you may prefer to restrict the ability to add users to only an administrator with access to UMS by leaving this option unchecked. That way, the UMS administrator can either:

  • perform both steps needed to give the user access to workgroup

or

  • they can just give access to the workgroups. Then, each workgroup admin can add the users to the workgroup (and subsequently give them the appropriate privileges) when they are ready.
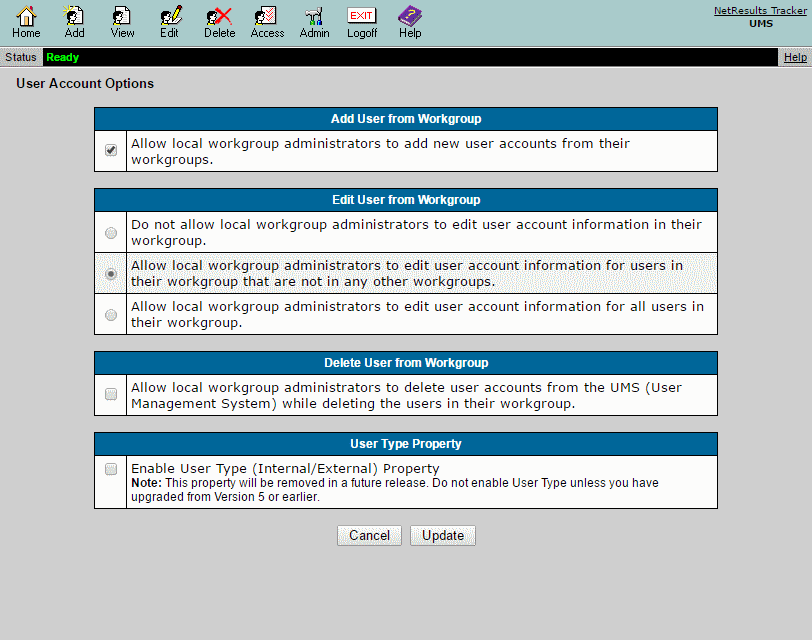
Multiple Workgroup Settings

For more information on these options, please review the User Account Options section of the Online Help Guide.