The Record History remembers everything and will give you the info you want anytime you ask. Learn more about this reliable friend.

It Knows ALL

Any time changes are made to a record, the details are recorded in the audit trail. You can see who made changes, when the changes were made and other pieces of information as they were at that time, such as, who was assigned to the record and its status.
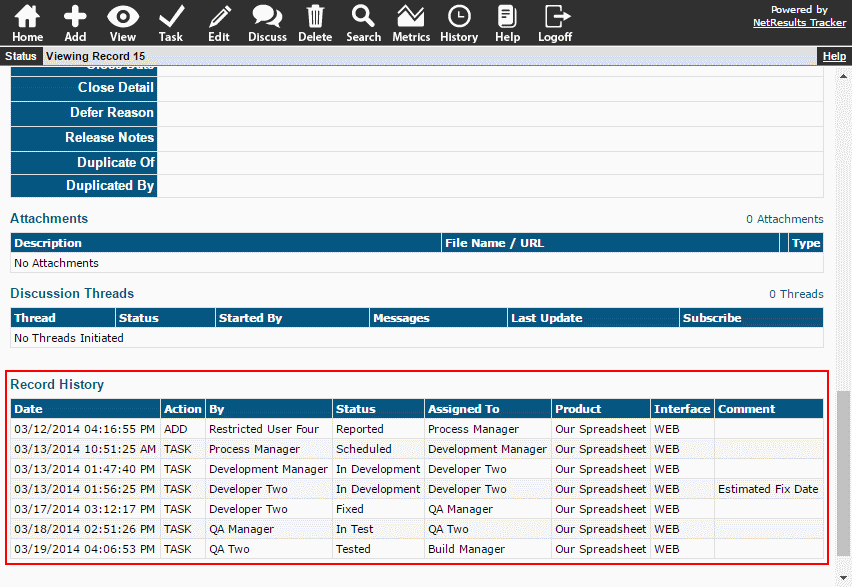
Record History

It Shares Information

Want to know what was changed in the system last week? Run a history search by clicking on the History icon at the top.

You can even search by keyword in the Comments field that can be updated when records are modified via Edit, Task and some Admin operations.
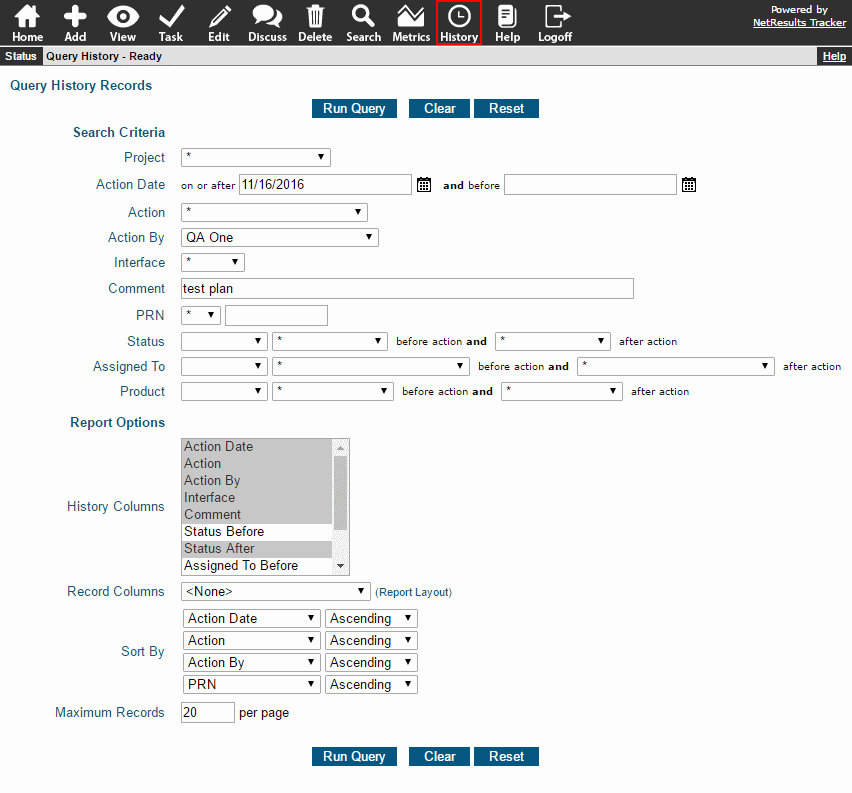
History Search

It Can Be Hidden

Access to the record history and the search function are tied to user group privileges so that you can keep this valuable wealth of information safe from unauthorized users.

The History privilege provides access to the search feature.

A View Record History privilege is available for showing the audit trail on the View and Edit pages.
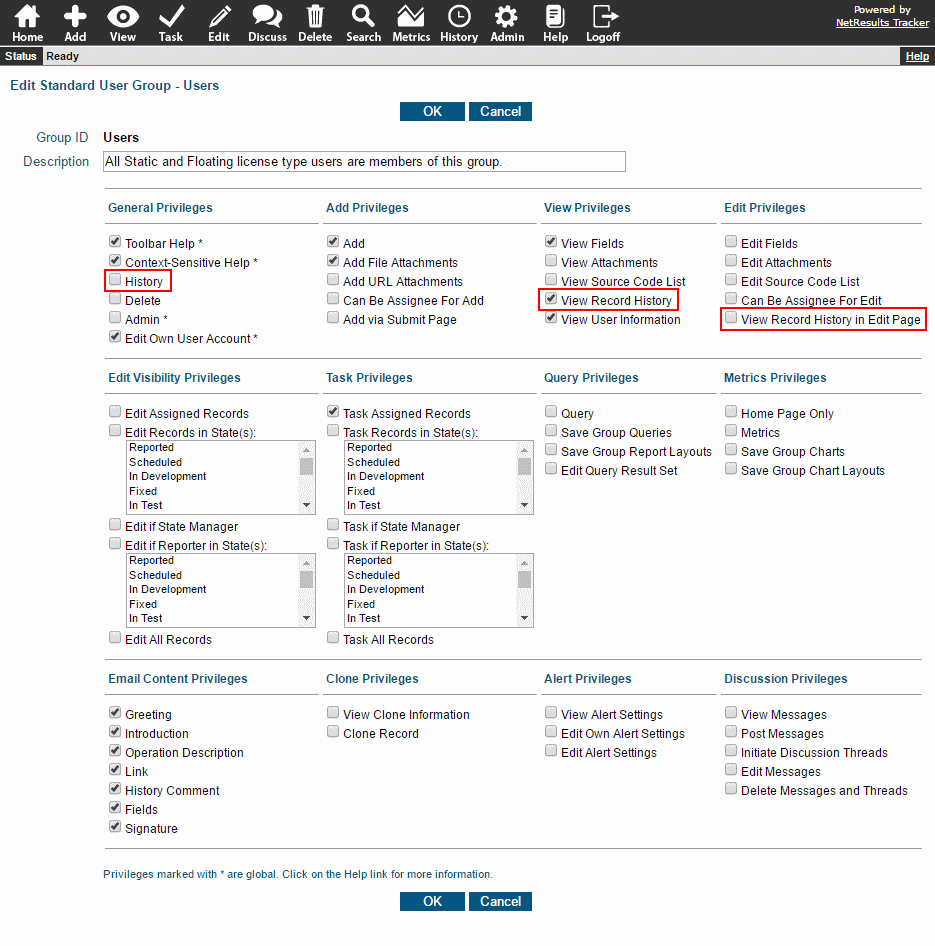
History Privileges

The history can be displayed during the Task operation via an option available when creating a transition.
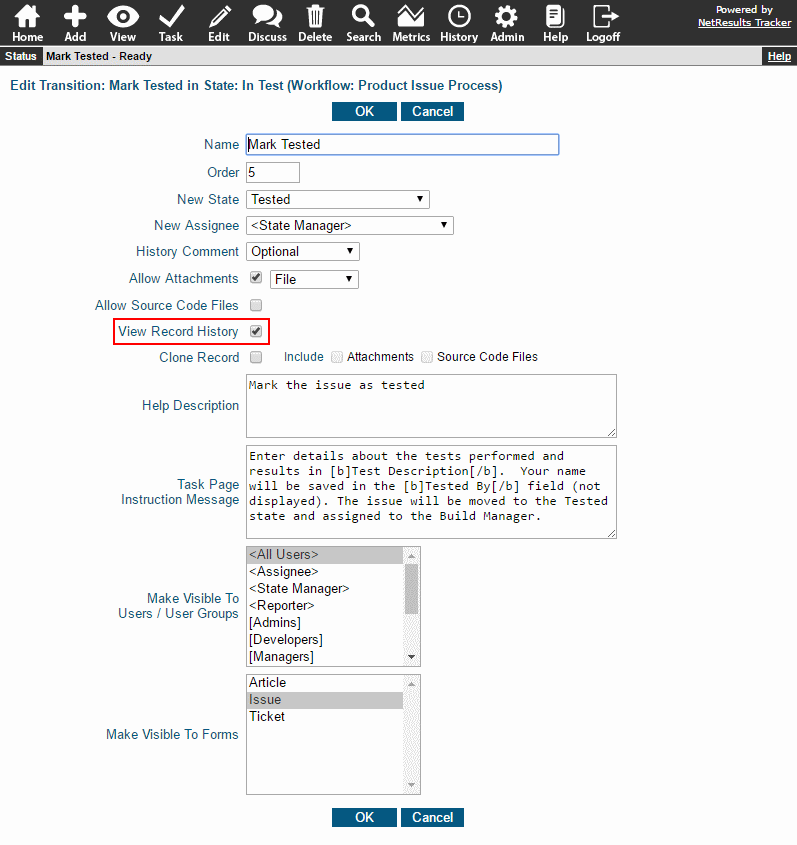
History Option in a Transition

For more information, check out the Record History section of the Online Help Guide.

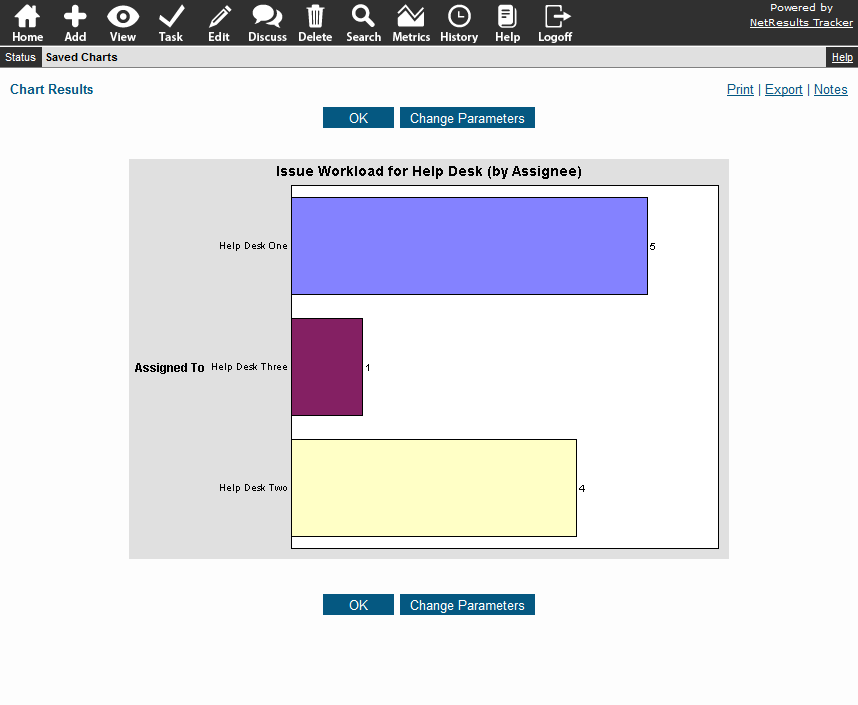
See a breakdown of items assigned to each team member with a workload chart.

Workload Chart

Add this report to your Home Page to easily access this information at any time.

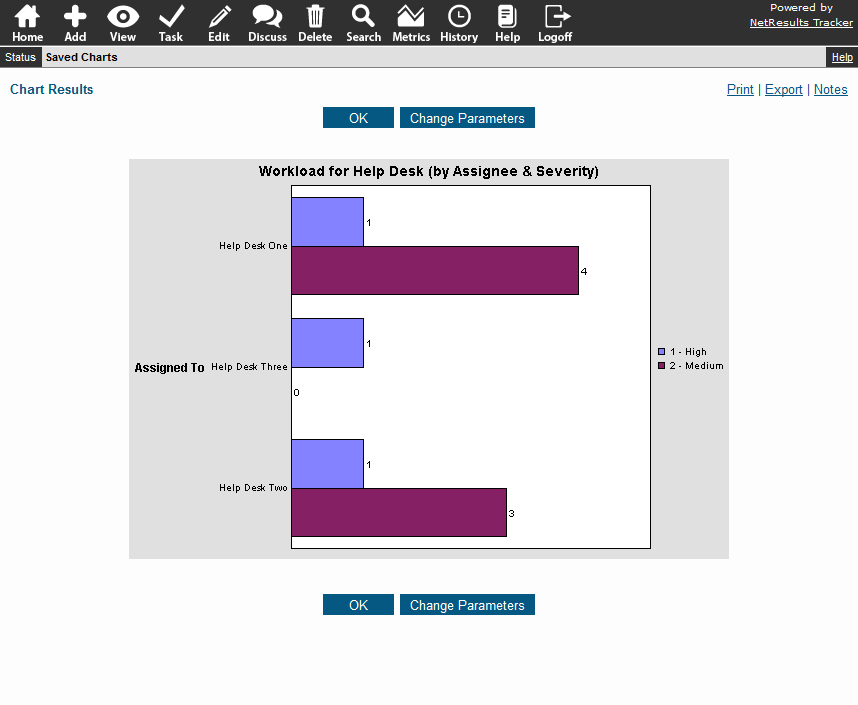
You can also breakdown the data down further as we did to show Severity in this chart.

Workload Chart with Severity Breakdown

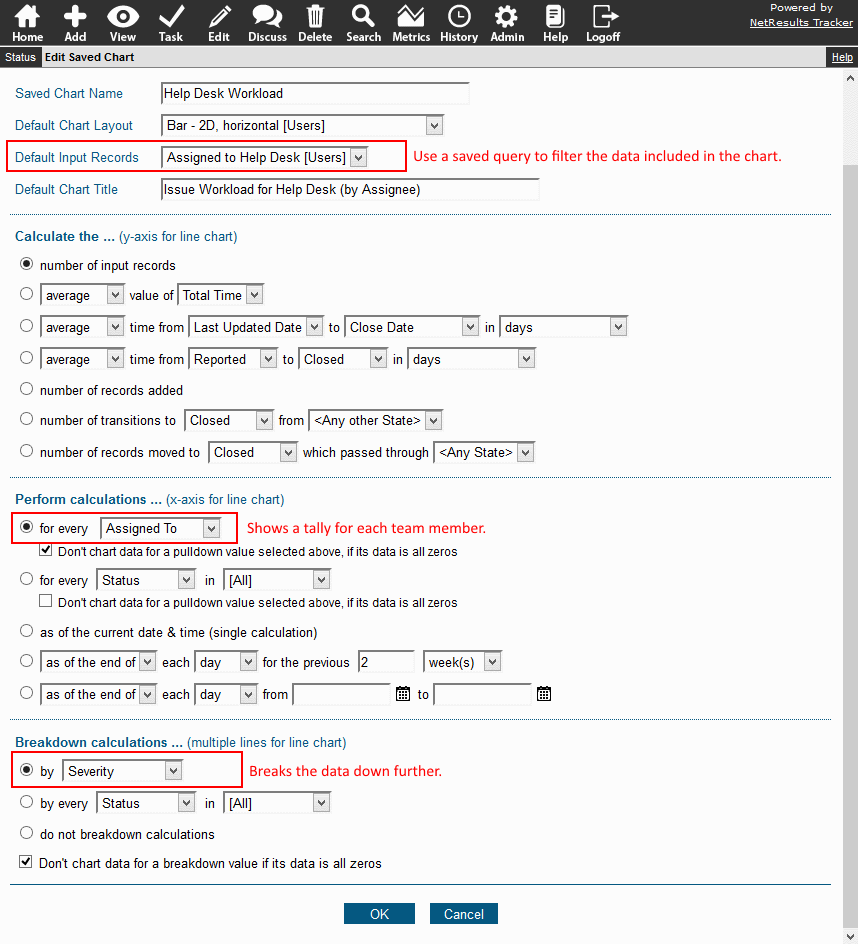
Take a peek at the settings we used to make this chart.

Workload Chart Settings

Steps for adding a chart can be found in the Metrics section of the Online Help Guide.
To add the report to the Home Page:

  1. Login to Tracker.
  2. Click on the Preferences link in the upper right corner.
  3. Select the chart for one of the Home Page Report options.
  4. Click OK to save the change.

Make changes to the subject, body and other parts of Tracker email notifications.

You can customize the emails generated by actions in Tracker to include custom wording, field data from the record being referenced and more.

Subject

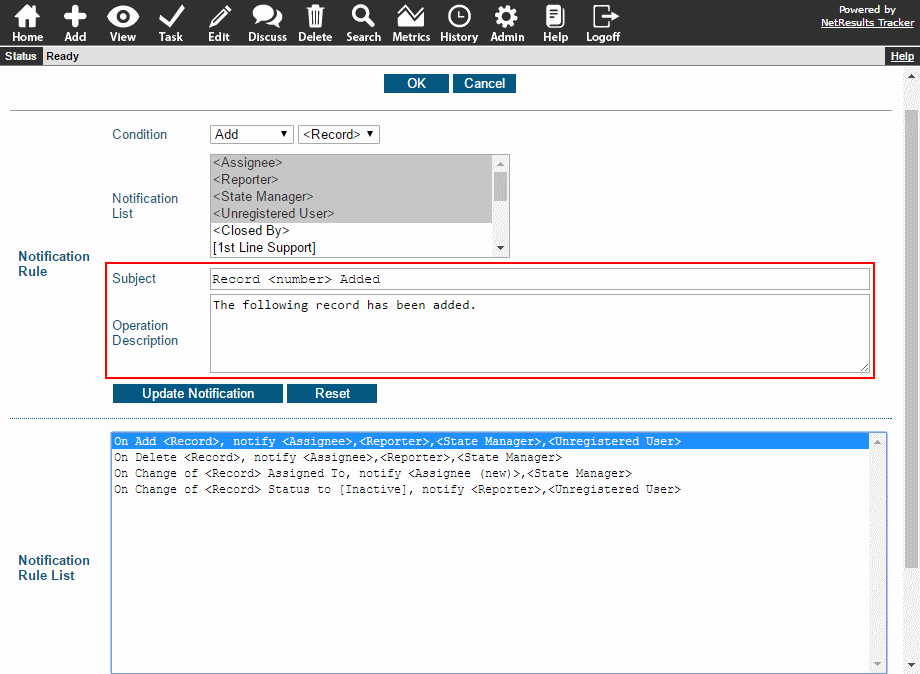
Modify the Subject in the email rule.

Email Rule

Body

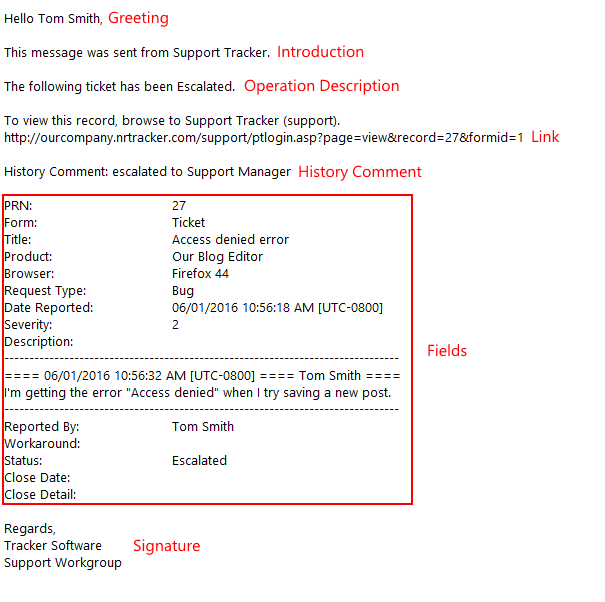
Here's a sample of the body of the email with the parts labeled.

Email Message Components

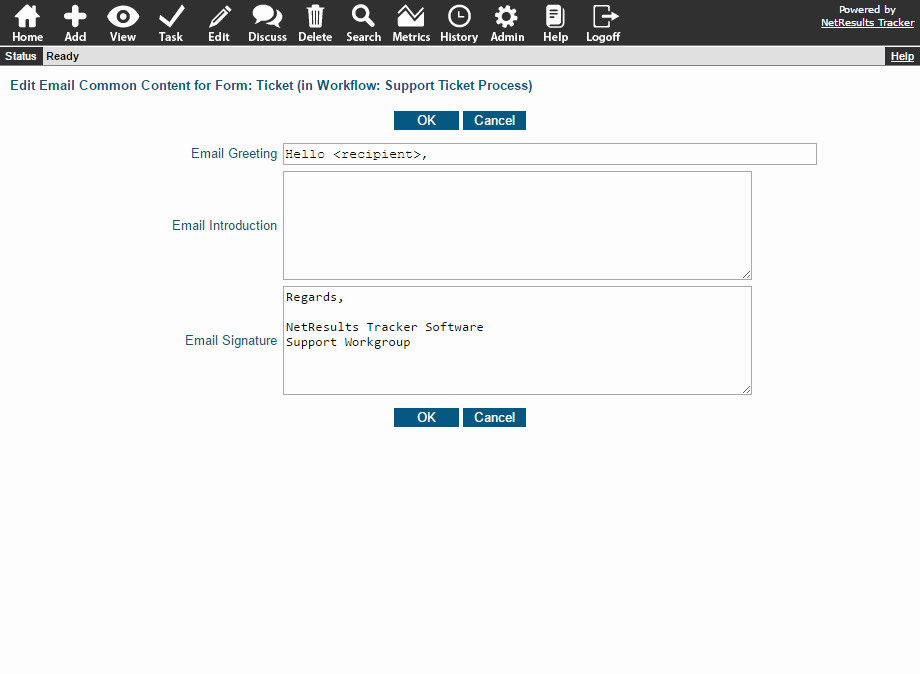
The Greeting & Introduction start it off. These are updated in the Email Common Content section.

Email Common Content

Then comes the Operation Description, which is configured in the email rule.

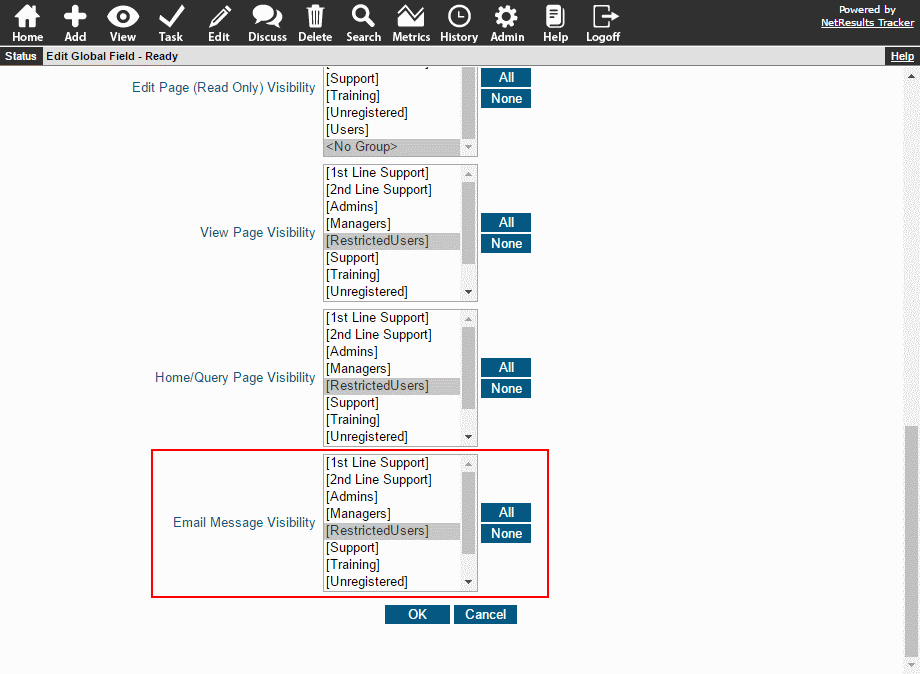
Any fields configured to be included in the body will follow the Operation Description. Whether a field is included is based on the user groups selected in the Email Visibility property explained in this blog post.

Email Visibility

The Signature ends the email and is configured in the Email Common Content section.

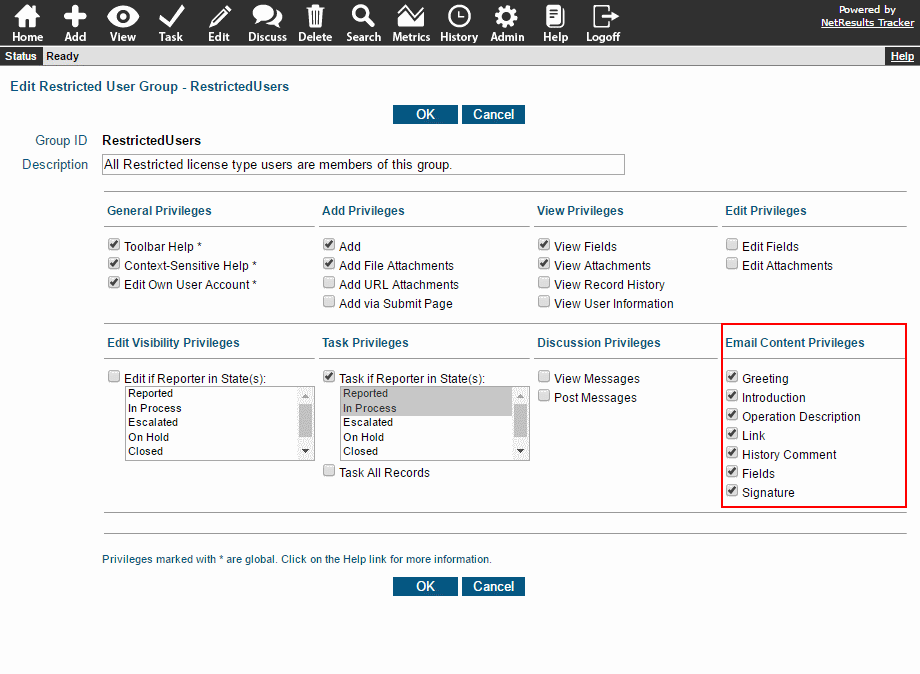
Privileges

You can include or exclude parts of the email by setting user group privileges in the Email Content section. You can include a Link to login and see the record and the History Comment that was entered when the record was processed (if applicable).

Email Privileges

Variables

Variables can be included in the Subject and Body options. For example, you can include the name of the user assigned to the record in the Subject by using <new assignee>. You can also include variables to include the value of a field. For instance, you can list the priority set for the record. The full list of variables is available in the Online Help Guide.
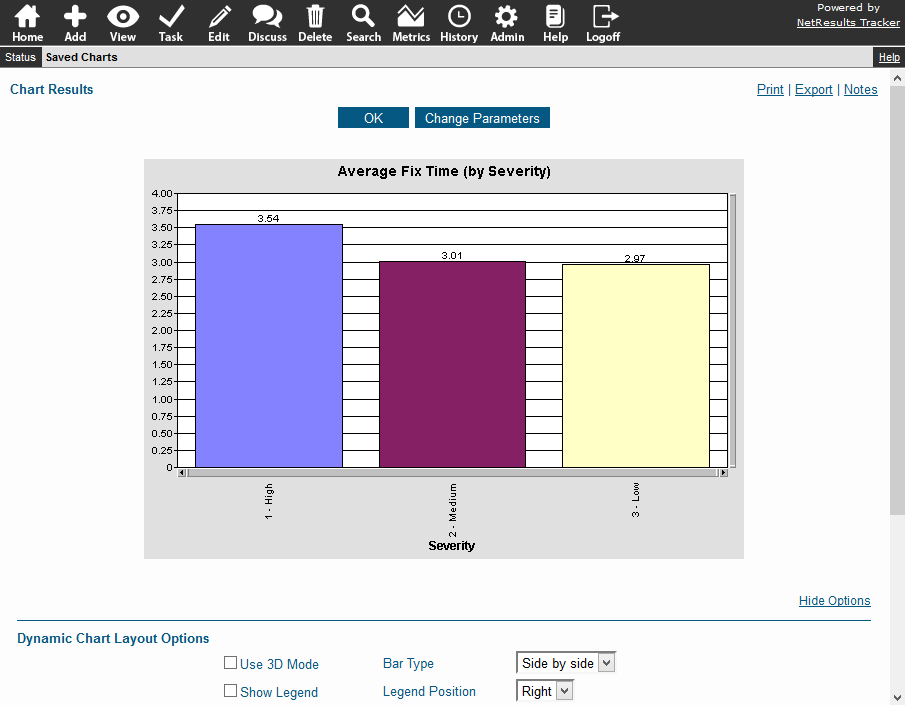
Monitor performance by running reports that compare dates via the Metrics feature.

Chart Comparing Two Dates

Collect Data as Records are Processed

Time stamp date fields at key points of your process. Then, use this data to generate performance metrics. For example, several date fields are configured in the Product Development template included with Tracker:

  • Date Reported - notes when an issue was created
  • Fix Date - the date and time an issue was fixed
  • Test Date - documents when the fix was tested

To ensure a date is entered into the field, you can either make the field required, forcing a user to enter a date, or you can make use of the field's configuration settings to fill in a date automatically.

When a Record is Added

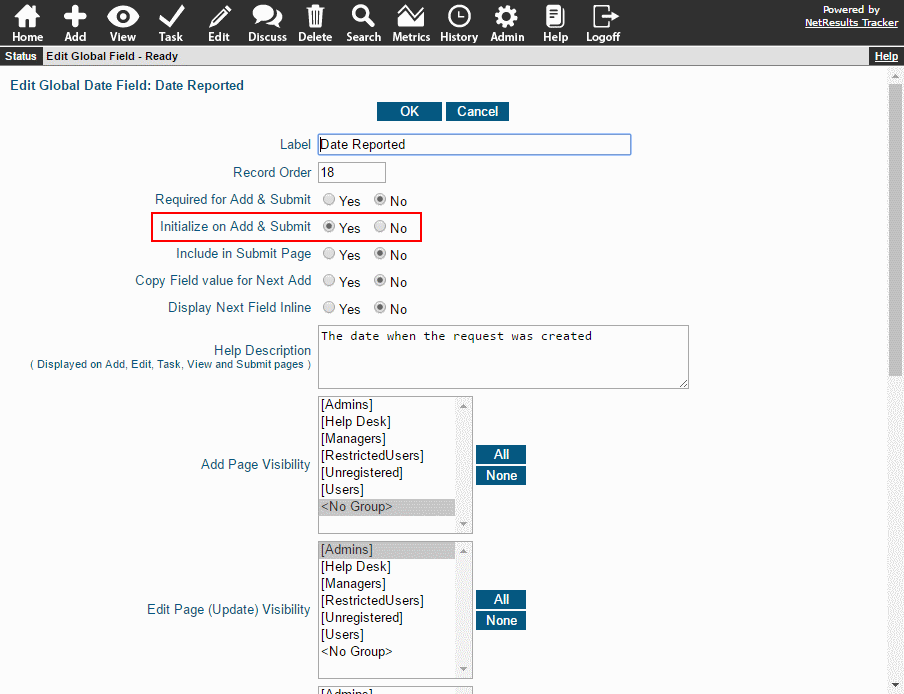
A date can be captured automatically when a record is added by setting the option called Initialize on Add & Submit to "Yes".

Initialize on Add

When Records Are Processed Using the Task Operation

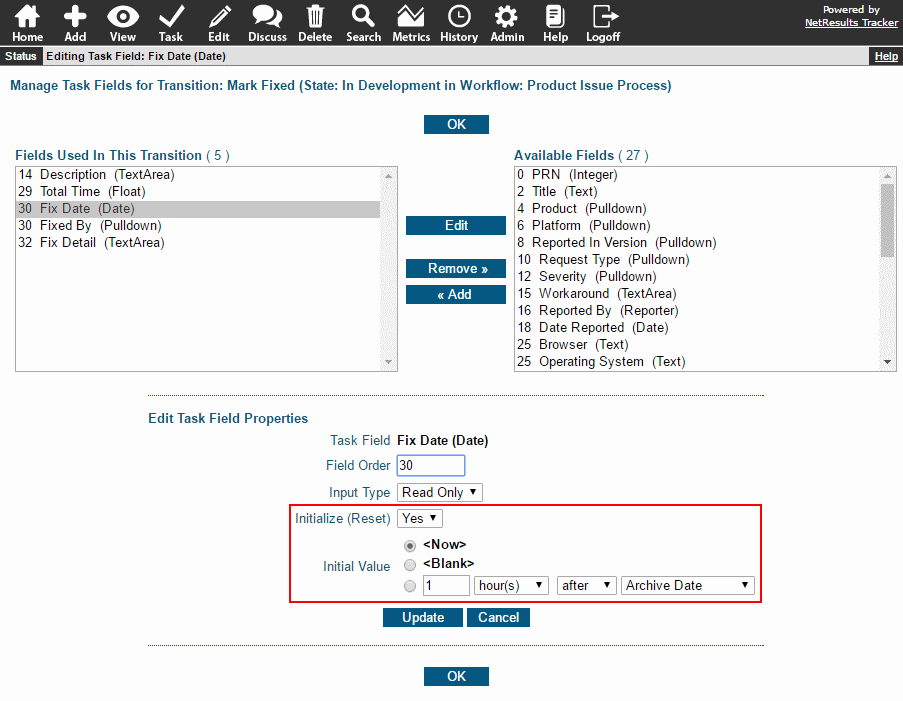
A date can be set during the Task operation via the Initialize (Reset) option. Set the Initial Value to <Now>.

Initialize on Task

Create Metrics that Compare Date Fields

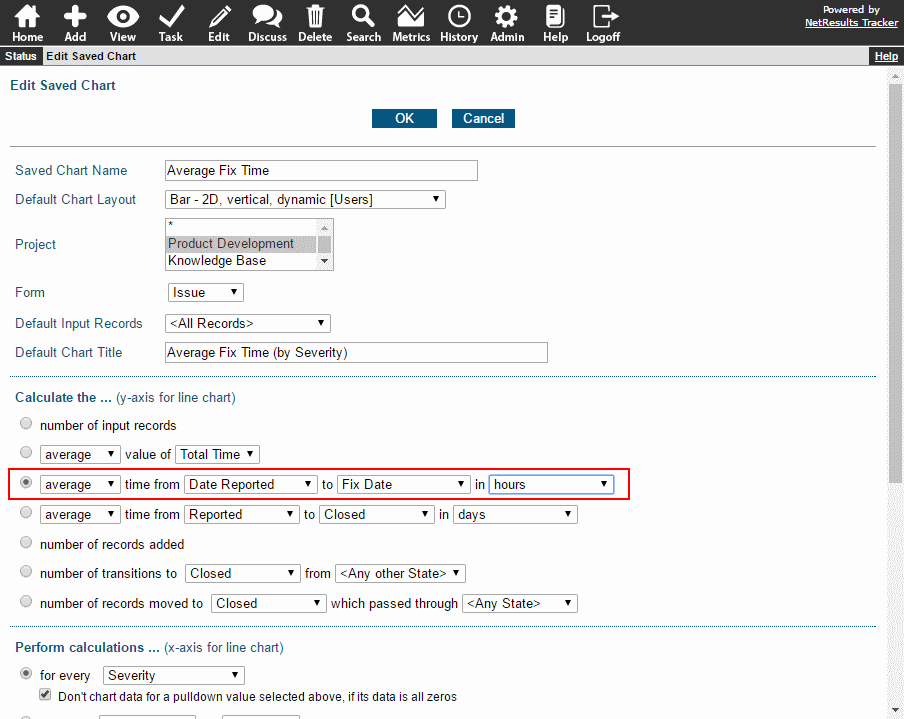
The Calculate... section of a chart has the option to compare 2 date fields.

Chart option

The Metrics section of the Online Help Guide has more information about creating and running charts.

Find out about the features TextArea fields have for saving and searching conversations, comments and other big chunks of data.

1. Add a Date & Time Stamp When Someone Adds Something New

Use the Annotate feature to add a date & time stamp that includes the user's name when new information is added to the field. This makes it easy to follow the conversation where multiple people have commented. The annotation can be done automatically or manually.

Multiple Annotations

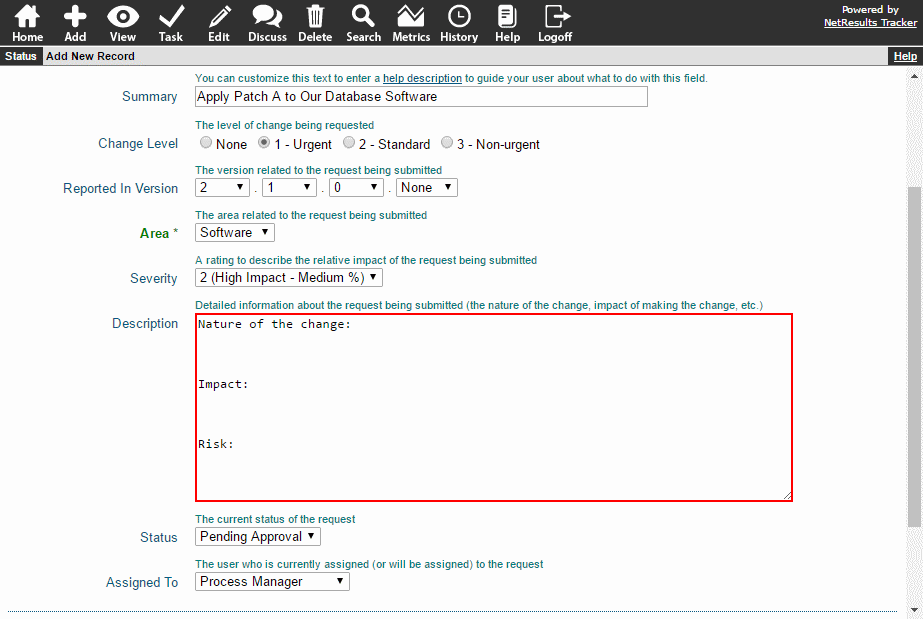
2. Add Instructions for a Field

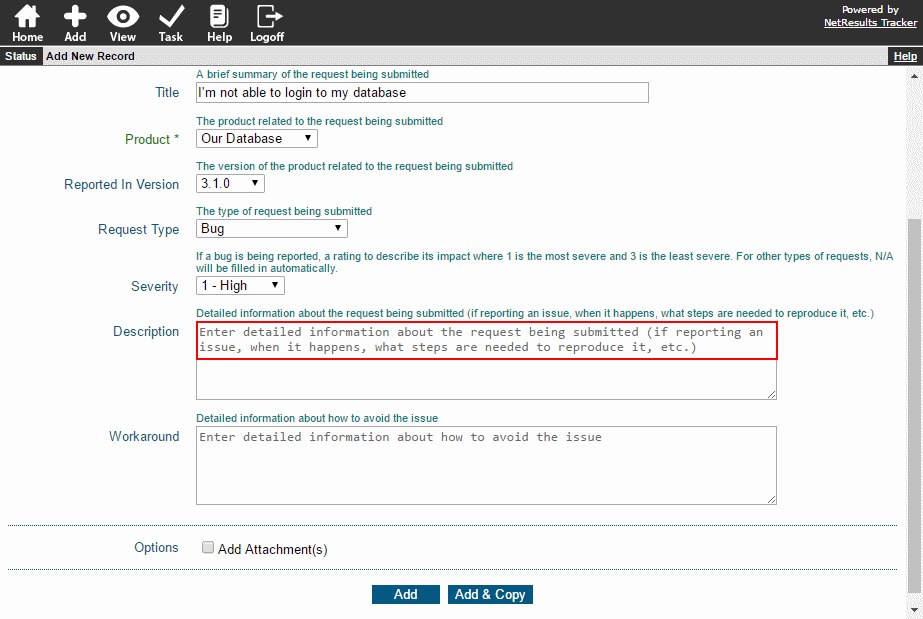
The Instruction Text feature allows you to provide information to your users within the field. These instructions can be configured to disappear when the user clicks on the field to enter data.

Instruction Text

3. Set an Initial Value

You can have a value saved in the field automatically. For example, if you want users to enter information using a particular format, you can save the format in the Initial Value field.

Initial Value

4. Protect Information That's Already in There

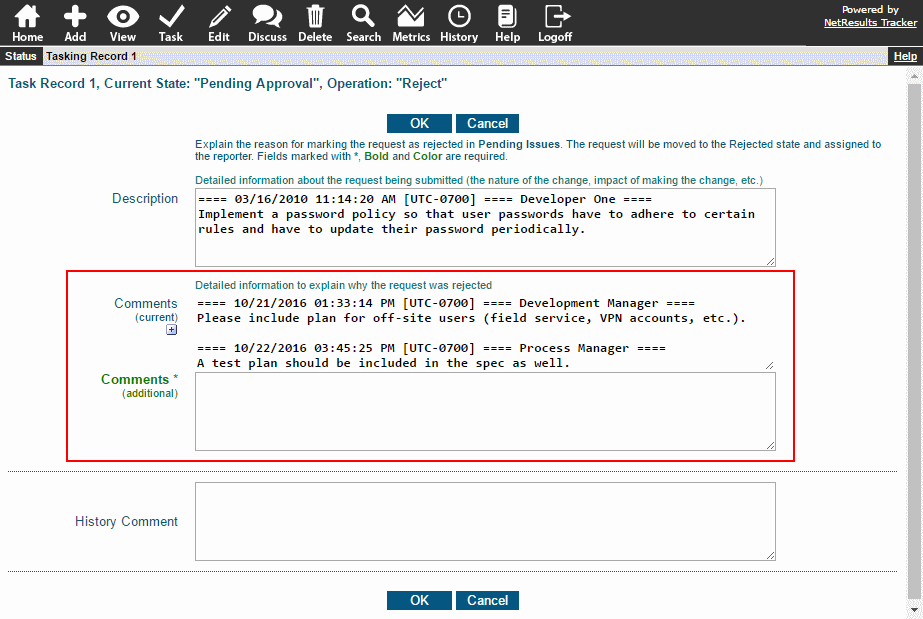
The Append option will protect the data that's already entered into a field. There's also an option to Show Current Text so the user entering new information can see what was added previously.

Append Text

To configure the properties described above, use the link below that corresponds to the page where the field is used:

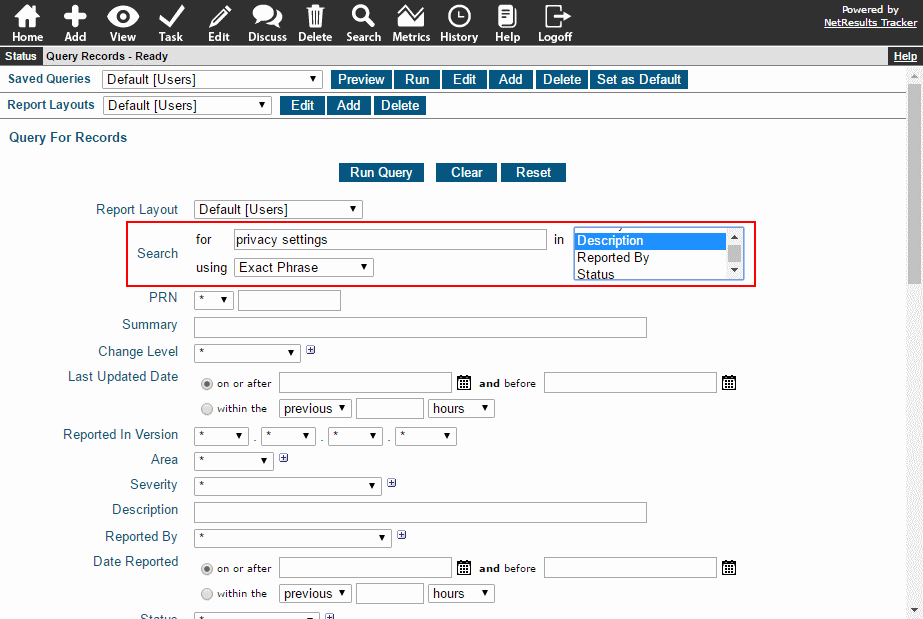
5. Do a Key Word Search

You can search the data for key words on the Search Page.

Text Search

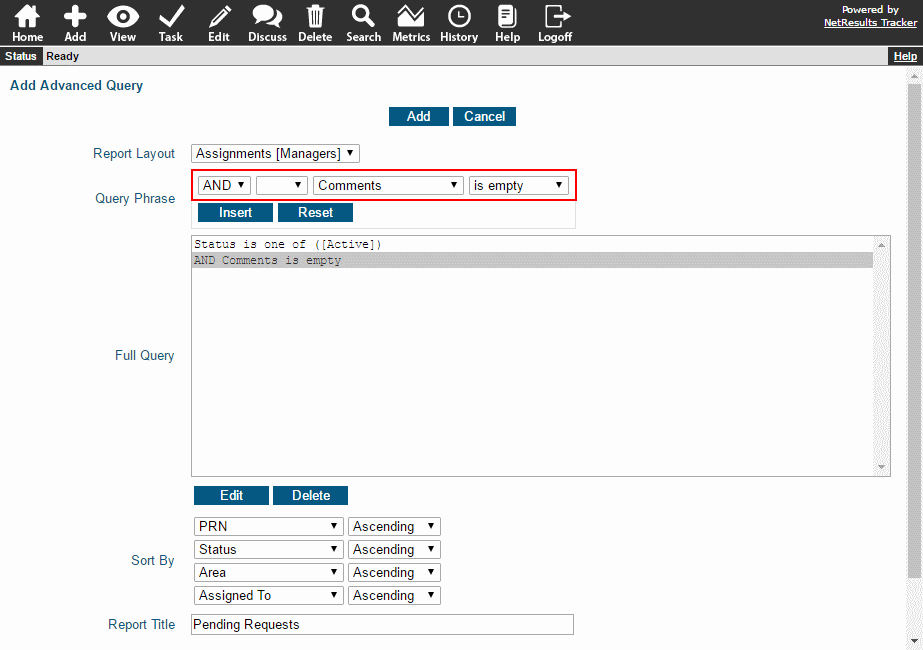
6. Search for Fields That Are Empty

Advanced queries have the option to search for fields that don't have data entered using the is empty option for TextArea fields.

Search for Empty Fields