Choose a display option that works best for the data in your pulldown field.

If You Have 100+ Menu Options...

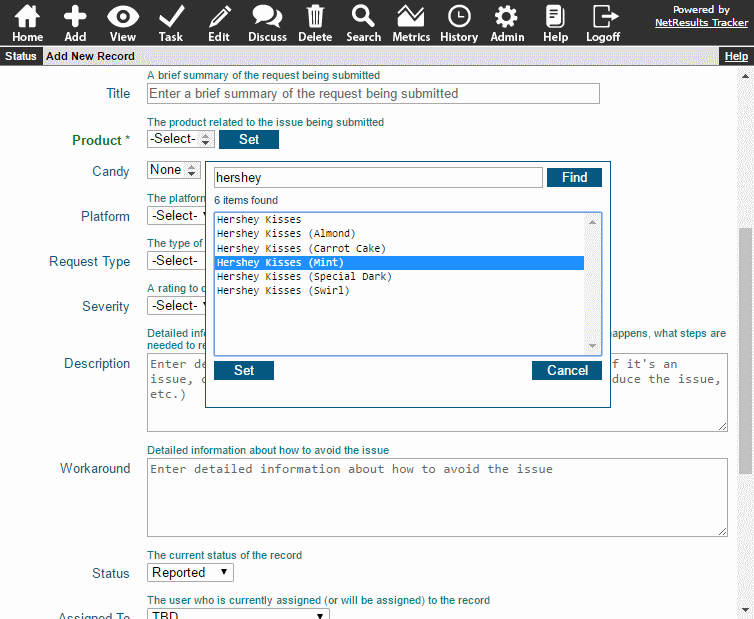
Search Pulldown

...use Search as the Display Style so you can easily locate the desired option using key words.

To set the Display Style for a pulldown:

  1. Login as Admin and click on the Admin icon.
  2. Click on the Fields link.
  3. Click on the Edit button to the left of the field you wish to modify.
  4. Change the Display Style option and click OK.

Show All of a Short List

Radio Pulldowns

The Radio options show the entire list of menu items.

More information about the properties of Pulldown fields is available in the Admin Help Guide

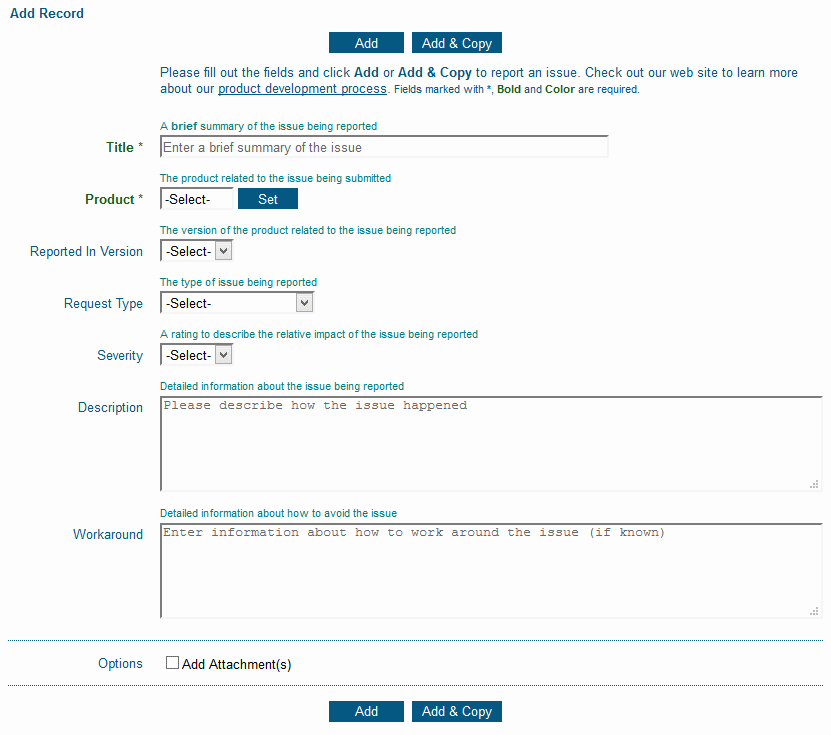
Create a form that's easy for your end users to fill out.

Keep It Short
Simple Add Page

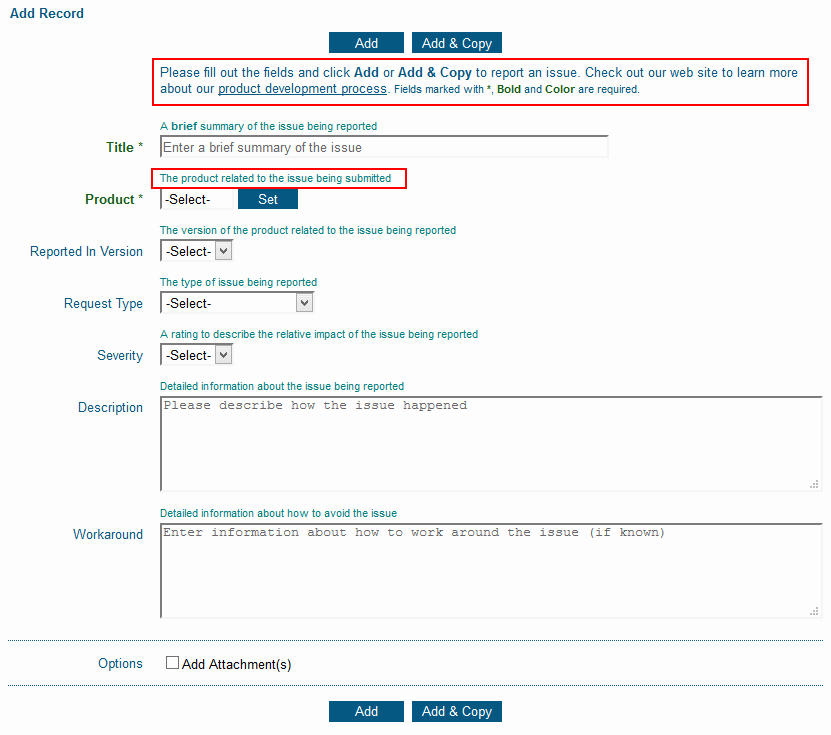
Figure out the most important data that needs to be collected, but keep it to a reasonable number of fields. End users are more likely to fill out the form if you keep it short and simple.

To set a field so it's not displayed on the Add Page:

  1. Login as Admin and click on the Admin icon.
  2. Click on the Fields link.
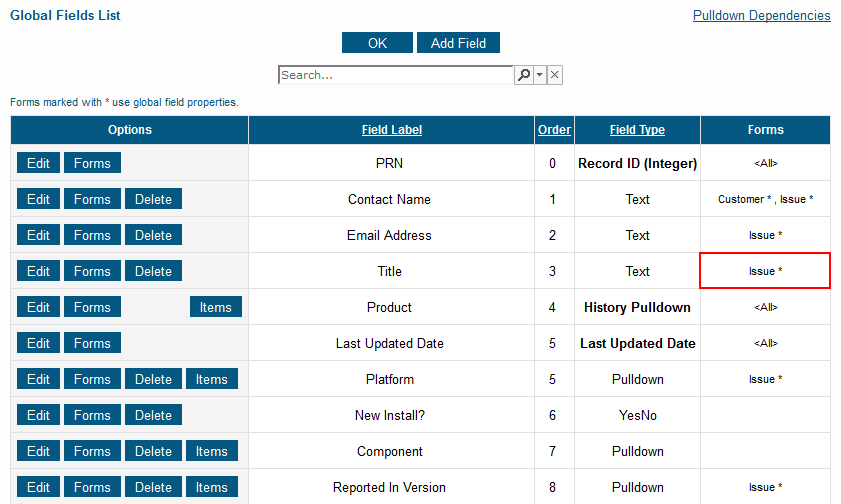
  3. Locate the field you wish to modify and check the Forms column.
  4. Check the name of the form where you want to change the field. If there is a * next to the form name, click on the Edit button to the left of the field and proceed to step 5. If there is no * next to the form name, click on the Forms button to the left of the field, then click on the Form name in the left column and click on the Edit button, then proceed to step 5.
  5. Scroll down to locate the field called Add Page Visibility. To remove the field from being displayed on the Add Page for some user groups (while keeping the field displayed for other user groups), hold down the Ctrl button on your keyboard while clicking on user groups to de-select them.
  6. Click OK to save the changes.

Check Form Properties

Show Required Fields First

List required fields at the top of the form so they get filled out first.

To change the order of a field:

  1. Login as Admin and click on the Admin icon.
  2. Click on the Fields link.
  3. Locate the field you wish to modify and check the Forms column.
  4. Check the name of the form where you want to change the field. If there is a * next to the form name, click on the Edit button to the left of the field and proceed to step 5. If there is no * next to the form name, click on the Forms button to the left of the field, then click on the Form name in the left column and click on the Edit button, then proceed to step 5.
  5. Enter a number in Record Order to determine where the field is displayed relative to other fields on the form, then click OK.
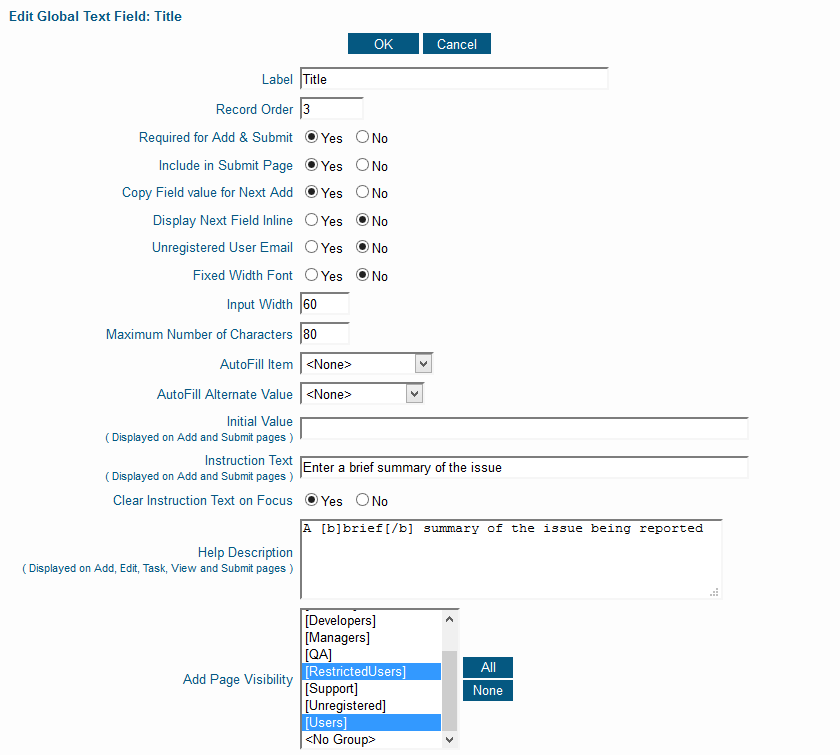
Change the Order

Provide a Help Description

Use Field Help

Make use of the Help Description feature to give hints about what goes into each field on the form. You can format the text using tags for bold, italics and more and you can add links to point to a web site page or document that provides additional information.

Check out these posts with tips and more tips to help your end users.
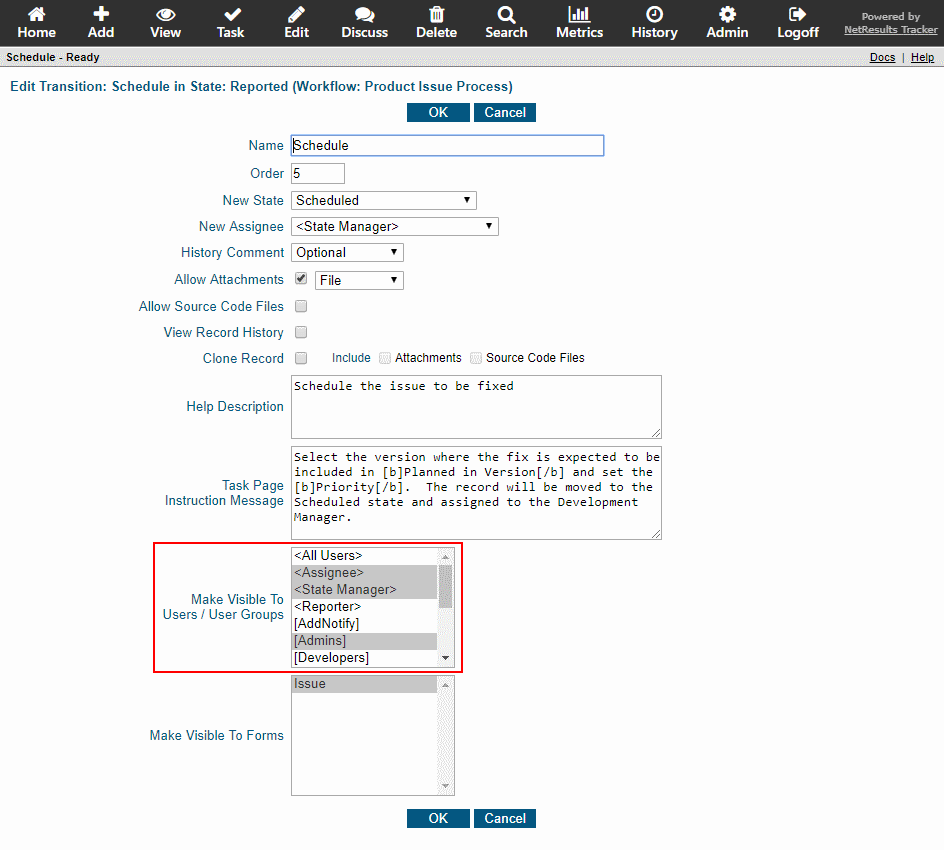
Show a different set of transitions in a step depending on who is processing the record.

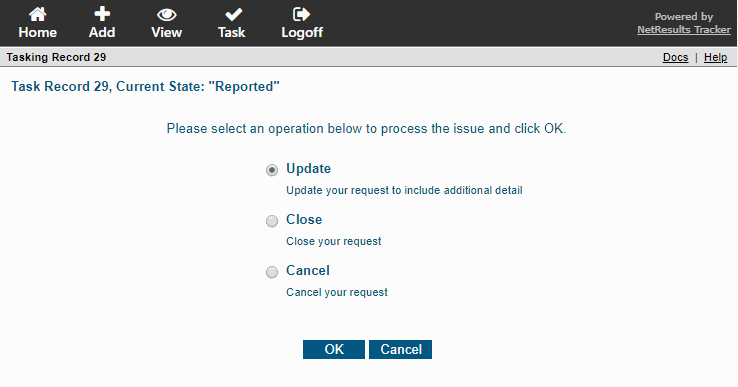
Options for Reporter

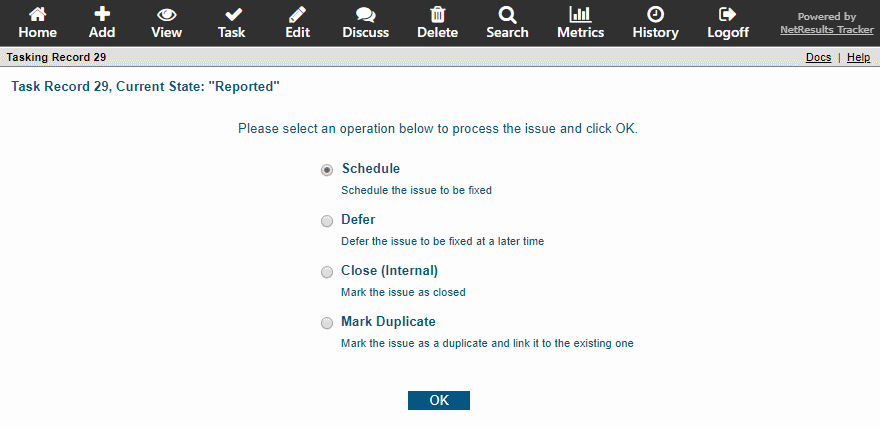
The list above shows the options available for the reporter in a product development process. The image below shows what the process manager sees when processing the same record.

Internal Options

This is configured using Transition Visibility. This can be set in the Make Visible to Users / User Groups option available for each transition.

Transition Options

To configure this option in an existing transition:

  1. Login as Admin and click on the Admin icon.
  2. Click on the Workflows link.
  3. Select the workflow in the pulldown at the top.
  4. Click on the Manage link to the right of States.
  5. Click on the state that contains the transition you wish to modify, then click on the Transitions button.
  6. Click Edit to the left of the transition you wish to modify.
  7. Make selections in the Make Visible to Users / User Groups option, then click OK to save the changes.
  8. Since transitions are configured with "<All Users>" selected by default, you'll need to repeat steps 6 and 7 for each transition available in that state.

For more information, please review the Transition Properties section of the Online Help Guide.

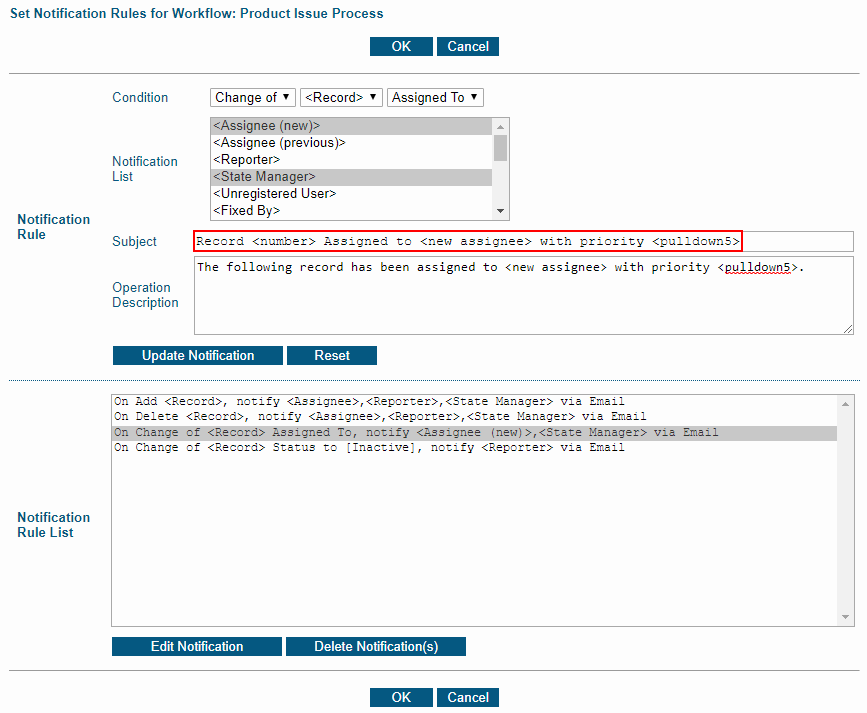
Use variables to include details like assignee or priority in the subject line of a notification message.

Use a Custom Subject Line

The subject line of notifications triggered by actions performed in Tracker can be customized to include detail from the record that was modified. For example, the image above shows the subject line of a message that will be sent when a record is re-assigned.

The Admin Help Guide contains a list of variables that can be used in notification rules. The notes below the table explain how to call out other fields not listed in the table (e.g. a pulldown other than status or assignee).

For detailed steps on modifying rules, review the Notification Rules section.

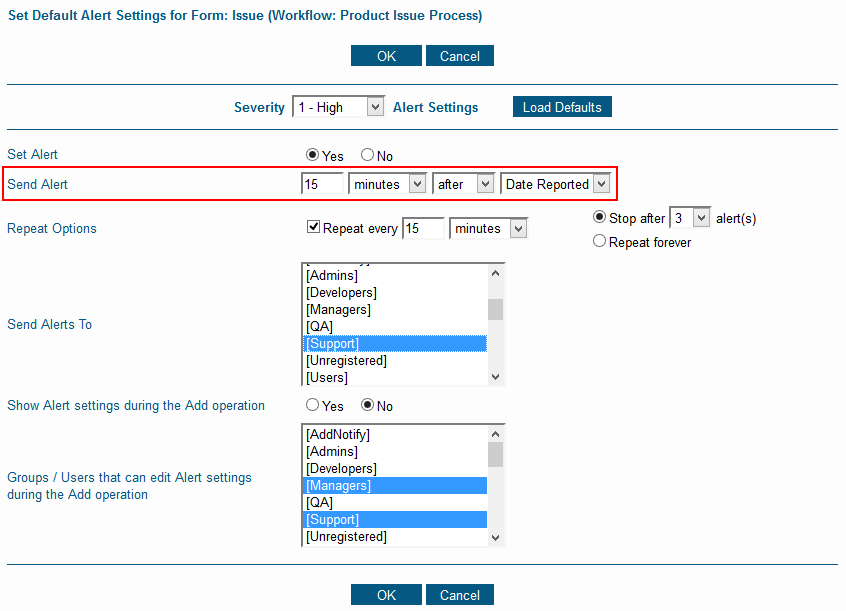
Alerts can be sent and repeated in 15 minute increments.

If you're using Alerts to regulate response times, you can trigger notifications in 15, 30 or 45 minute increments in Version 7.0 or newer.

Severity 1 Issues

You can set Alerts such that when a severity 1 issue is reported, it can trigger an alert every 15 minutes until someone takes action on the issue.

Severity 1 Example

To configure alerts this way, check out the based-on alerts blog post for details.

Information about upgrading to Version 7.0 or newer can be found on the downloads page.