Experiment on a new process or try the latest version of Tracker before you upgrade.

Request a Personal Live Trial to explore without impacting your production environment. It's a free, full-featured 30-day trial.

Need Help?

NetResults Technical Support can help you get started on a new project or process.

Techniques for prioritizing change requests and collecting data that can be used to monitor performance.

Approval Step

Approval Step

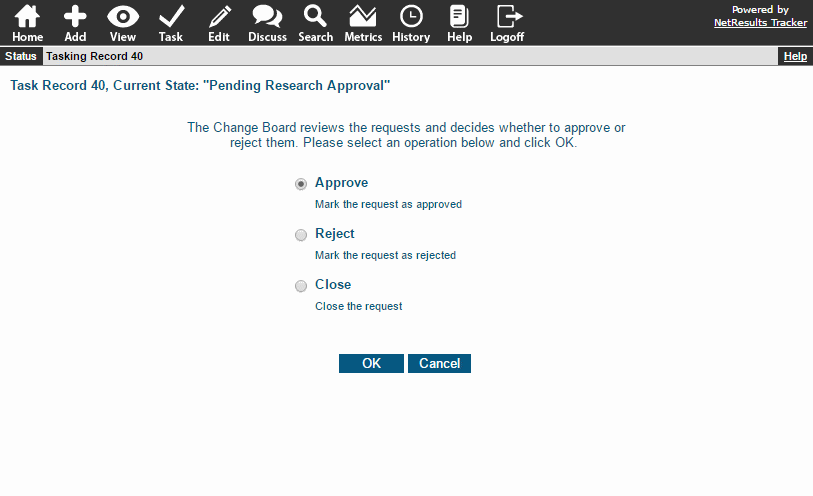
Configure a step for requests to be reviewed to decide which ones will be implemented. The Change Management template available in Tracker has an approval step where a request is assigned to a group. There are other ways to set up this step. For example, requests can be routed to a specific approver by department, product or request type.

See detailed steps in this Knowledge Base article.

Track Time Spent

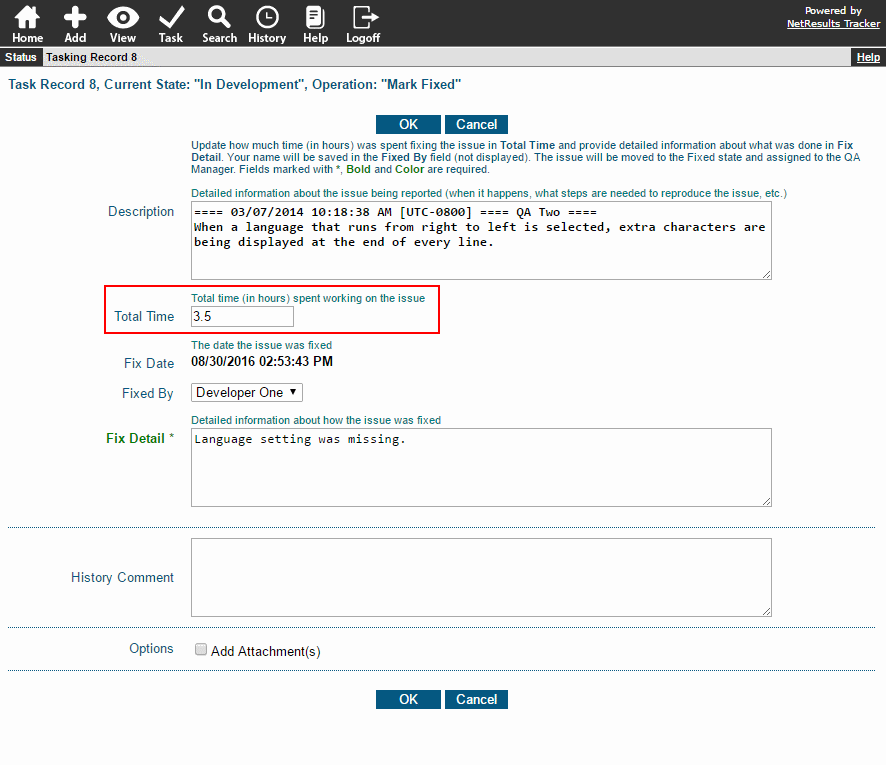
Total Time

Track the amount of time spent implementing a change, then run reports to dissect the data. Check out this blog post for details.

Analyze Performance

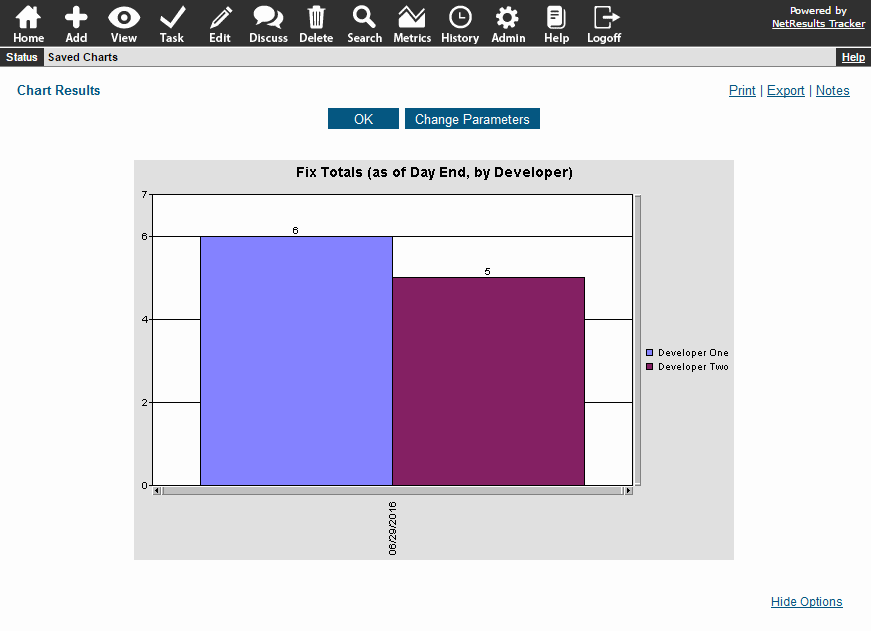
Performance Report

Set up a User Pulldown field to capture who approved or implemented each change. This allows you to generate performance metrics. This blog post explains how to set this up.

Declutter your pulldown option menus by hiding values that are no longer needed for new records.

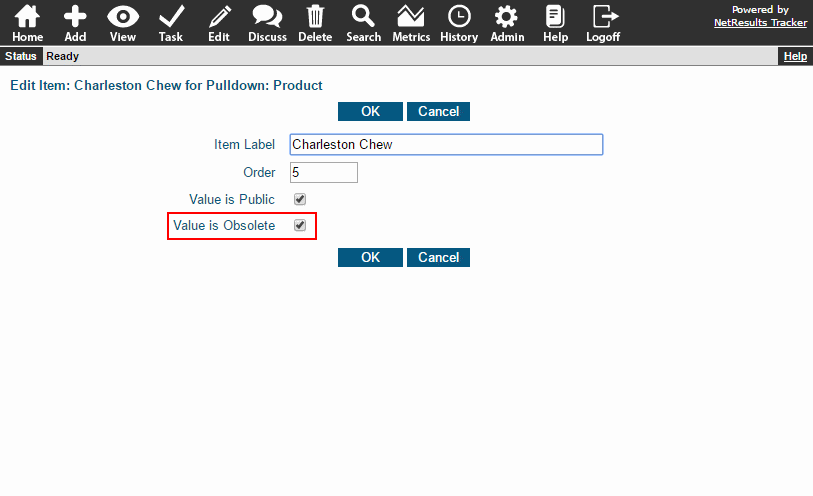
If you've been using Tracker for many years (Thank you for your loyalty!), you may have option menu items that should no longer be displayed on the Add or Submit pages. You can mark old items as obsolete so they can't be selected for new records, but are still available in the system to be included in reports.

Note: If the pulldown is involved in a dependency, when you mark one of its items obsolete, all dependencies for that item (whether it is a child or parent) will be removed. The Online Help Guide explains an example of this case.

To mark an option menu item as obsolete:

  1. Login as Admin and click on the Admin icon.
  2. Click on the Fields link.
  3. Click on the Items button to the left of the pulldown field.
  4. Click on the Edit button to the left of the option menu item.
  5. Check the box for Value is Obsolete.
  6. Click OK to save the change.

Mark Obsolete

After you make this change, the item won't be displayed on the item list by default. You can show obsolete items by clicking on the filter options and selecting "Yes" for Filter By Obsolete.
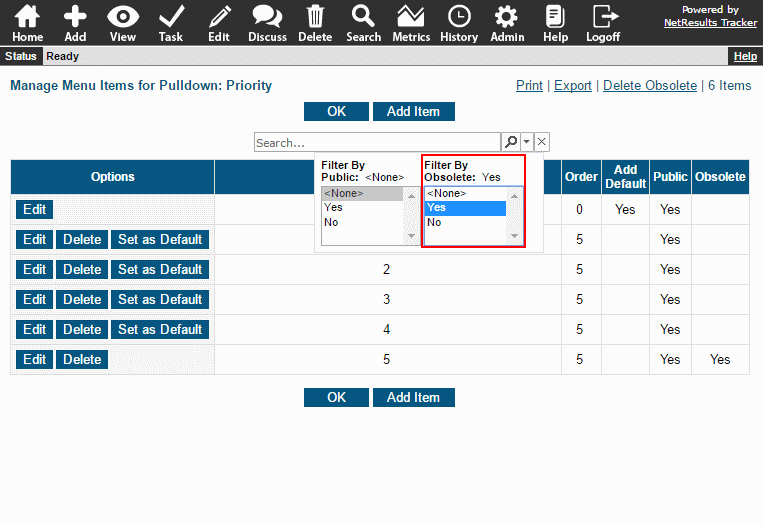
Show Obsolete Items

To include obsolete items in a report:

  1. Click on the Home icon.
  2. Click on the Preferences link in the upper right.
  3. Scroll down to find Query Page Pulldown Settings.
  4. Check the box for Include Obsolete Items.
  5. Click OK to save the change.

Now the obsolete items will be available in the pulldown field on the Query and Metrics pages.
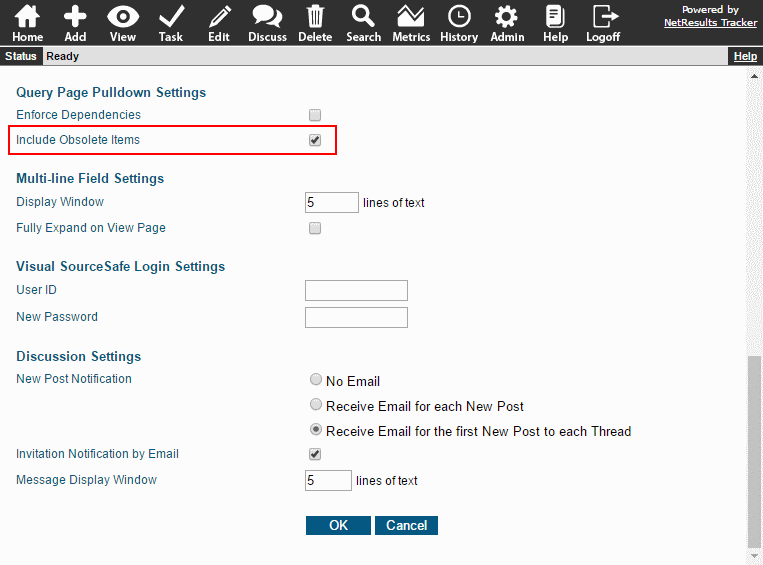
Include Obsolete Items

Please review the Online Help Guide for more detailed information about the effects of marking items obsolete.

Limit the states that can be selected for newly added records.

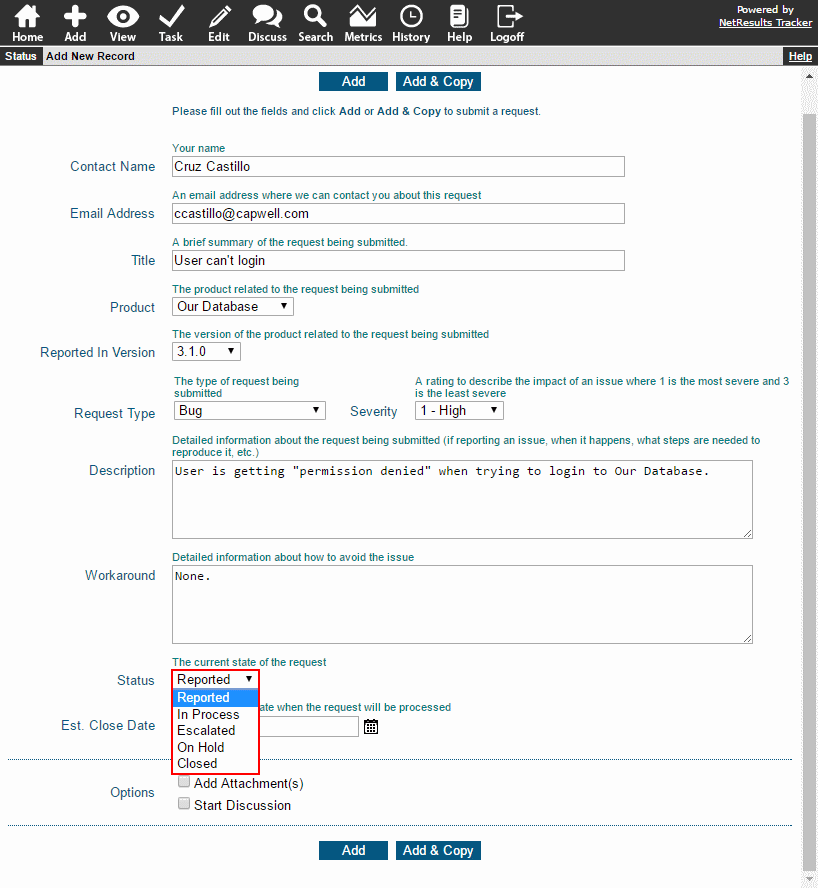
Status on Add Page

Perhaps there are two or three different paths for new records in your workflow. You can allow users to pick where the record will be routed by showing the Status field on the Add Page. You can show the field to only specific users rather than showing it to everyone. This is done by creating a state group and selecting that state group for the Allowed Add States workflow option.

Use the steps in the Online Help Guide to add a state group.

To use the state group in your workflow:

  1. Login as Admin and click on the Admin icon.
  2. Click on the Workflows link.
  3. Select the desired workflow in the pulldown at the top.
  4. Locate the Forms section and expand the desired form.
  5. Click on the Manage link to the right of Default Add State Settings.
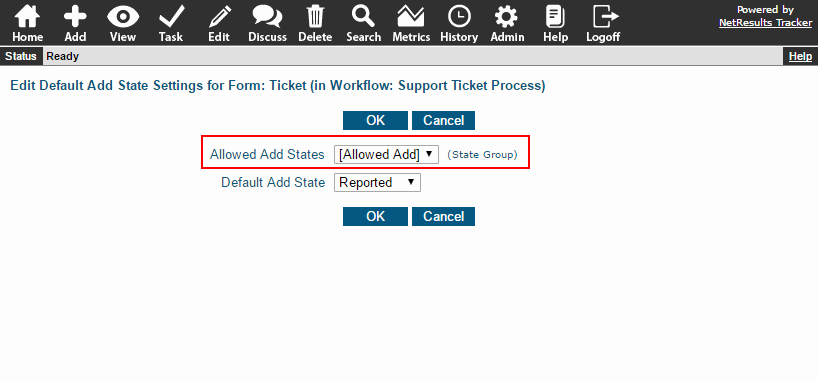
  6. For Allowed Add States, select the state group you created, then click OK.

Allowed Add States Option

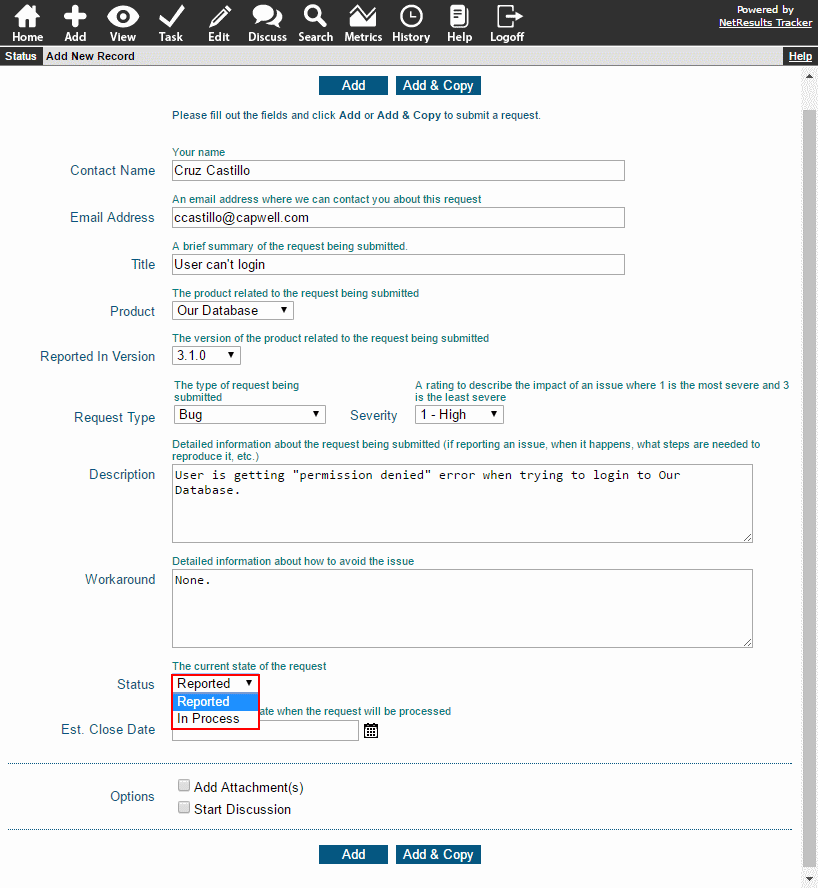
Now, users who are allowed to set the Status field on the Add Page will see the desired states.

Allowed Add States

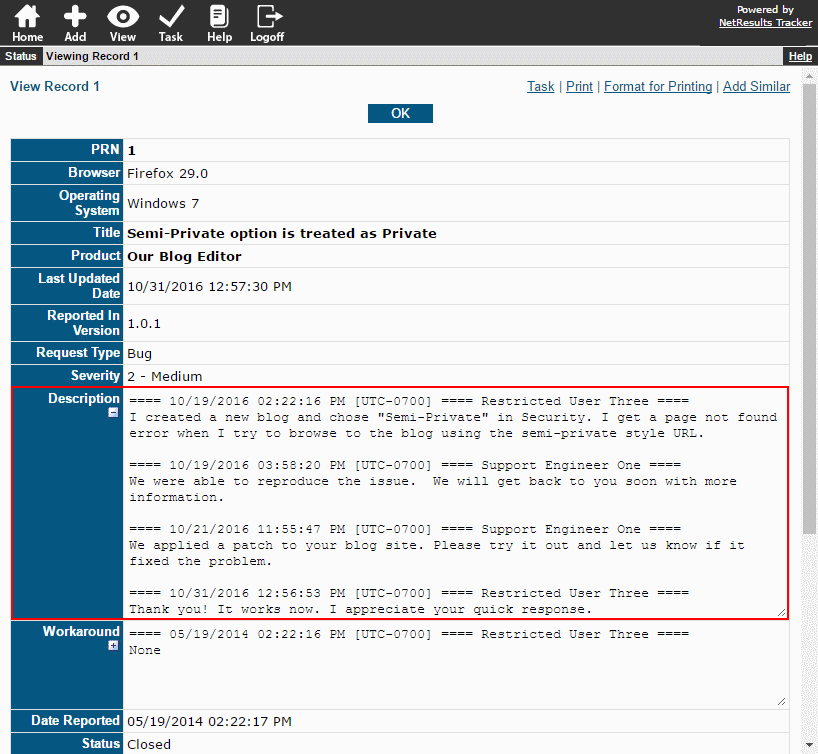
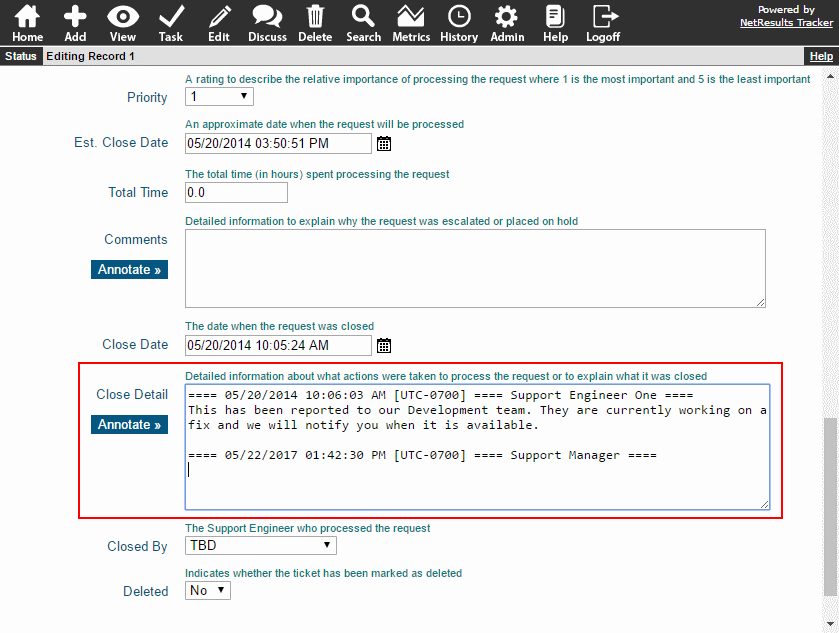
Use the Annotate option to include a user's name and a date and time stamp above their comments in a TextArea field so it's easy to distinguish what each user has contributed.

Annotated Conversation

TextArea fields are used for large amounts of text such as long explanations, descriptions or conversations between users.

Automatic

The annotation can be done automatically on the Add or Submit pages or when modifying a record using the Task operation. This allows the user to simply enter their comments without having to remember to click on the Annotate button.

Annotate Options for Add, Submit, Edit

Optional

When the annotation is optional, the Annotate button will be available for the user to click to add the date and time stamp.

Optional Annotation

Unavailable

An annotation may not apply in some situations. For example, when the field is being used to publish information, such as in a Knowledge Base, an annotation may not be appropriate. The "Unavailable" option prevents an annotation from being added.

Configuration

To set the Annotate option on the Add, Submit and Edit pages:

  1. Login as Admin and click on the Admin icon.
  2. Click on the Fields link.
  3. Click on the Edit button to the left of the field you wish to modify.
  4. Make a selection for the Annotate options, then click OK to save them.

To configure the Annotate option for a field presented during the Task operation:

  1. Login as Admin and click on the Admin icon.
  2. Click on the Workflows link.
  3. Locate the States section and click on the Manage link to the right.
  4. Click on the desired state, then click on the Transitions button.
  5. Click on the Task Fields button to the left of the desired transition.
  6. Click on the TextArea field in left column and click on the Edit button (or click on a field in the right column, then click Add).
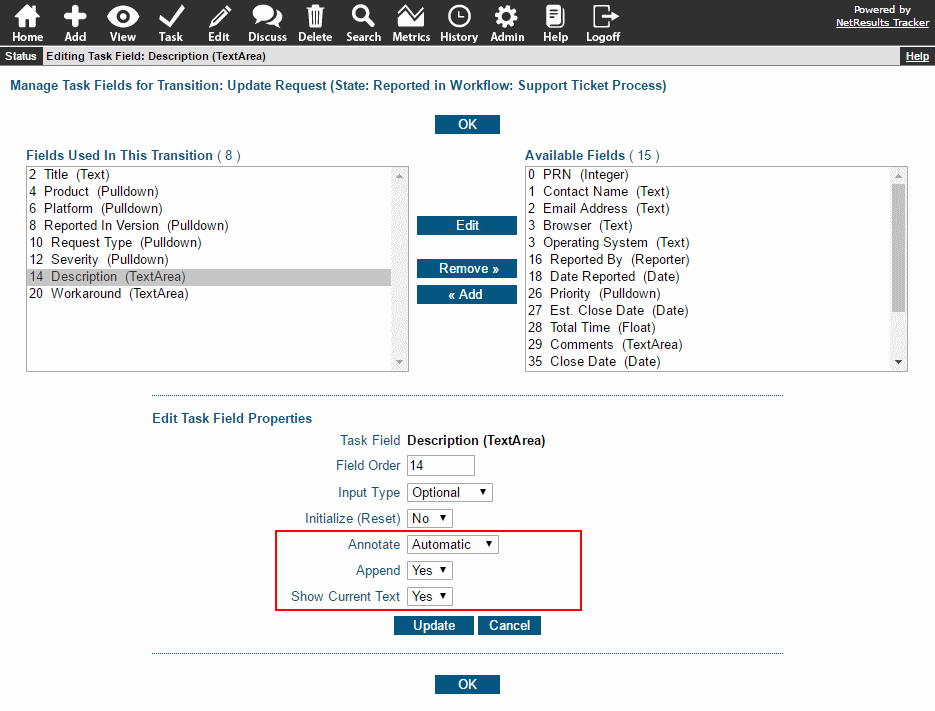
  7. Set the Annotate option. Then, set the Append and Show Current Text options accordingly. Detailed information about setting these options is available in the Online Help Guide.
  8. Click Update to save the changes.

Annotation Options During Task