Setting up a Knowledge Base allows end users to get the information they need on their own at any time. Adding this feature to an existing Tracker system can be done a few different ways.

KB Search Page

Add a Form

A Knowledge Base can be added by creating a new form. If you want the KB data to be separate from existing data, you can also create a new project.

KB Form

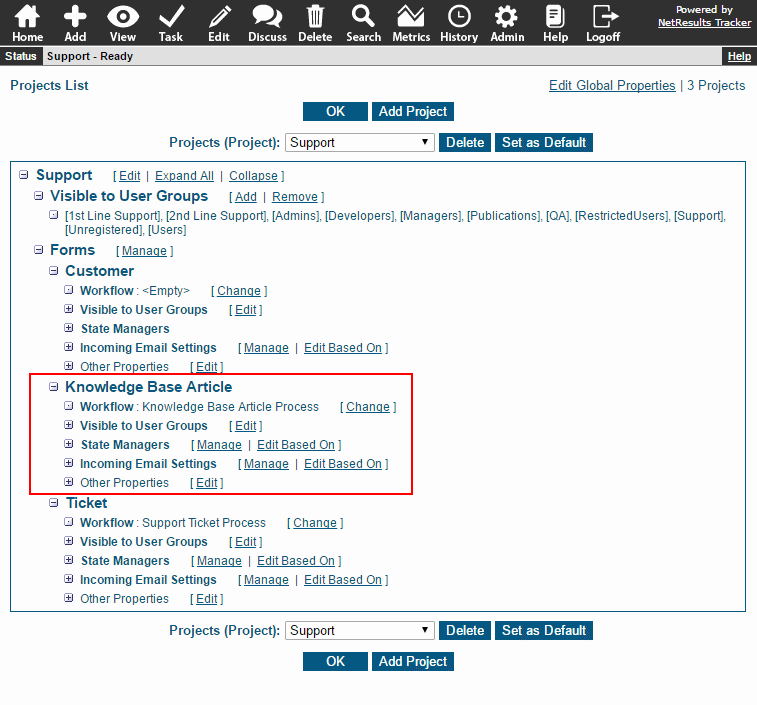
The advantage of this method is that you can link KB articles to the record that inspired the content.

KB Link Field

For details, please review option 3 in this Knowledge Base article.

Create a New Database

You can set up a new database (workgroup) for your Knowledge Base. This option is the fastest to set up because the project, form and workflow are configured for you. However, the KB data will be completely separate from any existing data.

For more information, check out option 1 in this Knowledge Base article.

KB Add Page

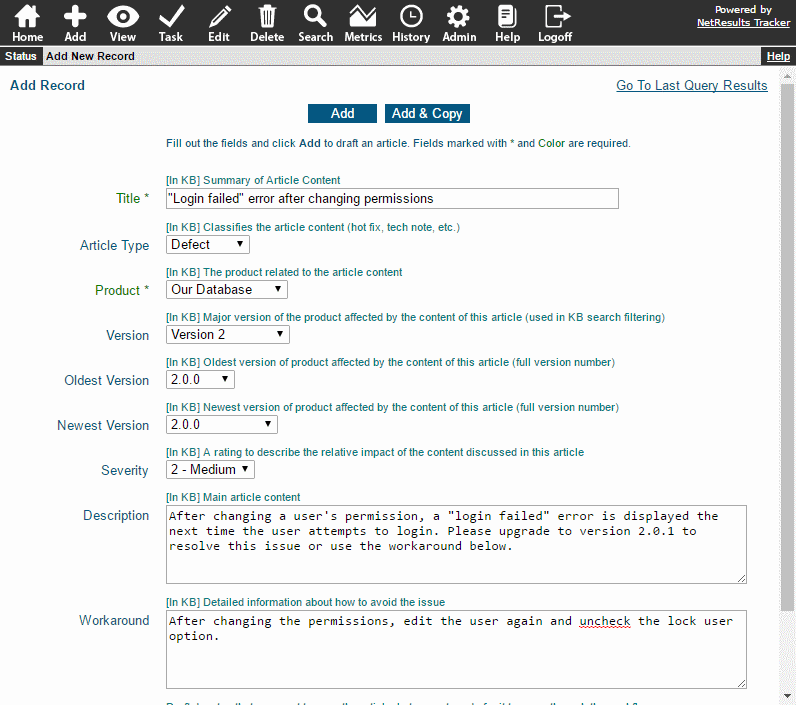
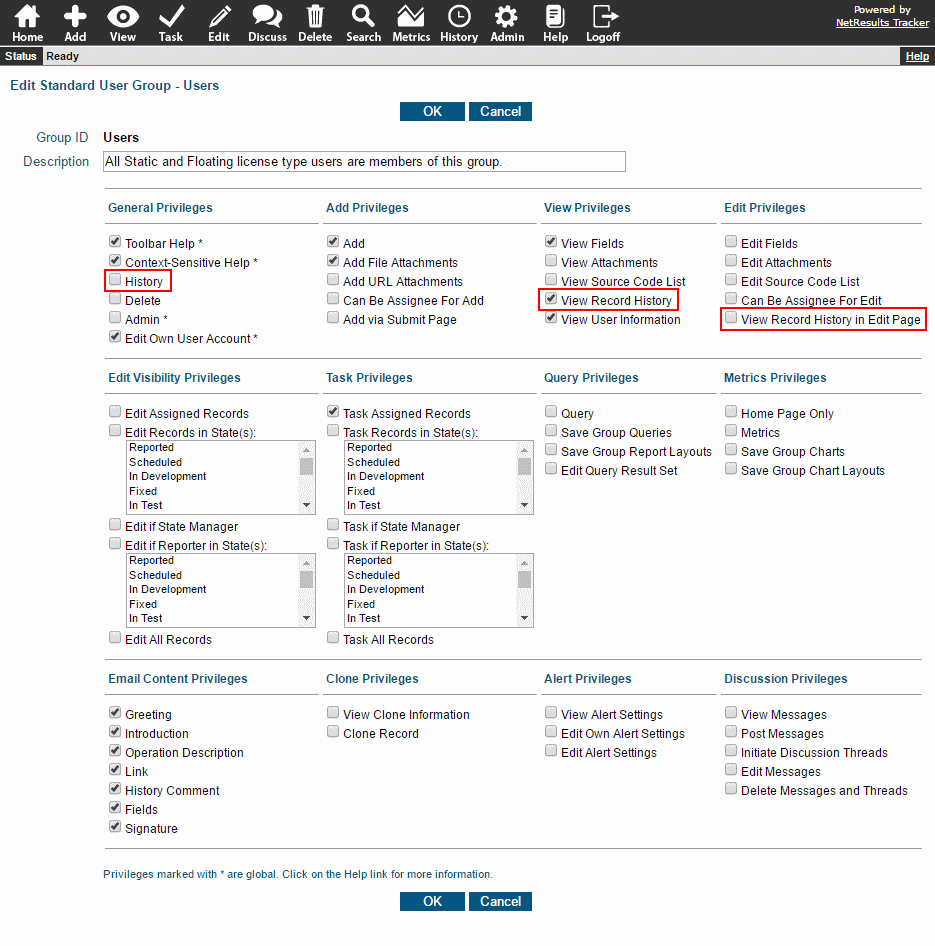
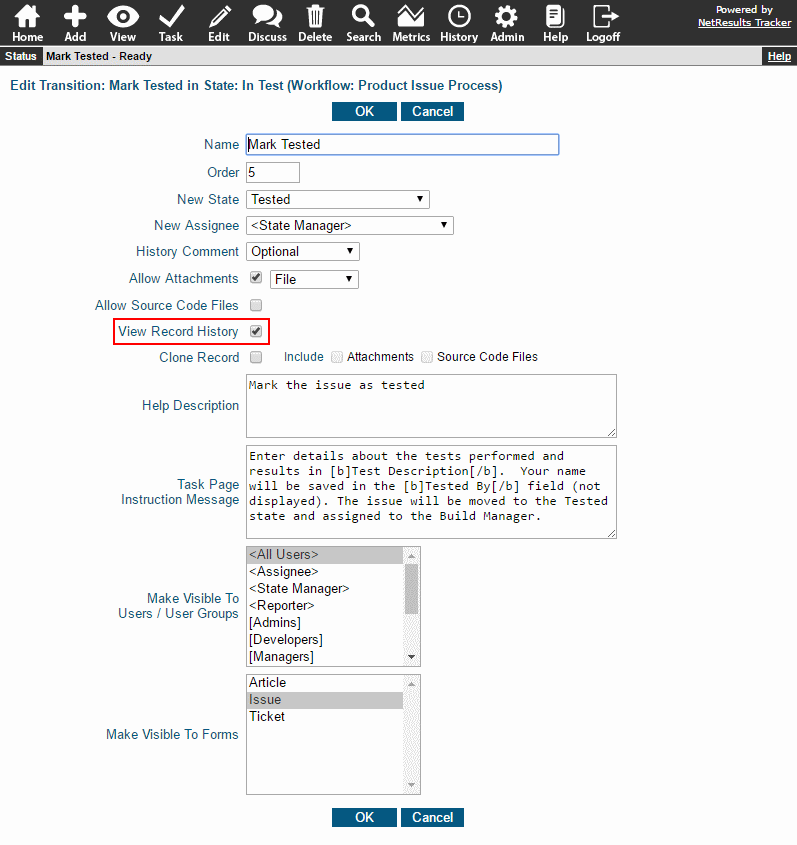
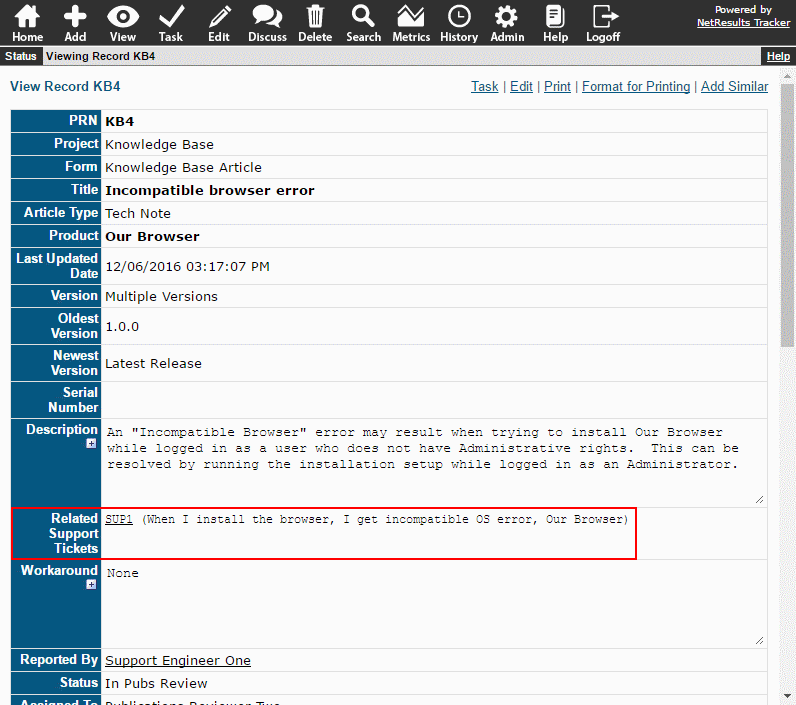
Copy a Record and Publish it to the KB

Use the clone feature to copy a record, make some changes to the fields and publish the copy to the Knowledge Base. The KB article will have a link back to the original record. This option takes some effort to configure, but makes it easy to populate your Knowledge Base using data you already have.

Clone KB Article

Step by step instructions can be found in option 2 of this Knowledge Base article.

Build a chart to help you identify trends in your data.

Add Rate by Product

Create a line chart, select the date range and break down the data by a pulldown, if desired.

The sample above shows the monthly rate of issues reported against various products.

Use a Saved Query as a Filter

You can select a saved query that will limit the data included in the chart. The Default Input Records option in the sample below shows we've selected a saved query that will only show tickets reported by Company A in the chart.

Close Rate Parameters

Here's the resulting chart.

Company A Close Rate

Steps for creating a chart can be found in the Metrics section of the Online Help Guide.

Allow users to reset their own password without administrator intervention.

The Enable Reset Password option is available in the Login Options section. This will display a "Forgot Your Password?" link on the Login Page.

Login Page

Users can set up a security question and answer that can be used to reset their password at a later time.

Security Question & Answer

Enable the Reset Password Option

  1. Login as Admin and click on the Admin icon.
  2. Click on the Login Options link.
  3. In the Password Settings section, select "Yes" for "Enable Reset Password".
  4. Click OK to save the change.

Password Options

User Setup

Advise your users to do the following to set up this option before it is needed:

  1. Login to Tracker.
  2. Click on the Preferences link in the upper right corner of the Home Page.
  3. In the Reset Password section, enter values in the Security Question and Answer options, then click OK to save them.

Reset a Password

Use the If you forget your password steps in the User Help Guide.

The Record History remembers everything and will give you the info you want anytime you ask. Learn more about this reliable friend.

It Knows ALL

Any time changes are made to a record, the details are recorded in the audit trail. You can see who made changes, when the changes were made and other pieces of information as they were at that time, such as, who was assigned to the record and its status.

Record History

It Shares Information

Want to know what was changed in the system last week? Run a history search by clicking on the History icon at the top.

You can even search by keyword in the Comments field that can be updated when records are modified via Edit, Task and some Admin operations.

History Search

It Can Be Hidden

Access to the record history and the search function are tied to user group privileges so that you can keep this valuable wealth of information safe from unauthorized users.

The History privilege provides access to the search feature.

A View Record History privilege is available for showing the audit trail on the View and Edit pages.

History Privileges

The history can be displayed during the Task operation via an option available when creating a transition.

History Option in a Transition

For more information, check out the Record History section of the Online Help Guide.

Add your logo, change the color scheme and use other options to customize Tracker to be consistent with with your brand.

Add Your Logo

Login Page with Logo

Add your logo to the Login Page using the Custom HTML text box. In the sample below, we've uploaded the logo image file as a global attachment and included the link in the HTML box.

Login Page Custom HTML

More information is available in the Login Page section of the Online Help Guide.

Update the Page Title

You can update the Page Title property which shows up in browser tabs and bookmarks/favorites.

Customize Other External Facing Pages

The Submit Page and each page of the Knowledge Base (Search, Results, Item) can be customized with a logo, color preferences and page title properties described above. Please refer to the following Help sections for details:

Submit Page

Knowledge Base

Provide Custom Help Documentation

You can configure Tracker such that when a user clicks on the Help icon in the Button Bar it will direct them to your own Help documentation or any other link to guide their experience. Different links can be provided for Standard and Restricted users. Review the Help Options section for more information.

Customize the Tool Tip For the Task Icon

The Task operation is used to advance a record to the next step in the workflow. You can customize the tool tip for that icon to display terminology specific to your process.

Set the Task Icon Tool Tip in the General Preferences section.