A Tracker report is a quick way to set up your product release notes.

Release Notes Report

Add a field for collecting the release notes summary for each issue. Then, make it a task field in the step where an issue is included in a release.

Release Transition

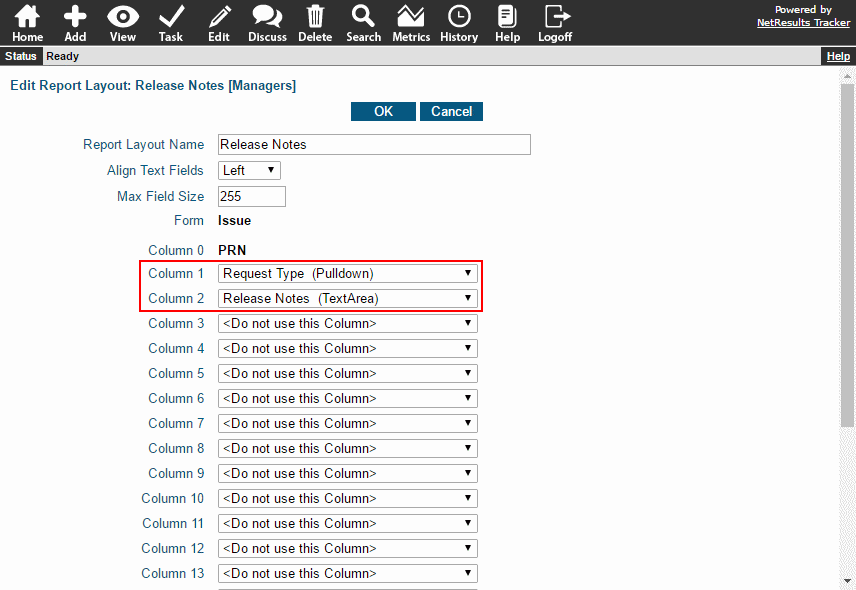
Create a report layout that shows the information you want to include in the release notes.

Release Notes Layout

Save a query that returns the records included in the release. In this sample, we do it with the following criteria:

  • Select the Release Notes report layout so that the results will show the desired fields.
  • Select the product.
  • Select the version of the product being released.
  • Select issues in the Released state.

Release Notes Query

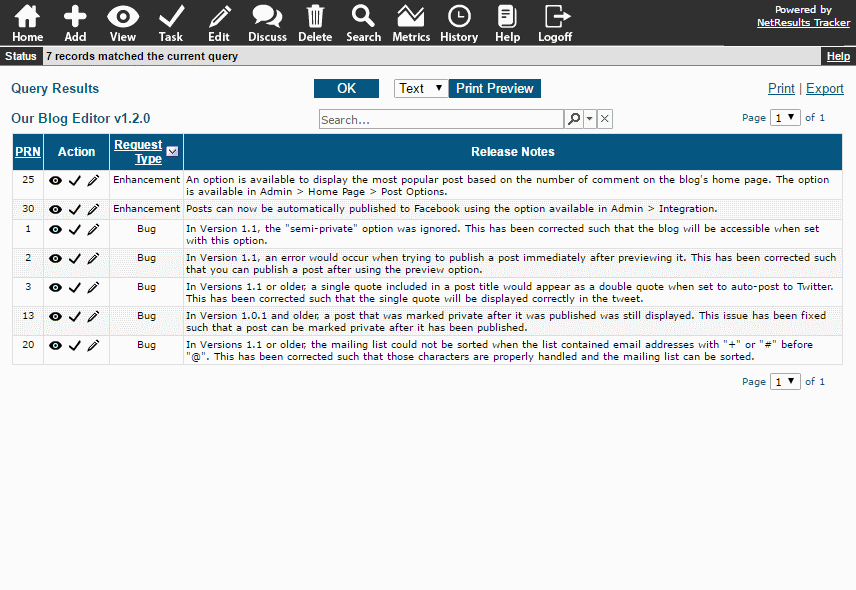
The result: Release Notes made easy.

Release Notes Report

Create intricate queries using AND, OR, NOT and other features available in Advanced Queries.

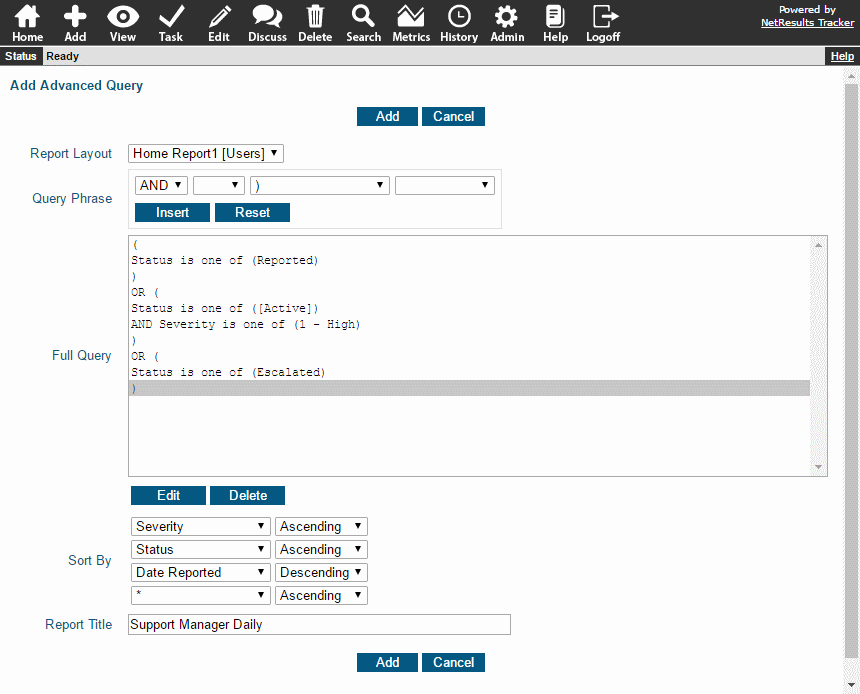
Advanced queries are useful for combining conditions into a single query. For example, the report below will return support tickets that meet any of the following conditions:

  • Newly added ticket (new tickets are routed to Reported state)
  • Active ticket with Severity 1
  • Escalated ticket

Advanced Query

Options only available in Advanced Queries:

  • OR and NOT conditions
  • Group query phrases using parentheses
  • Ability to search for empty Date, Text or TextArea fields.

Refer to the Advanced Queries section of the Online Help Guide for instructions for creating an advanced saved query.

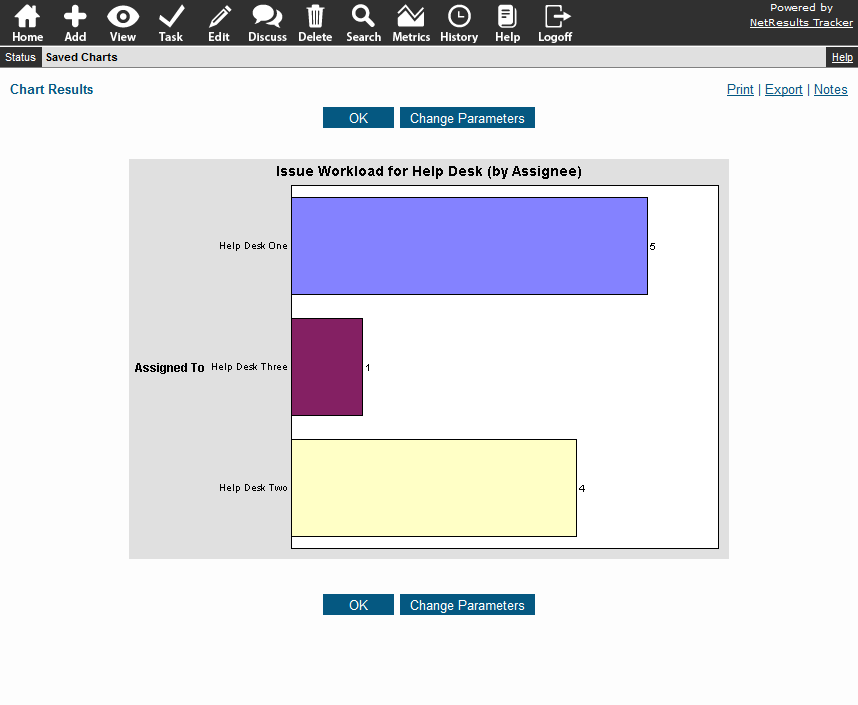
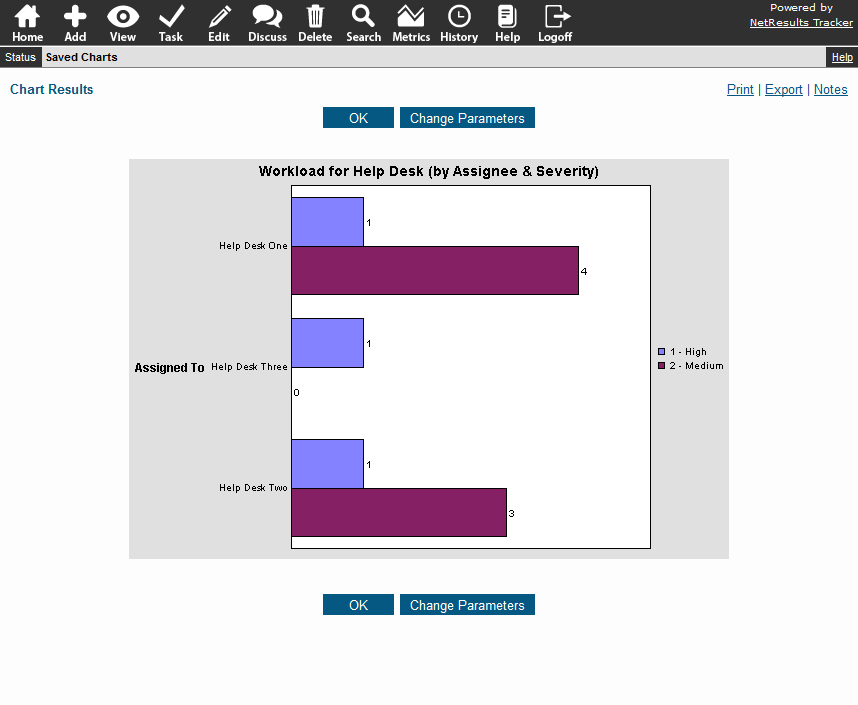
See a breakdown of items assigned to each team member with a workload chart.

Workload Chart

Add this report to your Home Page to easily access this information at any time.

You can also breakdown the data down further as we did to show Severity in this chart.

Workload Chart with Severity Breakdown

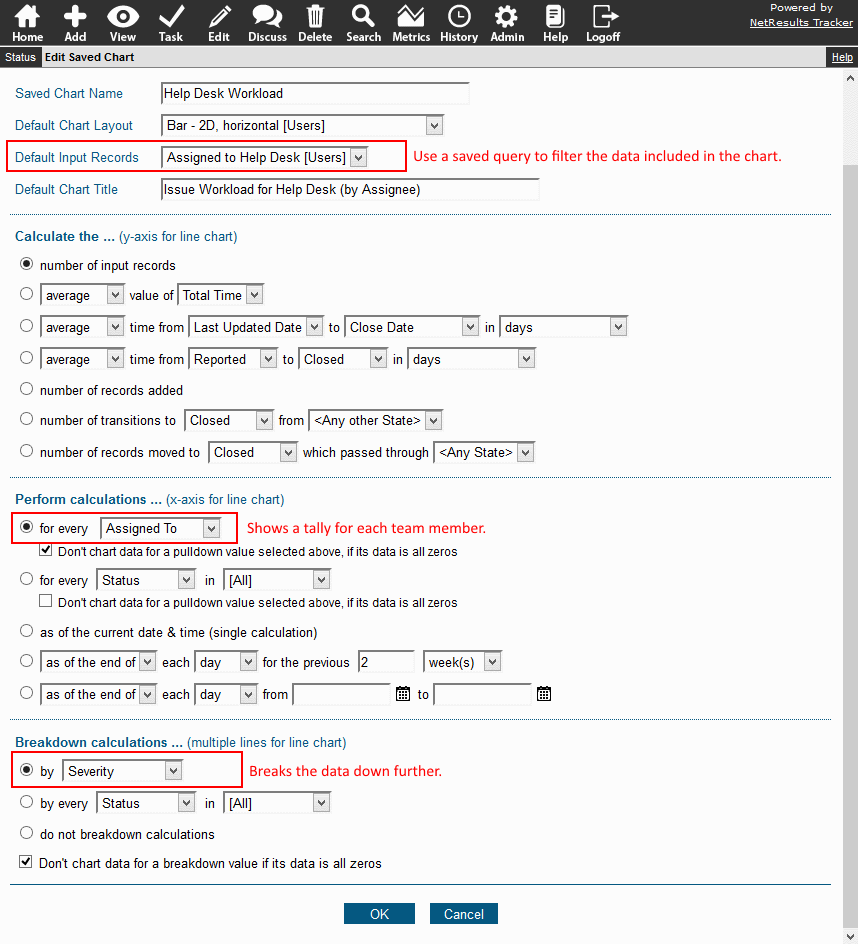
Take a peek at the settings we used to make this chart.

Workload Chart Settings

Steps for adding a chart can be found in the Metrics section of the Online Help Guide.

To add the report to the Home Page:

  1. Login to Tracker.
  2. Click on the Preferences link in the upper right corner.
  3. Select the chart for one of the Home Page Report options.
  4. Click OK to save the change.

Display saved searches on the KB Search Page for end users to easily access key information.

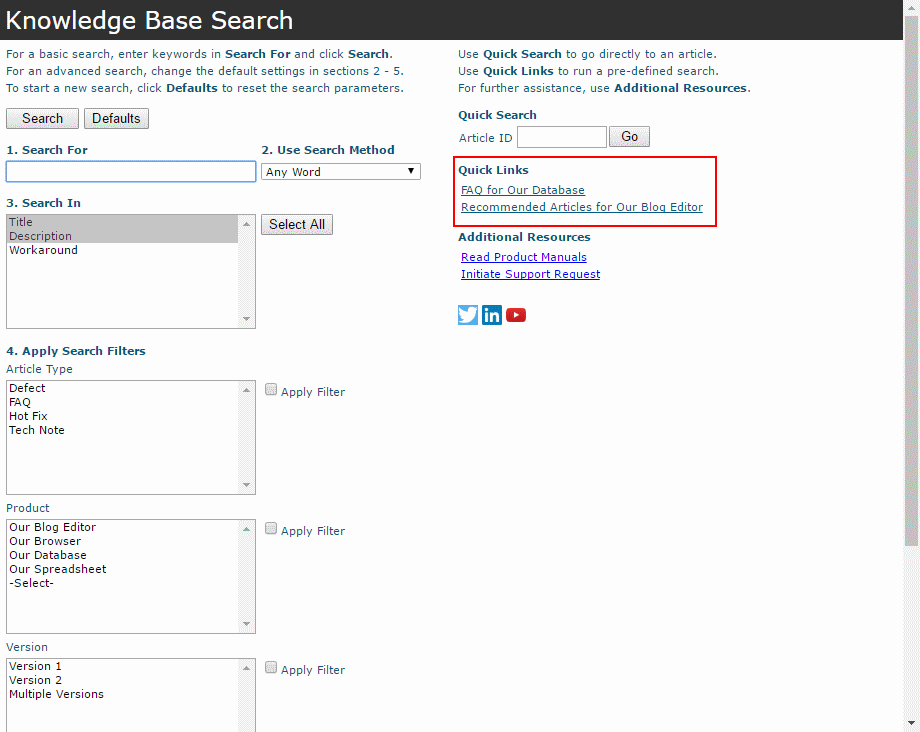
The Quick Links section on the Knowledge Base Search Page lets you save a Knowledge Base search and display a link so users can access the results in one click. You can use a quick link to display an FAQ list or some other group of articles that you want to make available.

Sample Quick Links

Create a Quick Link

  1. Login as Admin and click on the Admin icon.
  2. Click on the Knowledge Base link.
  3. Click on the Contents button to the left of Search Page.
  4. Click on the Modify Links button to the left of Quick Links.
  5. Enter a name in Quick Link Label.
  6. Set the order with respect to other quick links.
  7. Set the search criteria for the Quick Link.
  8. Click Add to save it.

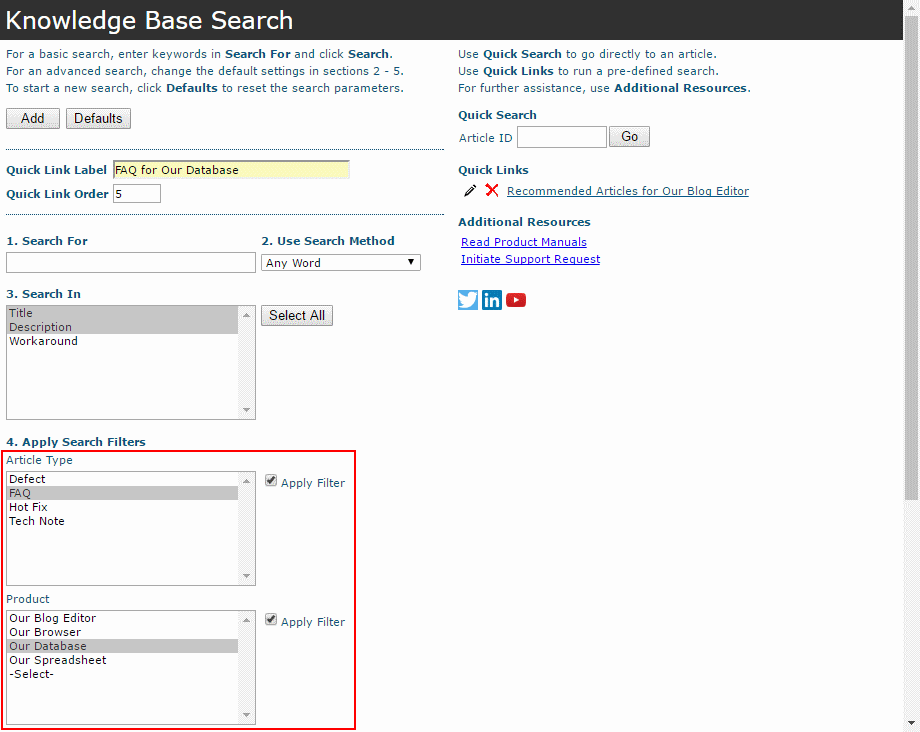
The quick link below will return KB articles that are set with "FAQ" and "Our Database".

Criteria

Check out the Online Help Guide for more information about the Knowledge Base.

Make changes to the subject, body and other parts of Tracker email notifications.

You can customize the emails generated by actions in Tracker to include custom wording, field data from the record being referenced and more.

Subject

Modify the Subject in the email rule.
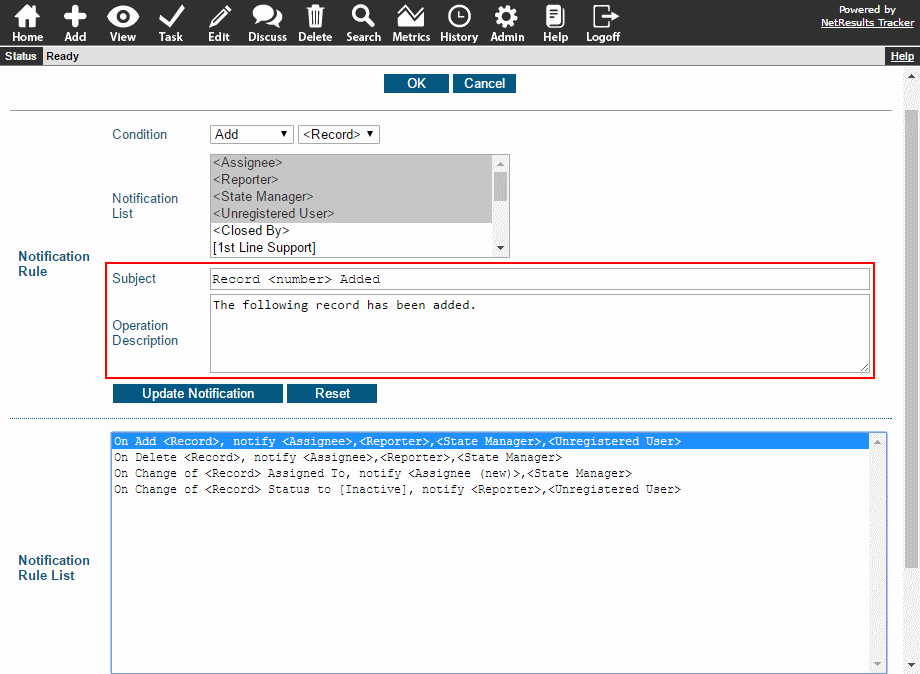
Email Rule

Body

Here's a sample of the body of the email with the parts labeled.
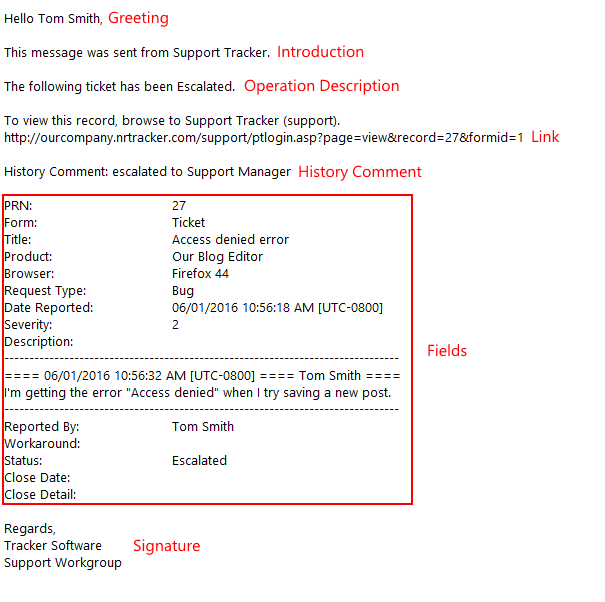
Email Message Components

The Greeting & Introduction start it off. These are updated in the Email Common Content section.
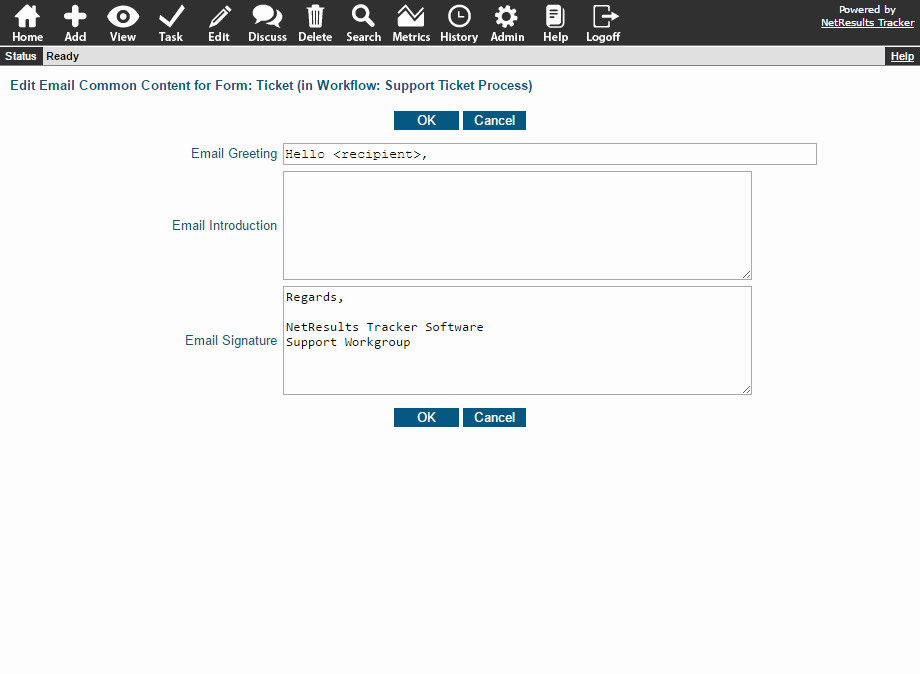
Email Common Content

Then comes the Operation Description, which is configured in the email rule.

Any fields configured to be included in the body will follow the Operation Description. Whether a field is included is based on the user groups selected in the Email Visibility property explained in this blog post.
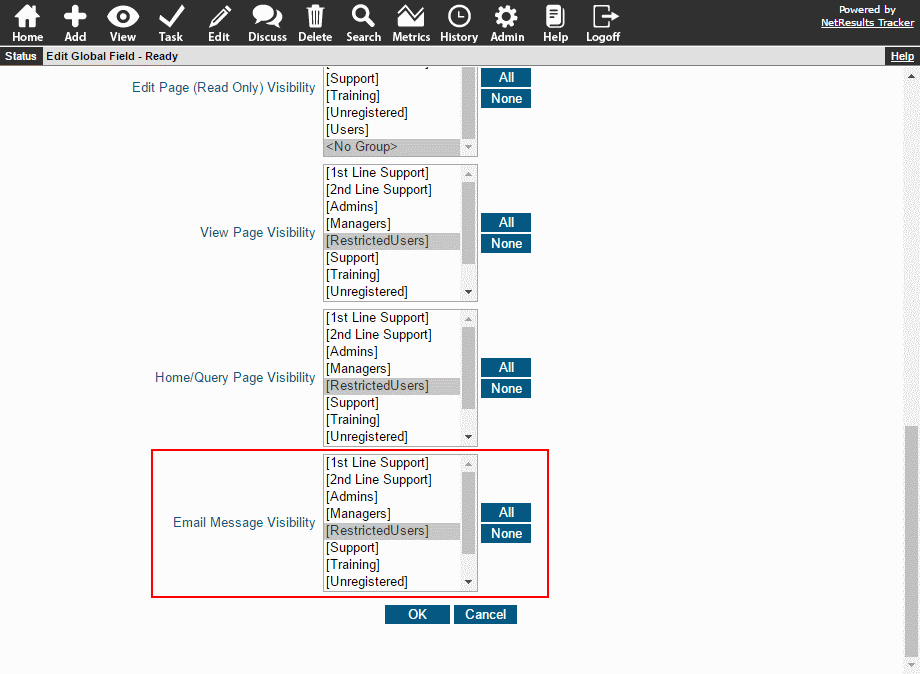
Email Visibility

The Signature ends the email and is configured in the Email Common Content section.

Privileges

You can include or exclude parts of the email by setting user group privileges in the Email Content section. You can include a Link to login and see the record and the History Comment that was entered when the record was processed (if applicable).
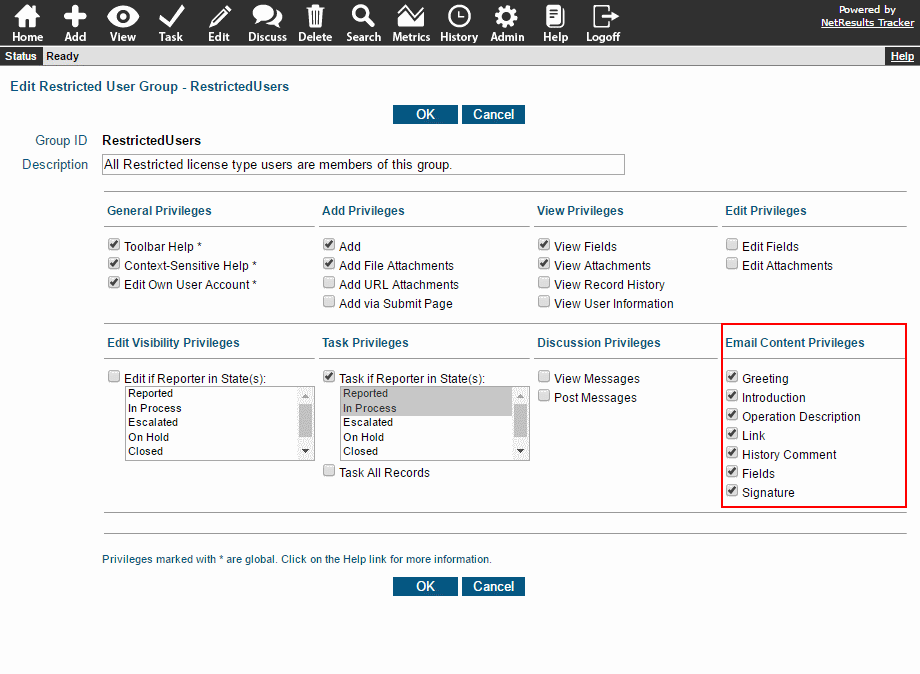
Email Privileges

Variables

Variables can be included in the Subject and Body options. For example, you can include the name of the user assigned to the record in the Subject by using <new assignee>. You can also include variables to include the value of a field. For instance, you can list the priority set for the record. The full list of variables is available in the Online Help Guide.