Use Date fields combined with the Alerts feature to manage subscriptions, contracts or other processes that involve expiration dates.

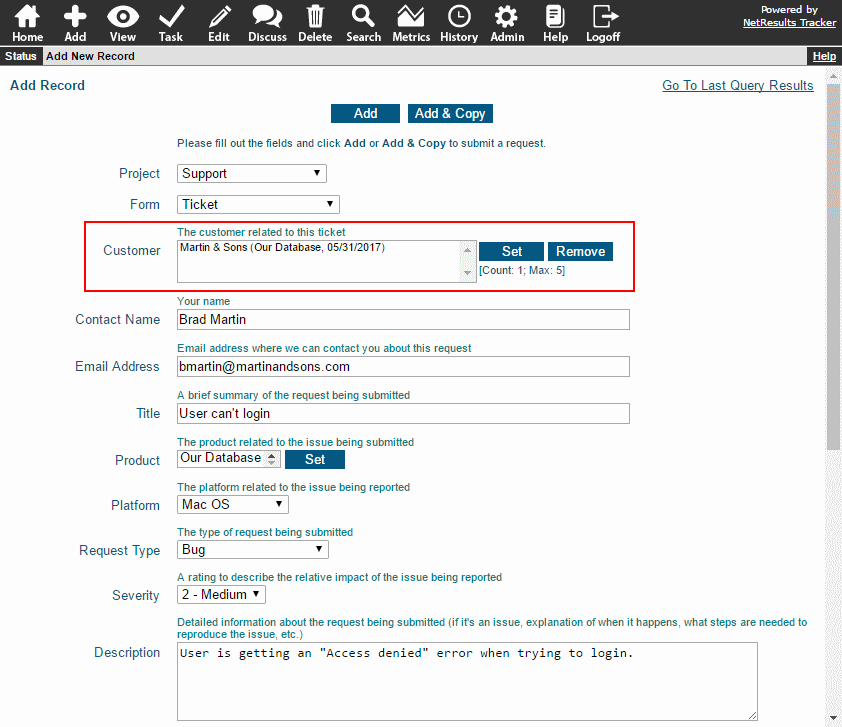
Allow your Help Desk / Support Engineers to see if a customer has a valid contract as part of the ticketing process. In the following sample, there is a form for tracking customer information and another form for ticketing. A link field allows the Help Desk / Support Engineer to associate a customer with a new ticket. The information displayed when searching for the customer includes the expiration date of their service contract. The fields included in the link are the key fields that can be set by editing a form's properties.

Expiration Date

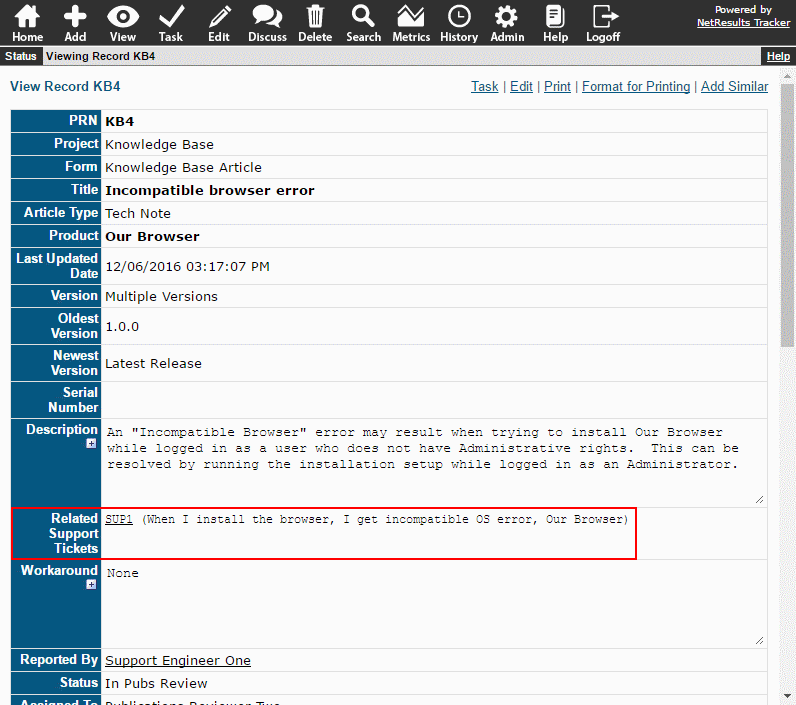
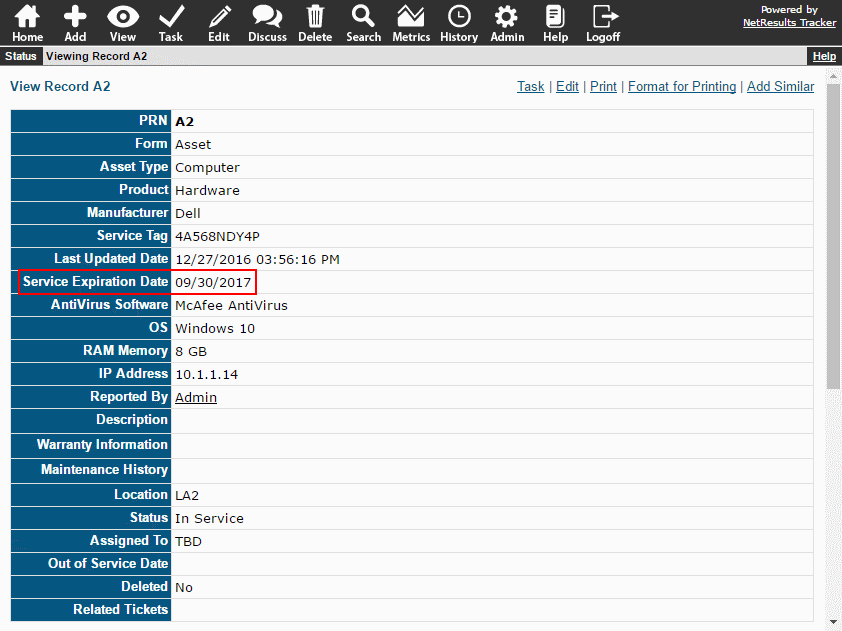
Tracking asset service / warranty dates is another similar example. The expiration date is listed with other details about the asset in the View Page.

Asset Service Date

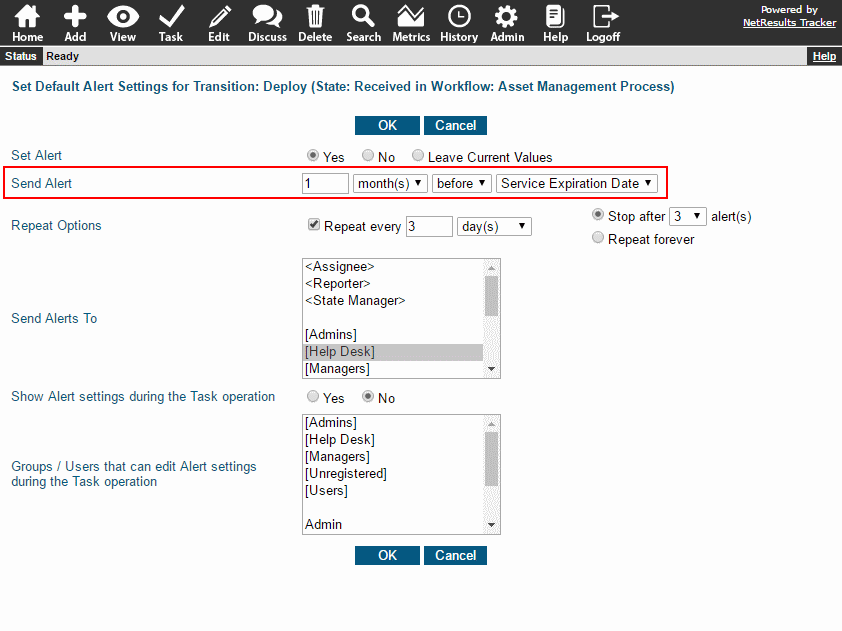
You can configure reminders before the expiration date using the Alerts feature.

Asset Alerts

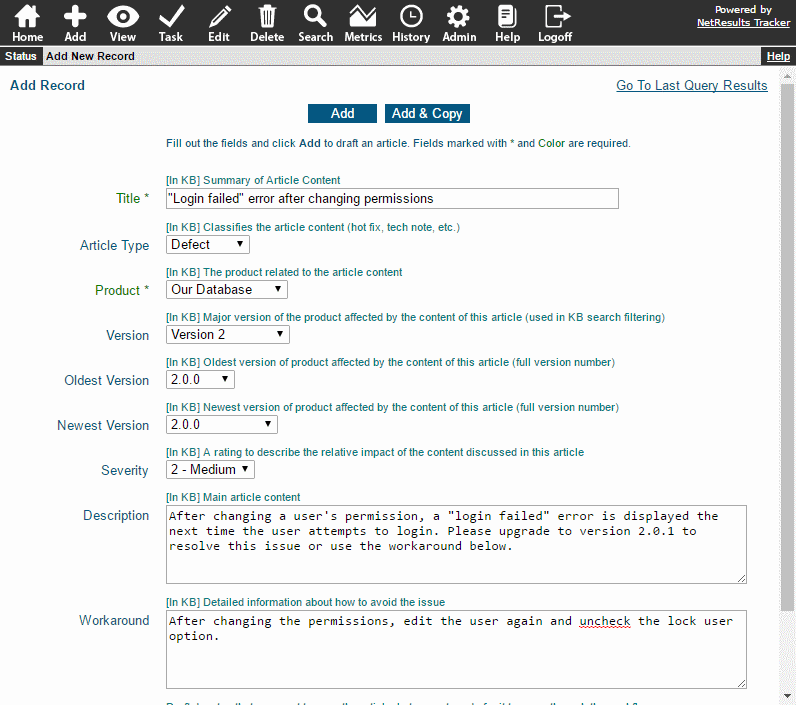
To add a Date field:

  1. Login as Admin and click on the Admin icon.
  2. Click on the Fields link.
  3. Click on the Add Field button.
  4. Select Date and click Continue.
  5. Use the information in the Date field properties section to configure the field, then click OK to save it.

Then, set Alerts on a transition to trigger reminders.

Use Metrics to review your process and find steps that can be improved.

A workflow step that involves testing or approval is an easy place to start. For example, you can run a chart that shows how many fixes have been rejected by QA.

Fixes Rejected By QA

This is done using the chart option that calculates how many records moved from one state to another. You can break the data down by a pulldown as we've done with Product.

Chart Options

Reviewing the data can help you identify categories or trends. You may find it helpful to create a pulldown field that categorizes the reasons for rejecting a fix so that reports can be run against that criteria. You can use this field to break down the chart data even further.

Reject Reason

Detailed steps for creating a chart can be found in the Online Help Guide.

Run a chart that shows you how many tickets were reported against each component.

Tickets By Component

Charts have the option to show a calculation for each value in a pulldown field. You can even break down the data by a second pulldown like Sub-Component.

Chart Criteria

Steps for saving a chart can be found in the Metrics section of the Online Help Guide.

Duplicate requests are inevitable. Use a link field to connect duplicates to the original record.

The link field displayed on the View Page of a record marked as a duplicate is a clickable link to view the details of the original record. The link in this example includes the status of the original record ("Released").

View Page with Link to Original Record

When viewing the original record, you can see links to any duplicates.

View Page of Original Record

Add a Link Field

  1. Login as Admin and click on the Admin icon.
  2. Click on the Fields link.
  3. Click on the Add Field button.
  4. Select "Link" as the type, then click Continue.
  5. Enter a Label for the field (e.g. "Duplicate Of" as this is where the original record will be selected). For "To Forms", select the form used to report issues. For "Add Page Visibility", select "None" since this field should not be available on the Add Page). Make selections for the rest of the options using the information in the Link field section of the Online Help Guide.
  6. Click Continue.
  7. Enter a Label for the Reverse Link (e.g. "Duplicated By" as this field will show any duplicates linked to the record). For "Allow Link Items to be Set", you can select "Yes" if you would like to be able to modify the original record to link duplicates.
  8. Click OK to save the field.
  9. Click on the Manage Forms for this Field button.
  10. Select the form used to report issues, then click Add.

Add a Link Field

Add a Workflow Transition

Create a workflow transition for marking a record as a duplicate in the step where records are dispositioned.

Mark a Record as a Duplicate

If desired, you can create a "Duplicate" state and route the records to it:

  1. Login as Admin and click on the Admin icon.
  2. Click on the Workflows link.
  3. Click on the Global States button.
  4. Click on the Add State button.
  5. Enter a Name and Order for the new state and click OK.
  6. Click OK after the new state has been saved.
  7. Click OK again to return to the Workflows section.

To create the transition:

  1. Login as Admin and click on the Admin icon.
  2. Click on the Workflows link.
  3. In the pulldown at the top, select the desired workflow.
  4. Locate the "States" section and click on Manage link to the right.
  5. If you created a new state, select it and click on the Add button.
  6. Click on the state where records are dispositioned, then click on the Transitions button.
  7. Click on the Add Transition button.
  8. Enter a Name (e.g. "Mark Duplicate") and order. For "New State", select the new state you created (if applicable) or select an existing state (e.g. "Closed"). For "New Assignee", select TBD (no one needs to work on it since it is being marked as a duplicate). For the rest of the options, review the Transition Properties section.
  9. Click OK to save the transition.
  10. Click on the Set Task Fields button.
  11. Select the Link field you created, then click on the Add button.
  12. If desired, set the "Input Type" to "Required" to force the user to link a record, then click on the Update button.

Setting up a Knowledge Base allows end users to get the information they need on their own at any time. Adding this feature to an existing Tracker system can be done a few different ways.

KB Search Page

Add a Form

A Knowledge Base can be added by creating a new form. If you want the KB data to be separate from existing data, you can also create a new project.

KB Form

The advantage of this method is that you can link KB articles to the record that inspired the content.

KB Link Field

For details, please review option 3 in this Knowledge Base article.

Create a New Database

You can set up a new database (workgroup) for your Knowledge Base. This option is the fastest to set up because the project, form and workflow are configured for you. However, the KB data will be completely separate from any existing data.

For more information, check out option 1 in this Knowledge Base article.

KB Add Page

Copy a Record and Publish it to the KB

Use the clone feature to copy a record, make some changes to the fields and publish the copy to the Knowledge Base. The KB article will have a link back to the original record. This option takes some effort to configure, but makes it easy to populate your Knowledge Base using data you already have.

Clone KB Article

Step by step instructions can be found in option 2 of this Knowledge Base article.