Create your own reports or use group reports as a starting point and save them on your Home Page.

Save Your Own Version

Perhaps you want to see different fields in the results or you'd like to add one more piece of criteria. It's easy to add your own twist to a group query:

  1. Login to Tracker.
  2. Click on the Search icon.
  3. Select the report you wish to copy in the "Saved Queries" pulldown at the top, then click on the Add button to the right of the pulldown.
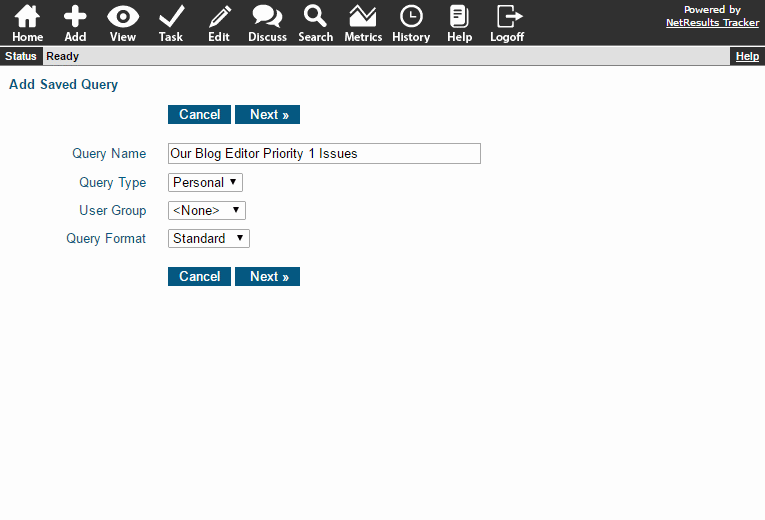
  4. Enter a name for your report, select "Personal" for Query Type, choose the Query Format and click Next.
  5. The criteria from the report you selected in step 3 will be available. Make any desired changes. To change which fields are displayed, change the Report Layout at the top.
  6. Click Add to save the new report.

Add Report

Create New Reports

The Online Help Guide has detailed information for creating saved queries and metrics.

Include the Reports on Your Home Page

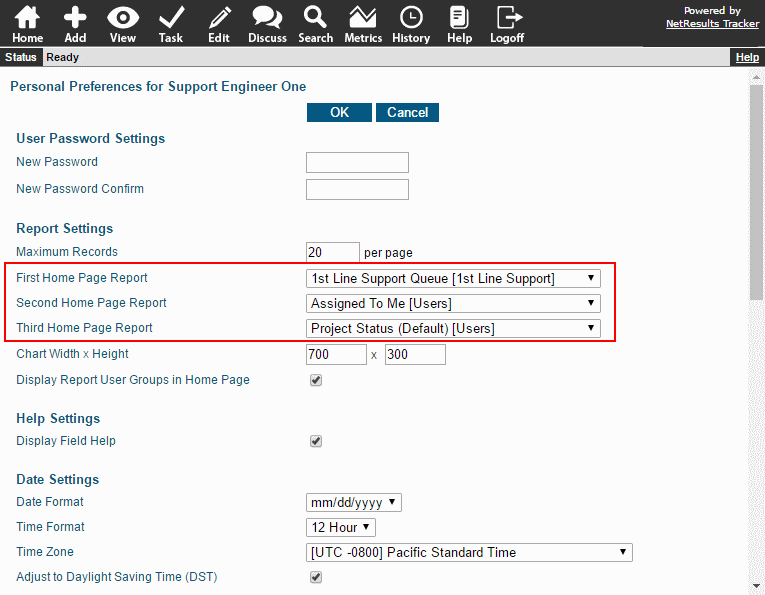
Select which reports are available on your Home Page:

  1. Login to Tracker.
  2. Click on the Preferences link in the upper right.
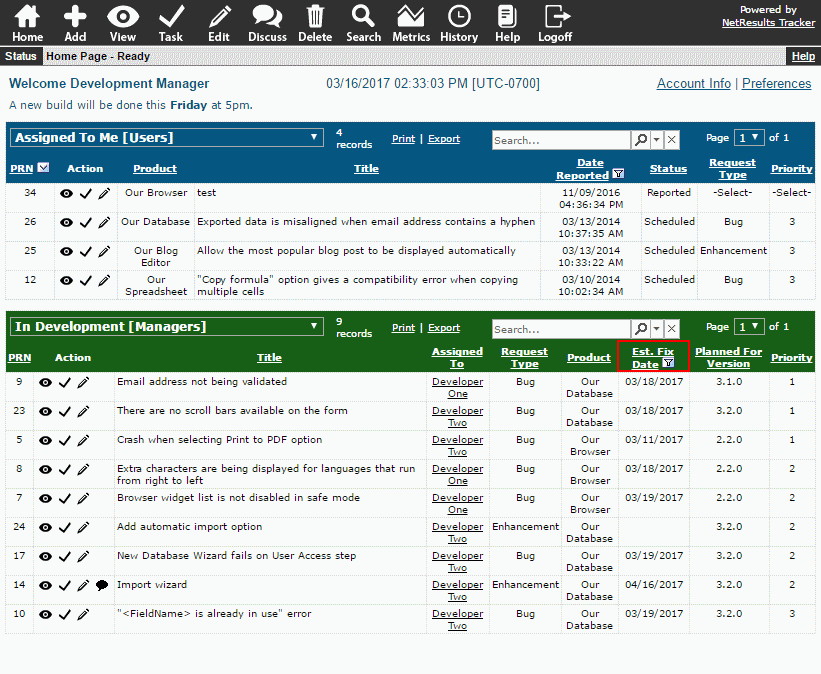
  3. Make selections for the Home Page Reports.
  4. Click OK to save the changes.

Report Preferences

Set the options in the interface for managing users to suit your environment.

The on-premises version of Tracker includes access to the User Management System (UMS). You can create, edit or delete user accounts as well as manage their access to different workgroups (databases). Let's take a look at different configurations for the options available in this interface.

Single Workgroup

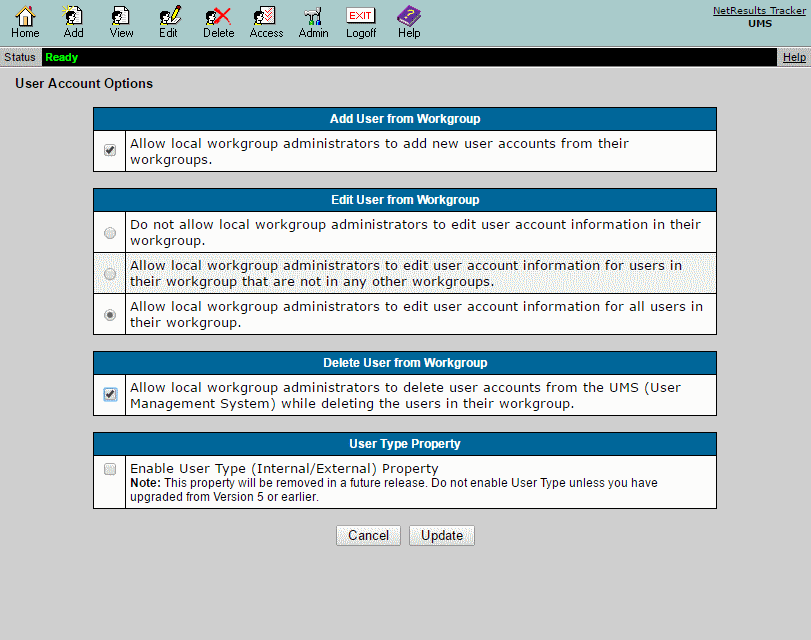
If you only have one workgroup (database), you can set the options as shown below such that users can be added and deleted from the workgroup so the administrator does not need to login to UMS to perform these actions. For the Delete User From Workgroup section, if you would like a user to also be deleted in UMS when they are deleted in the workgroup, check the box for that option.

Singe Workgroup Settings

Multiple Workgroups or Multiple Administrators

The following are the recommended settings if you have:

  • more than one workgroup (database) or
  • multiple administrators (one admin handles Tracker upgrades, multiple workgroups with different administrators)

To allow a user to access a workgroup, there are two steps that need to occur:

  1. The user needs to given access to the workgroup
  2. The user needs to be added to the workgroup

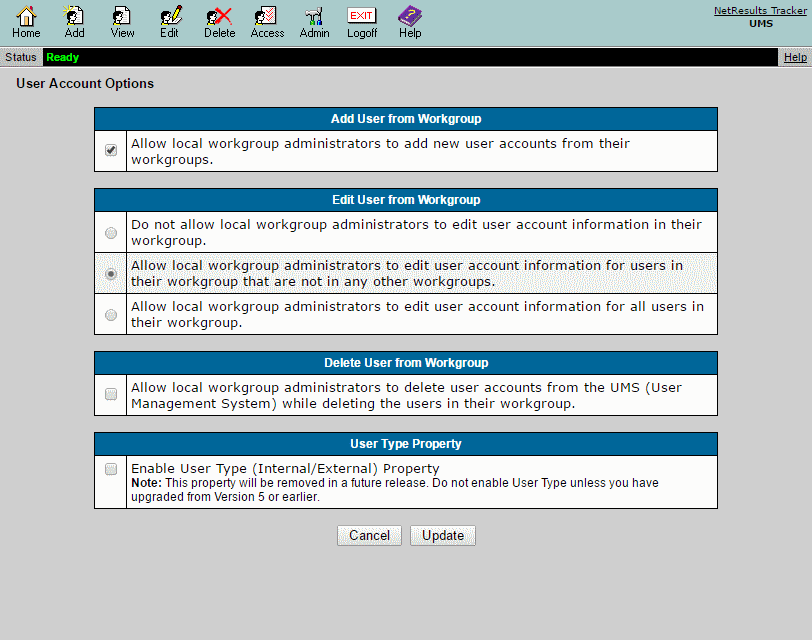
If you want to allow the workgroup administrator to add users without having to login to UMS (perform both steps listed above), check the box for the Add User From Workgroup option. Or, you may prefer to restrict the ability to add users to only an administrator with access to UMS by leaving this option unchecked. That way, the UMS administrator can either:

  • perform both steps needed to give the user access to workgroup

or

  • they can just give access to the workgroups. Then, each workgroup admin can add the users to the workgroup (and subsequently give them the appropriate privileges) when they are ready.

Multiple Workgroup Settings

For more information on these options, please review the User Account Options section of the Online Help Guide.

Take advantage of options available for using terminology specific to your process or project.

Login Page

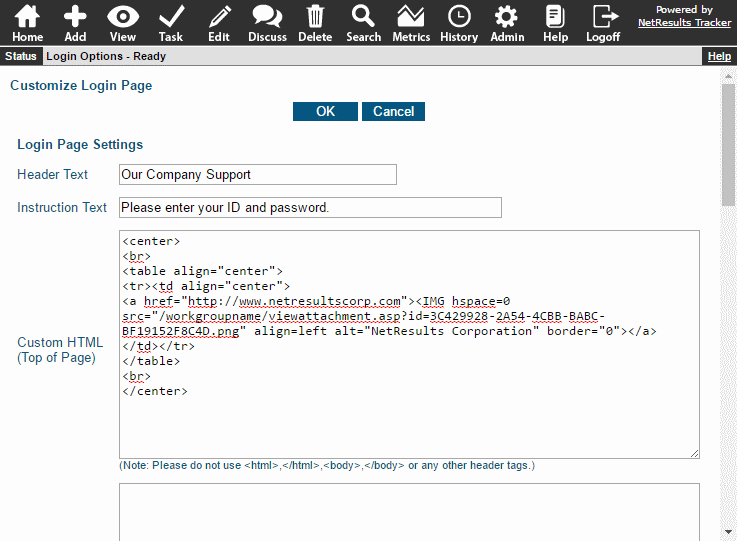
The first page end users see can have your logo and some instructions. You can also customize the Page Title displayed in the browser tab.

Login Page

Login Page Settings

Custom text can also be included on other external facing pages such as the Submit Page and Knowledge Base.

To set the Login Page settings:

  1. Login as Admin and click on the Admin icon.
  2. Click on the Login Options link.
  3. Make the desired changes and click OK to save them.

Home Page Message

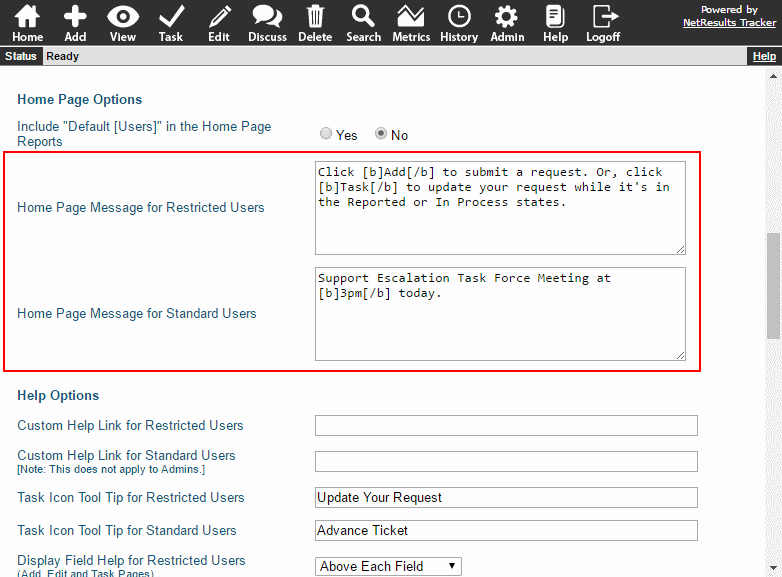
Enter a Home Page message for your end users. You can show a different message for Standard and Restricted users.
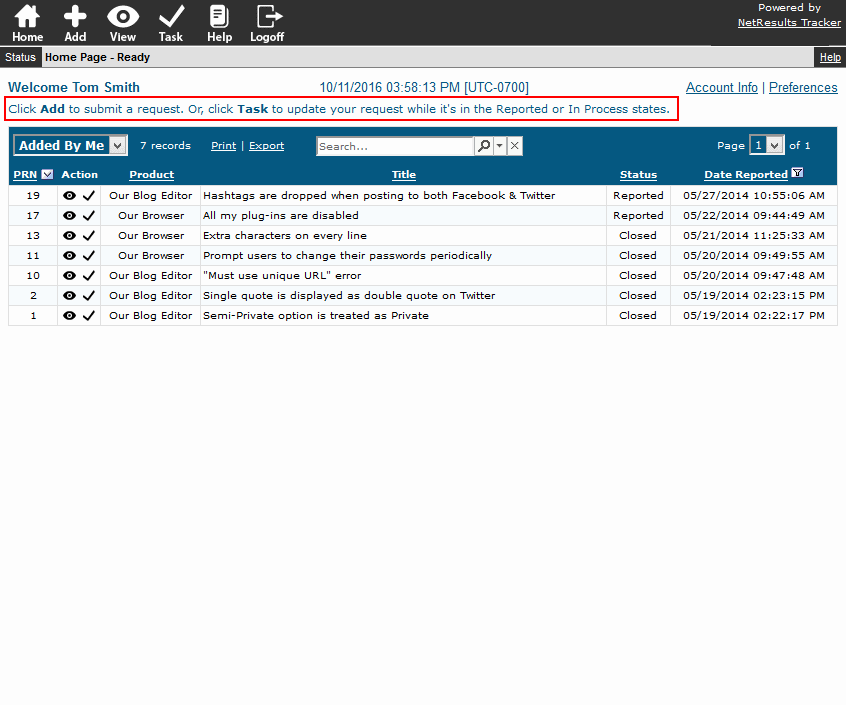
Home Page Message

Home Page Message Options

To set the Home Page message:

  1. Login as Admin and click on the Admin icon.
  2. Click on the General Preferences link.
  3. Scroll down to the Home Page Options section.
  4. Enter the Home Page messages for Standard and/or Restricted users. You can use format tags such as bold, italics, etc. to enhance your messages.
  5. Click OK to save them.

Add & Edit Page Instructions

You can include some instructions at the top of the Add & Edit pages.
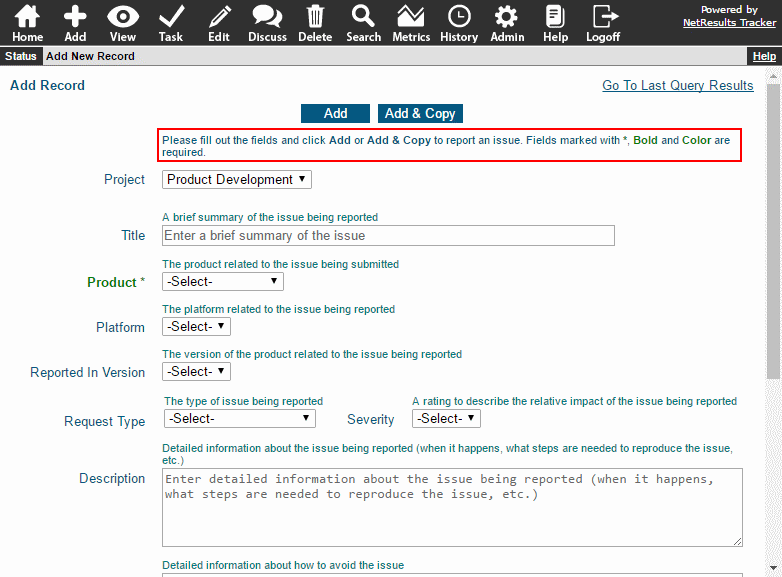
Add Page Message

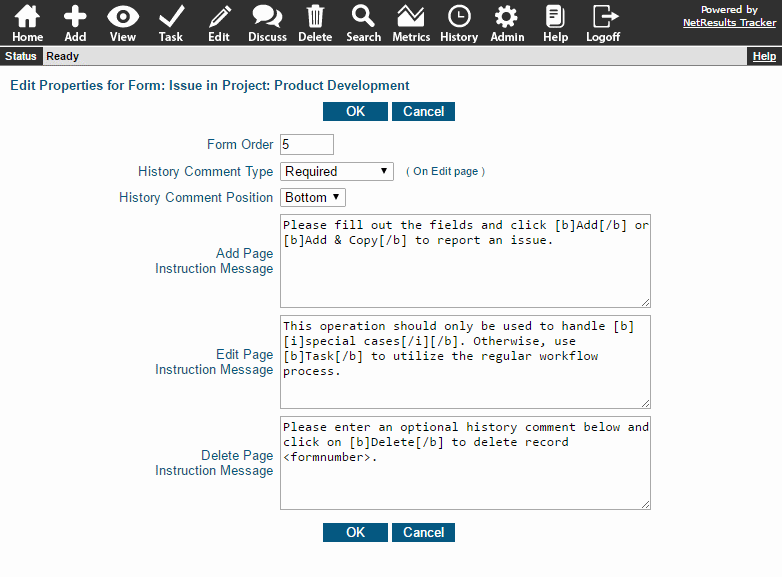
Each form can have its own set of instructions.
Form Properties

To add instructions to the top of the Add & Edit pages:

  1. Login as Admin and click on the Admin icon.
  2. Click on the Projects link.
  3. Locate the Forms section and expand the desired form.
  4. Find the entry called Other Properties and click on the Edit link to the right.
  5. Enter the instructions. You can use format tags such as bold, italics, etc. to enhance the text.
  6. Click OK to save the changes.

Workflow

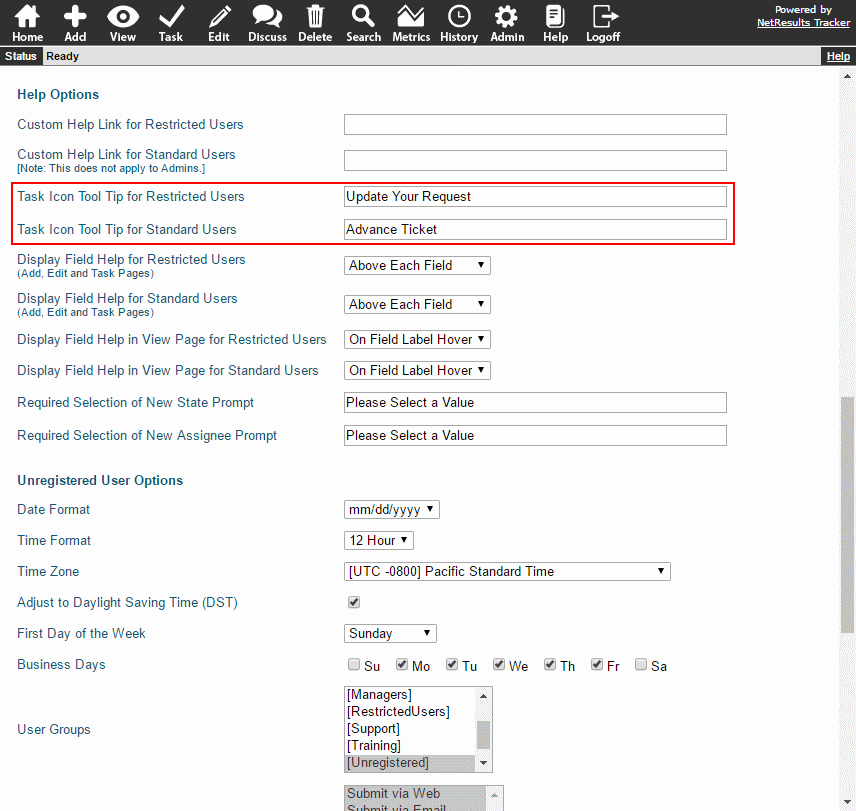
You can use your own wording for the tool tip for the Task icon. The tool tip can be different for Standard and Restricted users.
Tool Tip Options

To change the tool tip:

  1. Login as Admin and click on the Admin icon.
  2. Click on the General Preferences link.
  3. Scroll to the Help Options section.
  4. Set the tool tip for Standard and/or Restricted users.
  5. Click OK to save the changes.

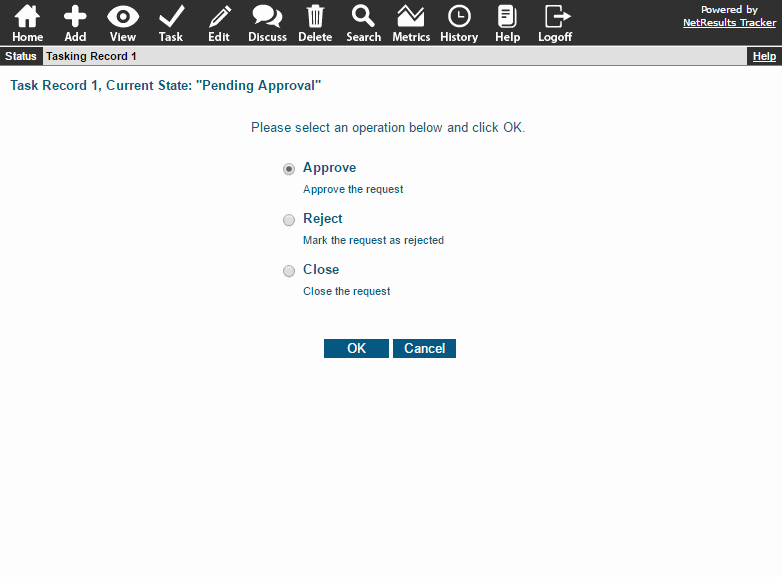
Instructions can be displayed above the transition list for each state in a workflow. Customize the name and descriptions of the transitions presented to the user when selecting a transition.
Task Instructions

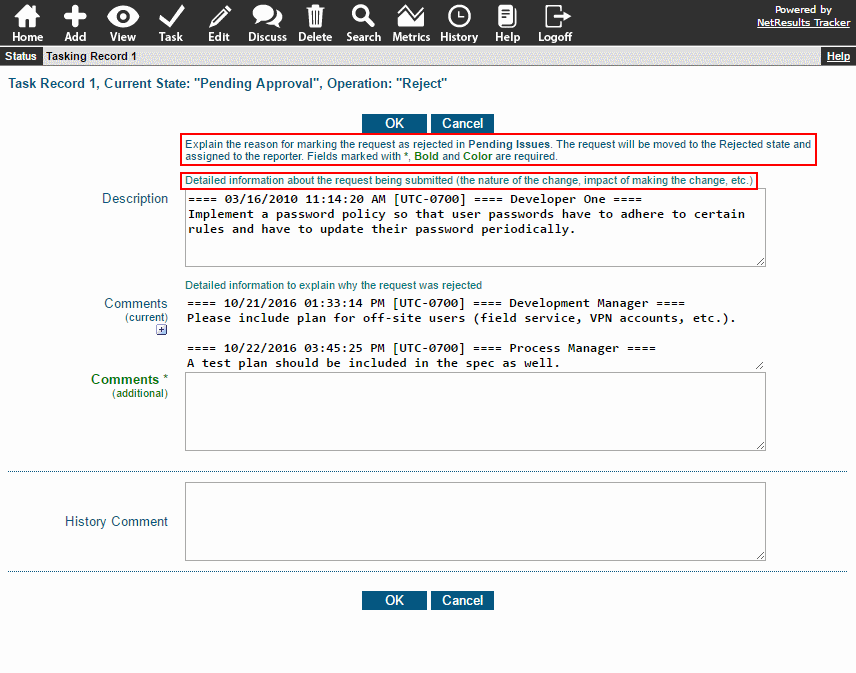
Each transition can have instructions in addition to the help description available for each task field.
Transition Instructions

To set the instructions for a state:

  1. Login as Admin and click on the Admin icon.
  2. Click on the Workflows link.
  3. Click on the Global States button at the top.
  4. Click on the Edit button to the left of a state.
  5. Enter your text into the Instruction Message box. You can use format tags such as bold, italics, etc. to enhance the text.
  6. Click OK to save the changes.

To set the name and descriptions of a transition:

  1. Login as Admin and click on the Admin icon.
  2. Click on the Workflows link.
  3. Click on the Manage link to the right of States.
  4. Click on the state that contains the transition you want to modify, then click on the Transitions button.
  5. Click Edit to the left of the transition you want to change.
  6. Make changes to the Name, Help Description or Task Page Instruction Message. You can use format tags such as bold, italics, etc. to enhance the text.
  7. Click OK to save the changes.

To set the Help Description for a field:

  1. Login as Admin and click on the Admin icon.
  2. Click on the Fields link.
  3. Click on the Edit button to the left of the field.
  4. Make changes to the Help Description. You can use format tags such as bold, italics, etc. to enhance the text.
  5. Click OK to save the changes.

Email Rules

Tailor the text in your email rules to suit the recipients.
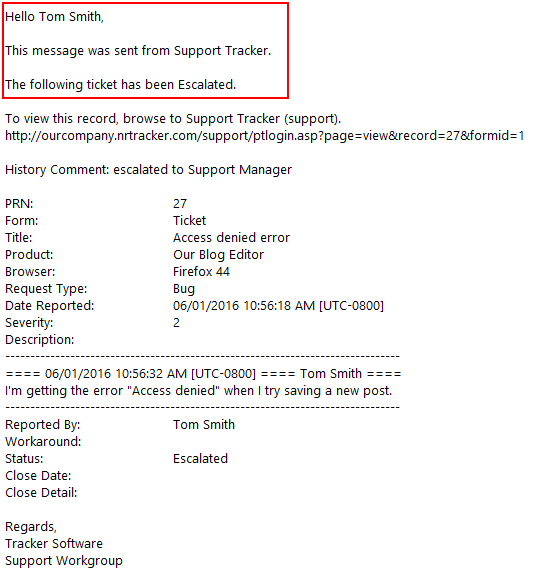
Sample Email

Email Rules

To set the Greeting, Introduction and Signature included in email notifications:

  1. Login as Admin and click on the Admin icon.
  2. Click on the Workflows link.
  3. Locate the Forms section and expand the desired form.
  4. Click on the Manage link to the right of Email Common Content.
  5. Make any desired changes and click OK to save them.

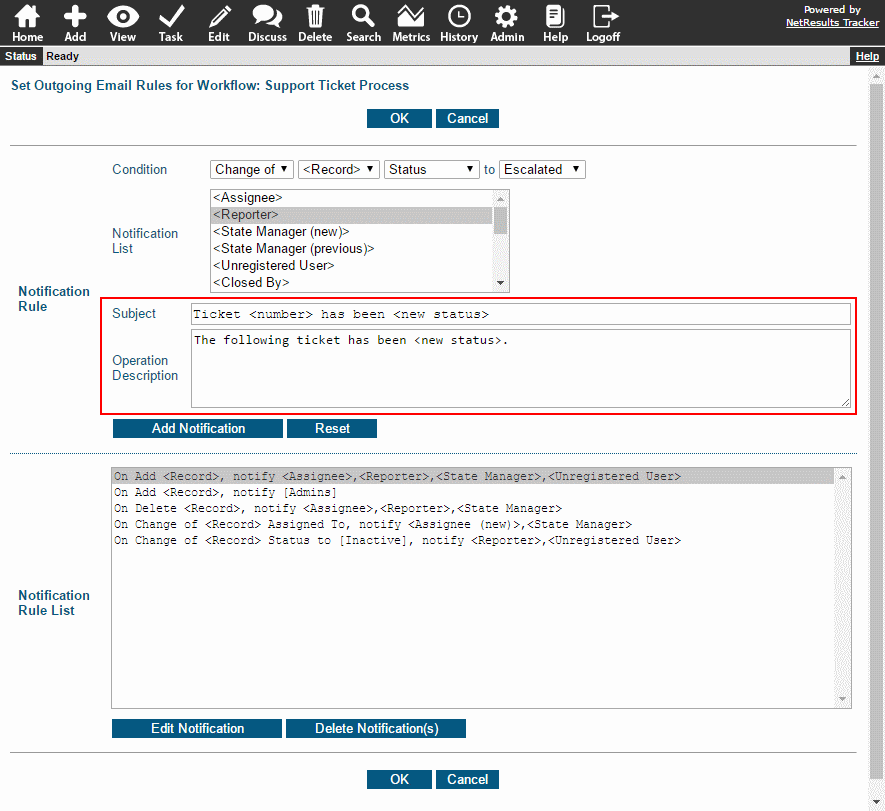
To customize the subject and body included in an email rule:

  1. Login as Admin and click on the Admin icon.
  2. Click on the Workflows link.
  3. Click on the Manage link to the right of Outgoing Email Rules.
  4. Double-click on a rule in the Notification Rule List.
  5. Make changes to the Subject and Operation Description (included in body of message). You can include variables or field values.
  6. Click on the Update Notification button to save the rule.
  7. Repeat steps 4-6 to modify any other rules.
  8. Click OK to apply all of the changes.
Doing one quick step before creating a user will ensure they start with a good setup.

Check Default User Preferences

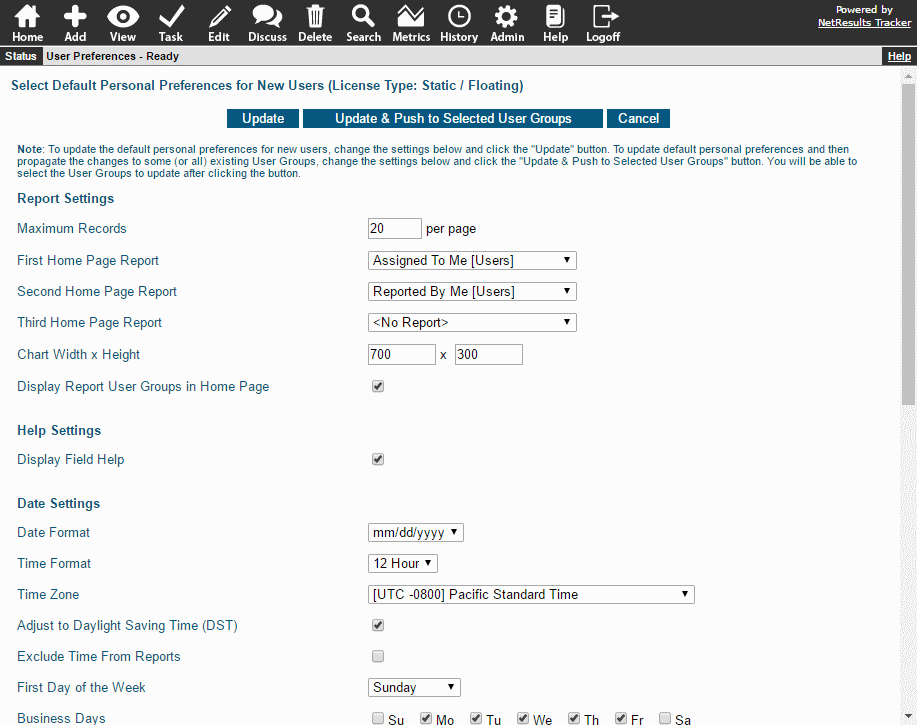
Take a look at the default reports, time zone settings, etc. the new user will inherit. This step is especially important if you're adding a large block of new users.

Default User Preferences

To check the Default User Preferences:

  1. Login as Admin and click on the Admin icon.
  2. Click on the User Preferences link.
  3. Select the User License Type, then click Continue.
  4. Check the settings. Make any desired changes and click Update. If you want to change the settings to what they were before, you can add the new users, then come back and use these steps to change the settings back.

Add a User

  1. Login as Admin and click on the Admin icon.
  2. Click on the User Accounts link.
  3. Click on the Add User button.
  4. Fill out the profile information. User ID, Password, First Name are required fields. Email Address is not required, but is recommended so the user can receive email notifications.
  5. Click the Add New User button to save the user.

Adding a User

More information is available in the Users section of the Online Help Guide.

Use a filter to zero in on records in a specific date range on reports.

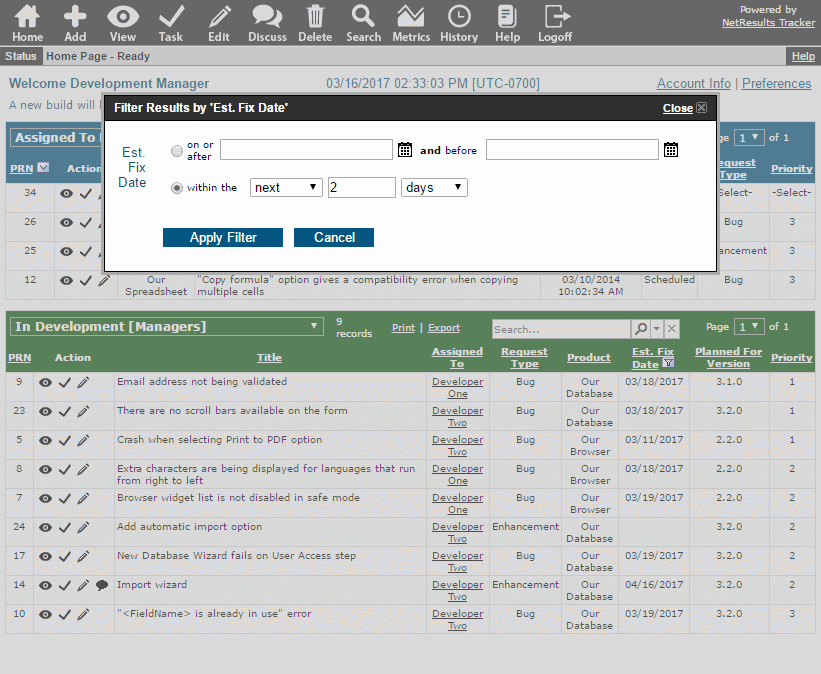
Want to see items that are due within the next few days or which requests came in last month? Use the filter available in the column heading of a Date field.

Date Filter

Click on the filter to make selections. You can enter a start and/or end date for a date range. Or, you can use the relative option.

Filter Options

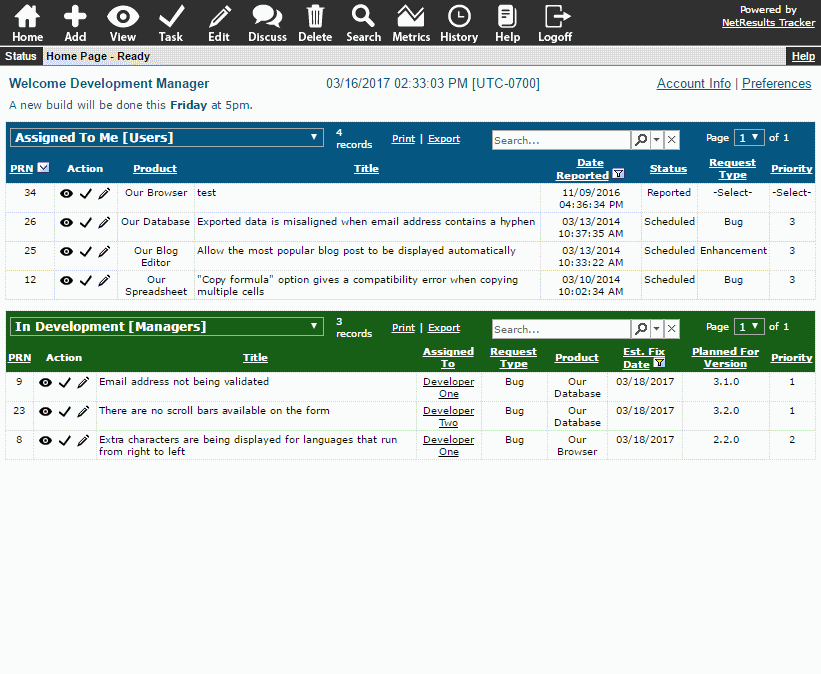
Here are the filtered results. To remove the filter, click on the icon again and click on the Remove Filter button.

Filtered Results