Make use of the versatile reporting options available for link fields.

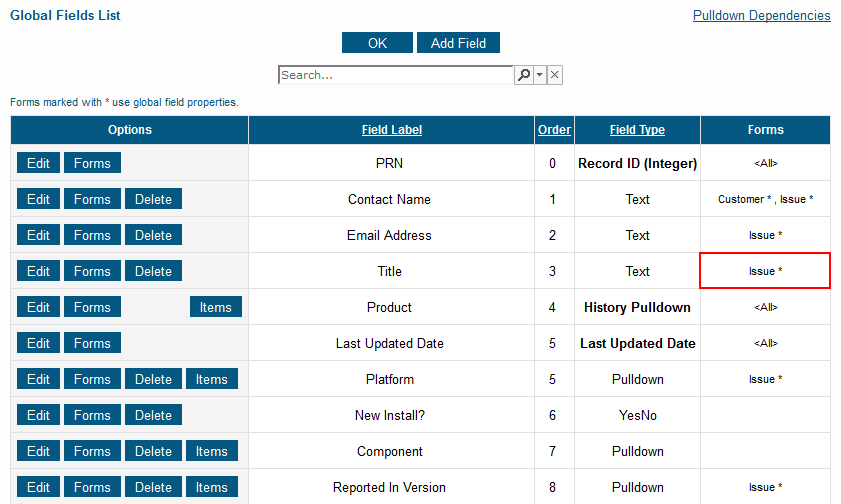
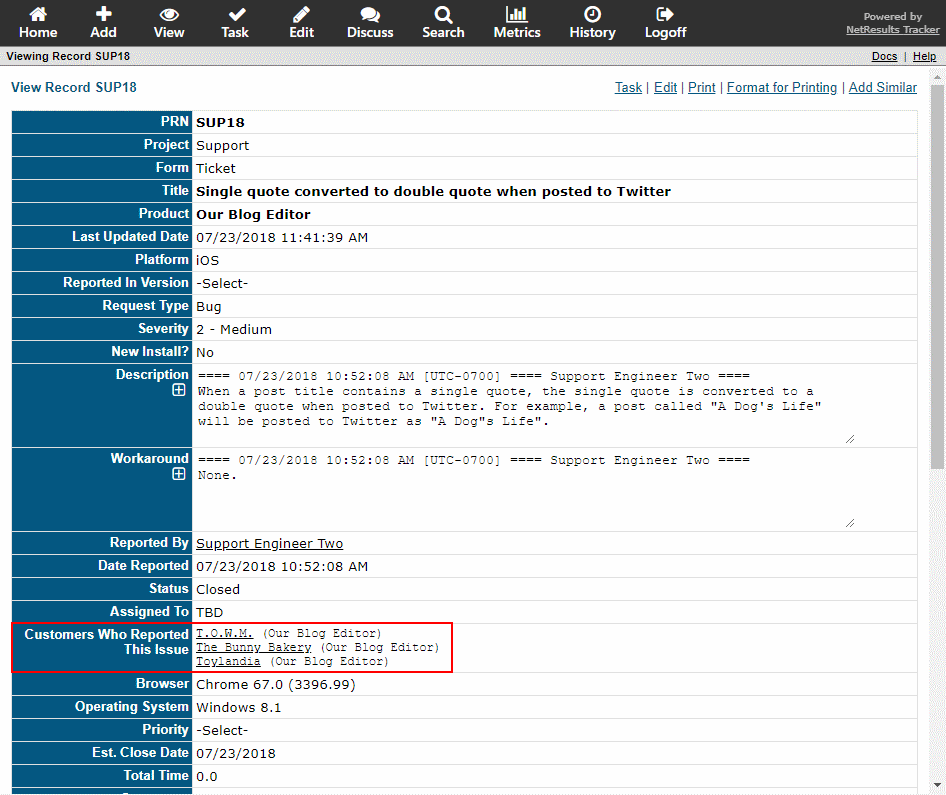
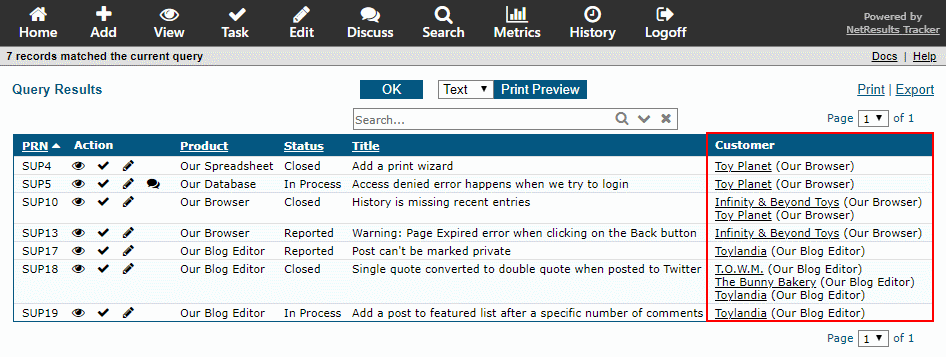
Link fields allow you to cross-reference records. For example, in a system where customers are reporting product issues, you may have a form for tracking information about each customer (products they purchased, contact information, support contract dates, etc.) in addition to the issue/ticket form they use to report issues. Below you can see a ticket, which includes a list of customers who reported the same issue. There are different options for running reports with these links.
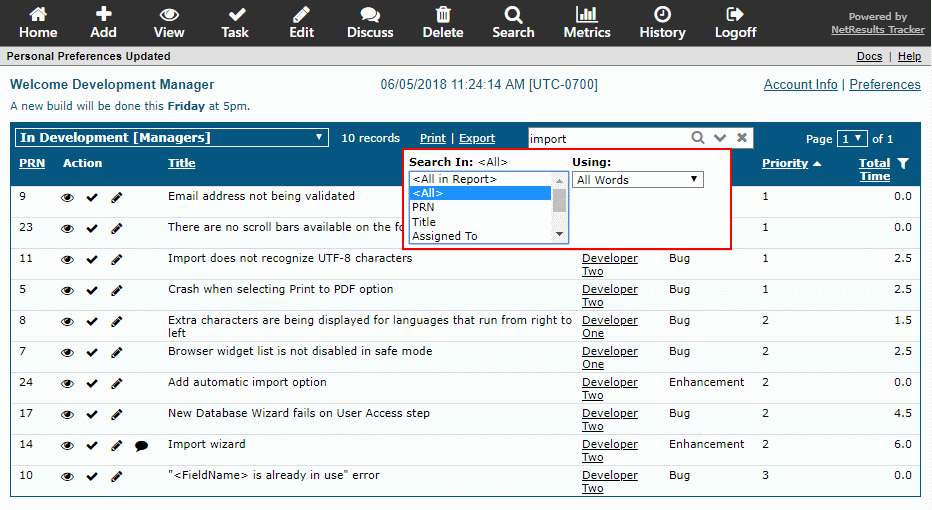
Customers Who Reported This Issue

Key Word Search

Use the "contains" option to search for tickets where the linked record includes the key word in its key fields.

Key Word Search in a Link

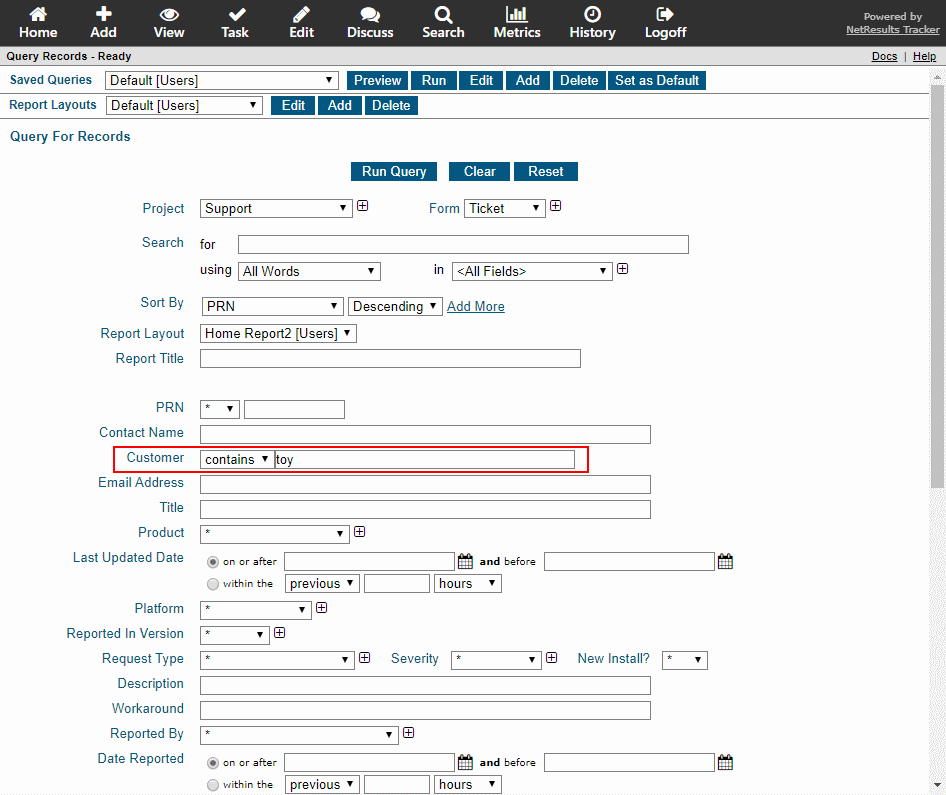
The key fields of the linked record are the fields displayed in the link; "Company Name (Product)" in the example below.
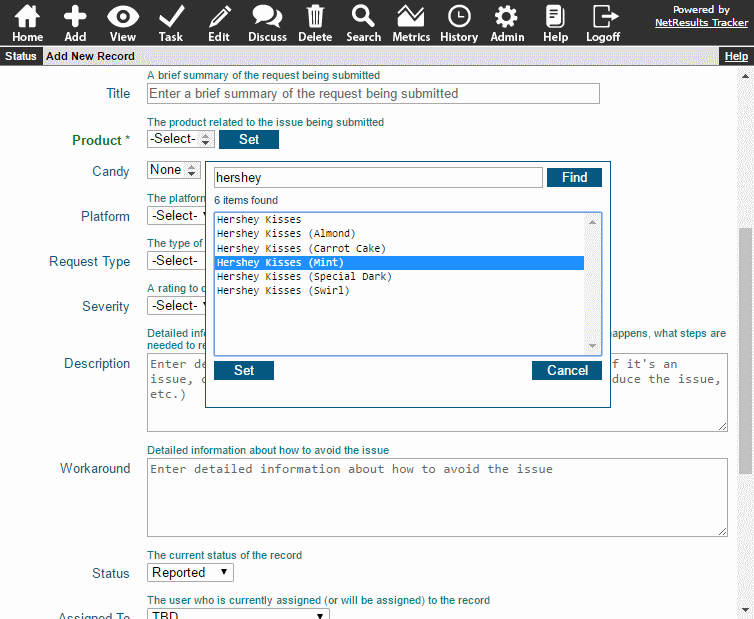
Key Word Search Results

Specific Links

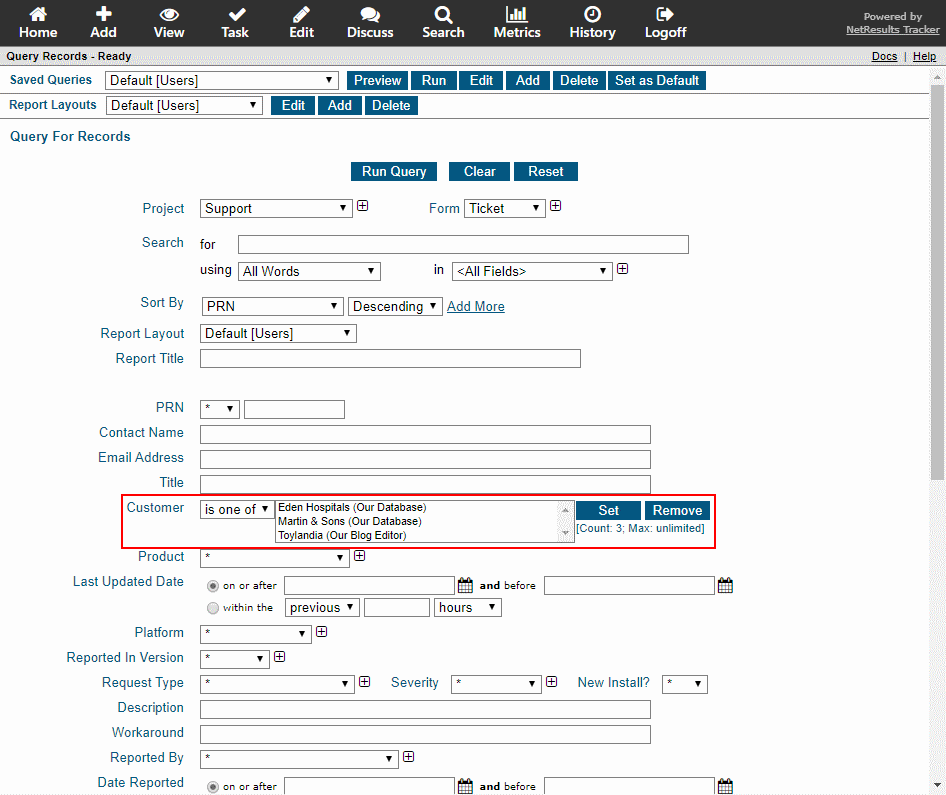
Find tickets linked to one or more specific customers using the "is one of" option.

Find Specific Links

Match to the Results of a Query

Locate tickets linked to the results of a saved query. For instance, find all tickets reported by Western Region Customers.

Match a Saved Query

More information can be found in the Querying Records section of the User Help Guide.

Tracker has a lot in common with the beautiful game's biggest tournament.

FIFA World Cup 2018

Unite People Without Having to Be in the Same Location

You can enjoy the World Cup from the comfort of your own device. The same is true of Tracker. All you need is a browser to access it from anywhere in the world. You don't need a conference room, you don't need a meeting...just login and see what's happening.

See the Stars and Learn New Tricks

Your organization's departments have their own Messi, Neymar or CR7. Tracker gives you a front row seat to their jawdropping customer saves and out-of-the-box solutions. A Tracker report can serve as a meeting agenda for a weekly/monthly staff meeting to review noteworthy actions.

You can also learn what not to do. Since Tracker has a complete & searchable audit trail, it's easy to conduct a post-mortem when needed.

Anything Can Happen

A reversal of fortune can happen in a single flick of the ball in stoppage time. Tracker's alerts & email notifications help you stay on top of changes so you can respond immediately.

Show fewer fields for a cleaner report while still searching within all.

In Versions 7.1.0 and newer, you can search within all fields directly from report results on the Home or Query pages.

Search All Fields

In previous versions, users would add many fields to a report layout so they could be searched. Cluttered reports take longer to load. We recommend including a maximum of 5 or 6 fields on a Home Page report.

To change a Home Page report:

  1. Login to Tracker
  2. On the Home Page, take note of the name of the report you'd like to change.
  3. Click on the Search icon.
  4. In the Saved Queries pulldown, select the desired report. The Report Layouts pulldown below it will be updated to show the layout associated with the report you selected.
  5. Click on the Edit button to the right of the Report Layouts pulldown.
  6. To remove a field from the report layout, select "<Do Not Use This Column>". Update the layout such that only 5 or 6 fields are displayed.
  7. Click OK to save the change.

More information can be found in the Using Saved Queries & Reports section of the User Help Guide.

Choose a display option that works best for the data in your pulldown field.

If You Have 100+ Menu Options...

Search Pulldown

...use Search as the Display Style so you can easily locate the desired option using key words.

To set the Display Style for a pulldown:

  1. Login as Admin and click on the Admin icon.
  2. Click on the Fields link.
  3. Click on the Edit button to the left of the field you wish to modify.
  4. Change the Display Style option and click OK.

Show All of a Short List

Radio Pulldowns

The Radio options show the entire list of menu items.

More information about the properties of Pulldown fields is available in the Admin Help Guide

Create a form that's easy for your end users to fill out.

Keep It Short

Simple Add Page

Figure out the most important data that needs to be collected, but keep it to a reasonable number of fields. End users are more likely to fill out the form if you keep it short and simple.

To set a field so it's not displayed on the Add Page:

  1. Login as Admin and click on the Admin icon.
  2. Click on the Fields link.
  3. Locate the field you wish to modify and check the Forms column.
  4. Check the name of the form where you want to change the field. If there is a * next to the form name, click on the Edit button to the left of the field and proceed to step 5. If there is no * next to the form name, click on the Forms button to the left of the field, then click on the Form name in the left column and click on the Edit button, then proceed to step 5.
  5. Scroll down to locate the field called Add Page Visibility. To remove the field from being displayed on the Add Page for some user groups (while keeping the field displayed for other user groups), hold down the Ctrl button on your keyboard while clicking on user groups to de-select them.
  6. Click OK to save the changes.

Check Form Properties

Show Required Fields First

List required fields at the top of the form so they get filled out first.

To change the order of a field:

  1. Login as Admin and click on the Admin icon.
  2. Click on the Fields link.
  3. Locate the field you wish to modify and check the Forms column.
  4. Check the name of the form where you want to change the field. If there is a * next to the form name, click on the Edit button to the left of the field and proceed to step 5. If there is no * next to the form name, click on the Forms button to the left of the field, then click on the Form name in the left column and click on the Edit button, then proceed to step 5.
  5. Enter a number in Record Order to determine where the field is displayed relative to other fields on the form, then click OK.

Change the Order

Provide a Help Description

Use Field Help

Make use of the Help Description feature to give hints about what goes into each field on the form. You can format the text using tags for bold, italics and more and you can add links to point to a web site page or document that provides additional information.

Check out these posts with tips and more tips to help your end users.