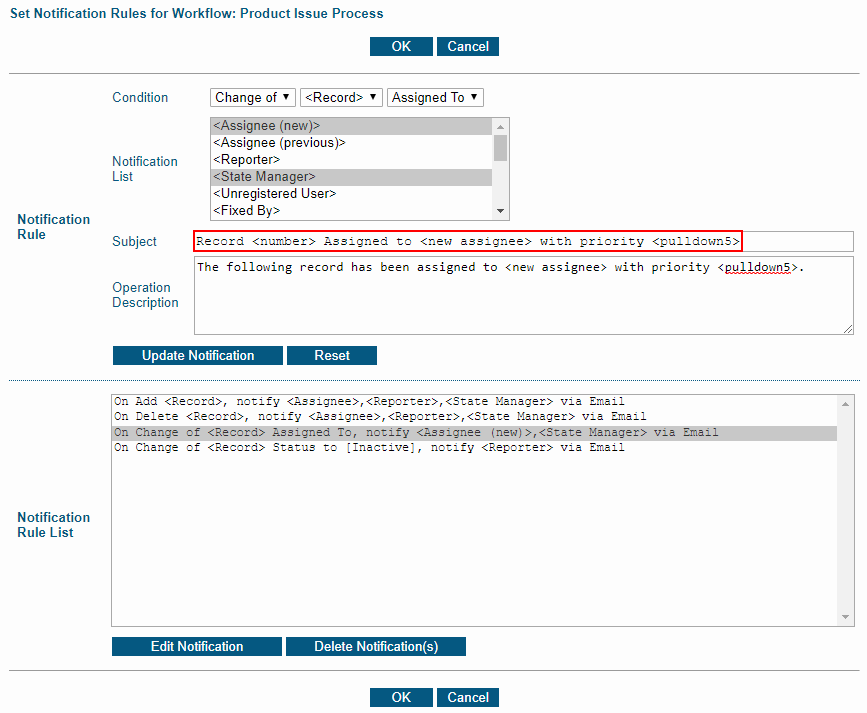
Show a different set of transitions in a step depending on who is processing the record.

Options for Reporter

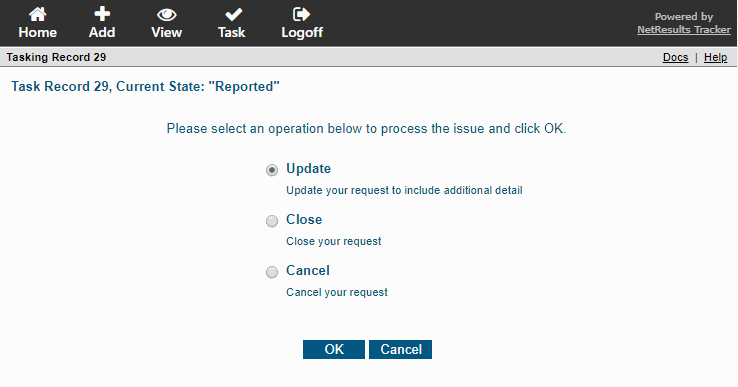
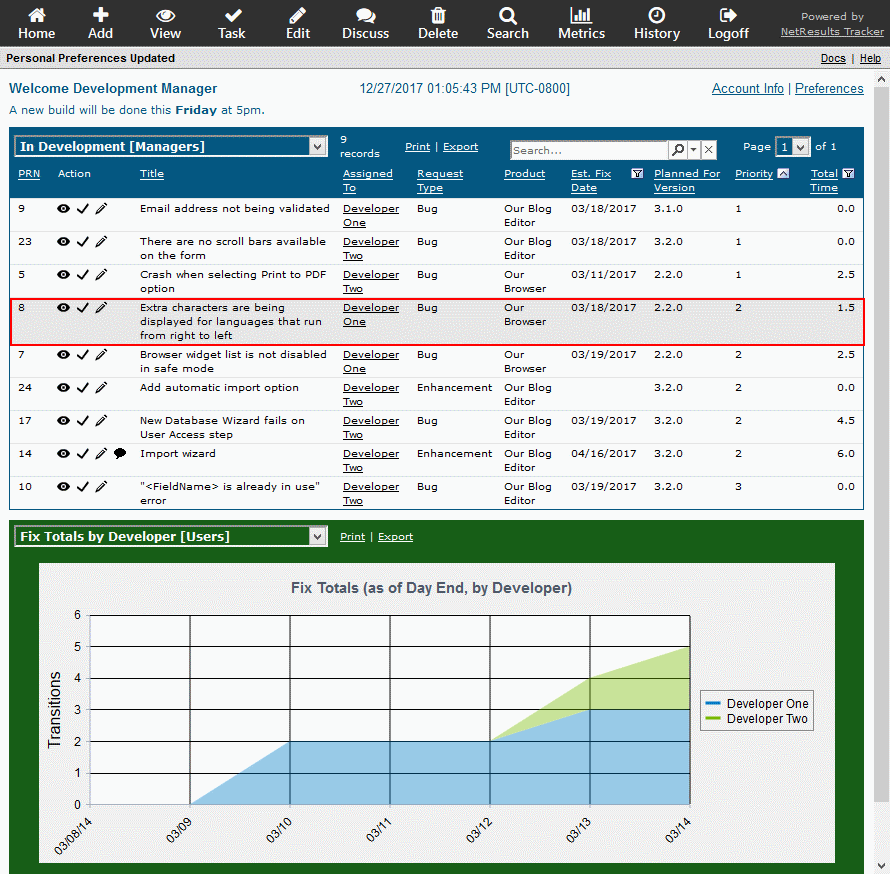
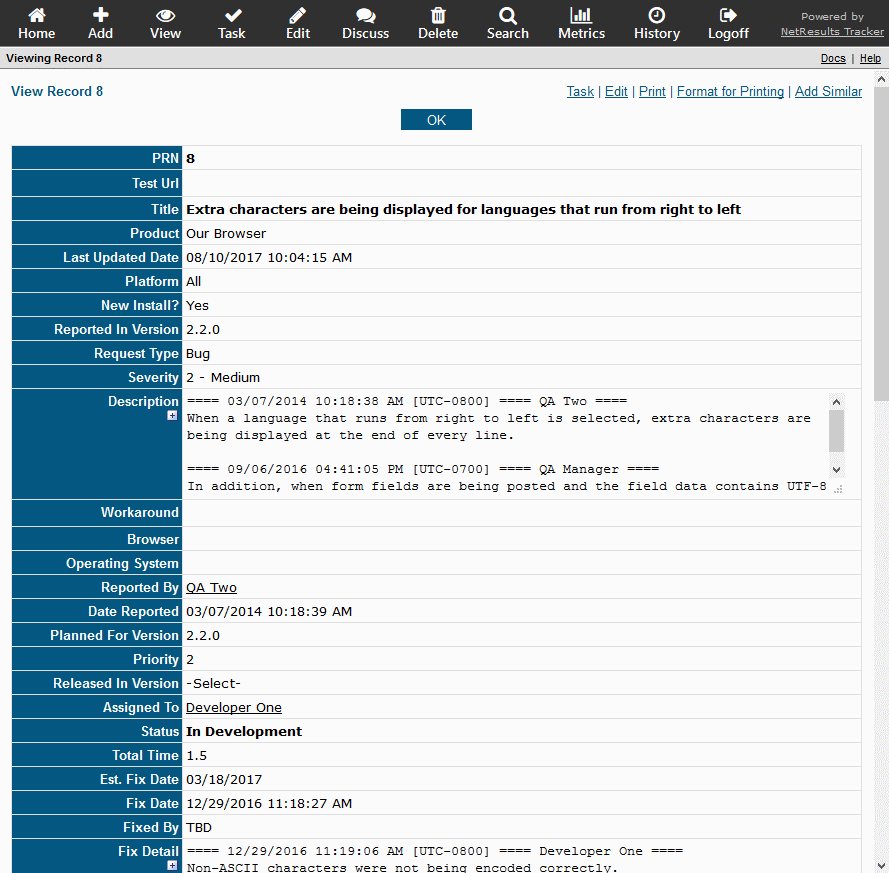
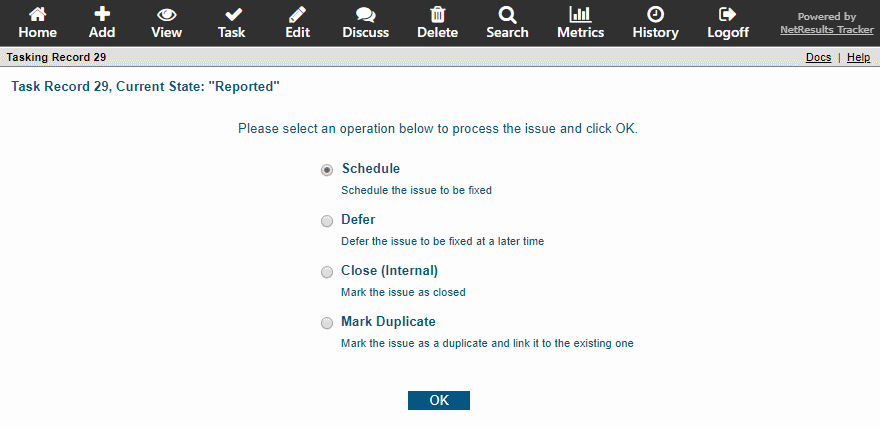
The list above shows the options available for the reporter in a product development process. The image below shows what the process manager sees when processing the same record.

Internal Options

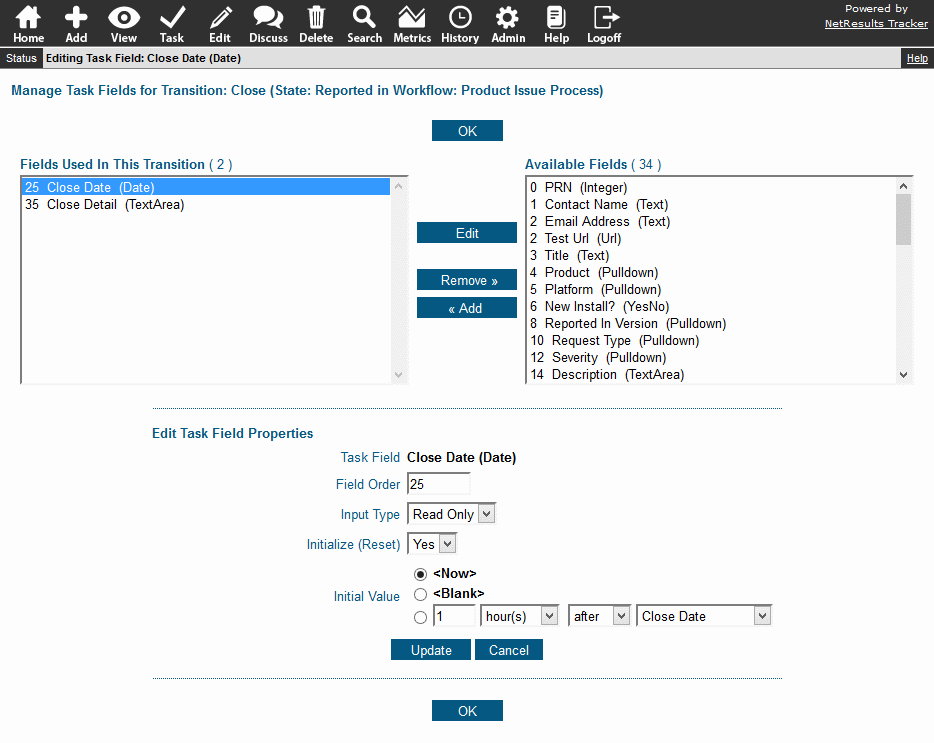
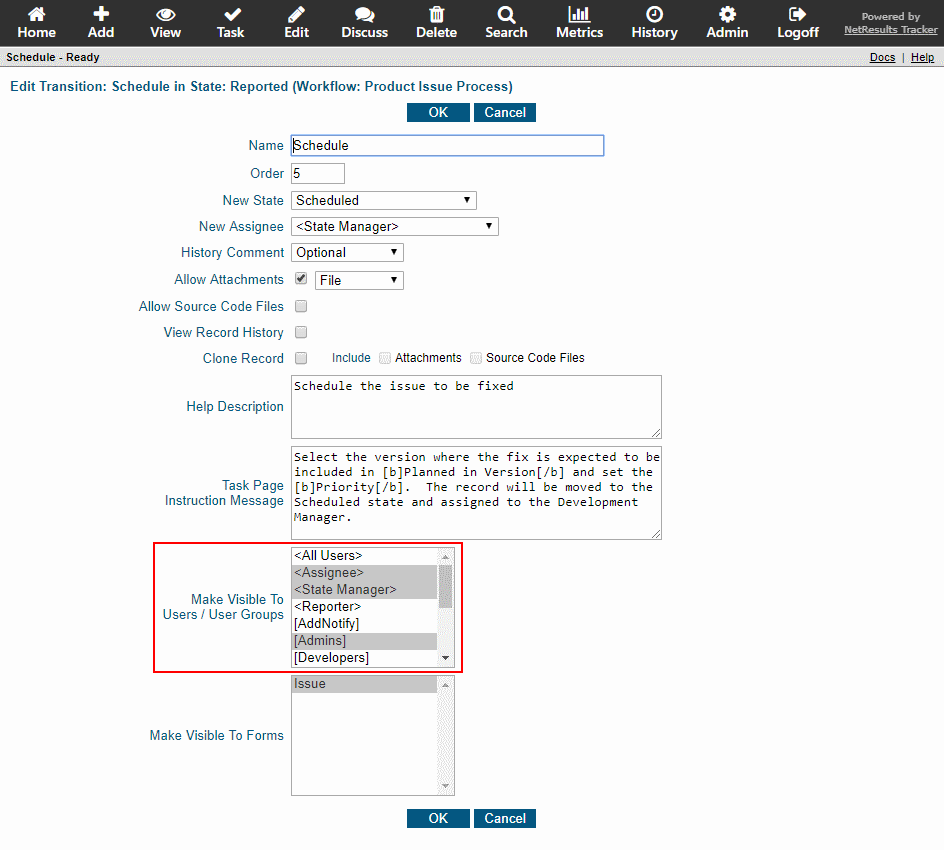
This is configured using Transition Visibility. This can be set in the Make Visible to Users / User Groups option available for each transition.

Transition Options

To configure this option in an existing transition:

  1. Login as Admin and click on the Admin icon.
  2. Click on the Workflows link.
  3. Select the workflow in the pulldown at the top.
  4. Click on the Manage link to the right of States.
  5. Click on the state that contains the transition you wish to modify, then click on the Transitions button.
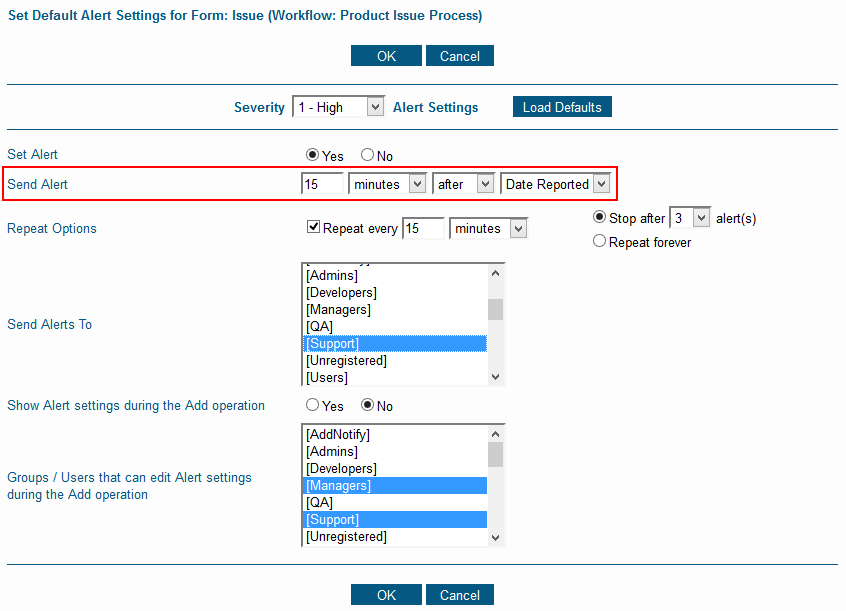
  6. Click Edit to the left of the transition you wish to modify.
  7. Make selections in the Make Visible to Users / User Groups option, then click OK to save the changes.
  8. Since transitions are configured with "<All Users>" selected by default, you'll need to repeat steps 6 and 7 for each transition available in that state.

For more information, please review the Transition Properties section of the Online Help Guide.

Use variables to include details like assignee or priority in the subject line of a notification message.

Use a Custom Subject Line

The subject line of notifications triggered by actions performed in Tracker can be customized to include detail from the record that was modified. For example, the image above shows the subject line of a message that will be sent when a record is re-assigned.

The Admin Help Guide contains a list of variables that can be used in notification rules. The notes below the table explain how to call out other fields not listed in the table (e.g. a pulldown other than status or assignee).

For detailed steps on modifying rules, review the Notification Rules section.

Double-click to view and other new report tricks.

Home Page Report Sample

Double click on a line in a report on the Home or Query pages and you will see the View Page with full details of the record.

View Page

A new Metrics display engine was added to allow charts to be displayed without requiring any browser add-ons or plug-ins. It automatically adjusts the chart layout based on the data at run time. For example, it will add a legend, if needed.

Chart with Legend

You can click on an item in the legend to hide or show it. The data for Developer One is hidden in the chart below.

Chart with Hidden Item

Or, a donut chart will be displayed instead of a pie chart when the calculation is being broken down by an additional parameter.

Donut Chart

These features are available in Version 7.0 or newer. Upgrade information can be found on the downloads page.

Alerts can be sent and repeated in 15 minute increments.

If you're using Alerts to regulate response times, you can trigger notifications in 15, 30 or 45 minute increments in Version 7.0 or newer.

Severity 1 Issues

You can set Alerts such that when a severity 1 issue is reported, it can trigger an alert every 15 minutes until someone takes action on the issue.

Severity 1 Example

To configure alerts this way, check out the based-on alerts blog post for details.

Information about upgrading to Version 7.0 or newer can be found on the downloads page.

Creating a new field is simple.

Add a Field

Choose a Field Type

  1. Login as Admin and click on the Admin icon.
  2. Click on the Fields link.
  3. Click on the Add Field button.
  4. Select the type of field you would like to add, then click on the Continue button.
  5. Enter a name and make selections for the properties available for the field type you selected. The fields at the bottom starting with the one called Add Page Visibility determine where the field will be displayed (e.g. Add Page, Edit Page, View Page, reports on Home & Query pages, and notifications) and which user groups can see and use the field in those areas. For example, you can set a field so that only Support Engineers will see it and fill it out on the Add Page and it will be hidden for all other groups. More information is available in the Field Visibility Help section.
  6. Click OK to save the field.
  7. To use the field on a form, click on the Manage Forms for This Field button.
  8. Select a form and click on the Add button.

Add Option Menu Items for Pulldowns

If the new field is a pulldown, configure the option menu items.

Add an Option Menu Item

Use the New Field in the Workflow

If the field should be updated or displayed during the workflow, configure it as a task field.

Add a Task Field

Add the Field to Reports

Use the field in report criteria or include it in report layouts.

Report Layout